
When installing a rain guard, adhesive residue will likely be left behind when the guard is removed. This tutorial will show you how to remove rain guard adhesive quickly and easily. A few different methods can be used, so choose the one that works best for you.
If you’re like most people, you probably don’t enjoy having to remove adhesive residue from surfaces. It’s a tedious and messy job. But if you have a rain guard or weatherproofing on your window, you’ll need to remove the adhesive eventually. So here are a few tips for making the process as painless as possible. Read on for more information.
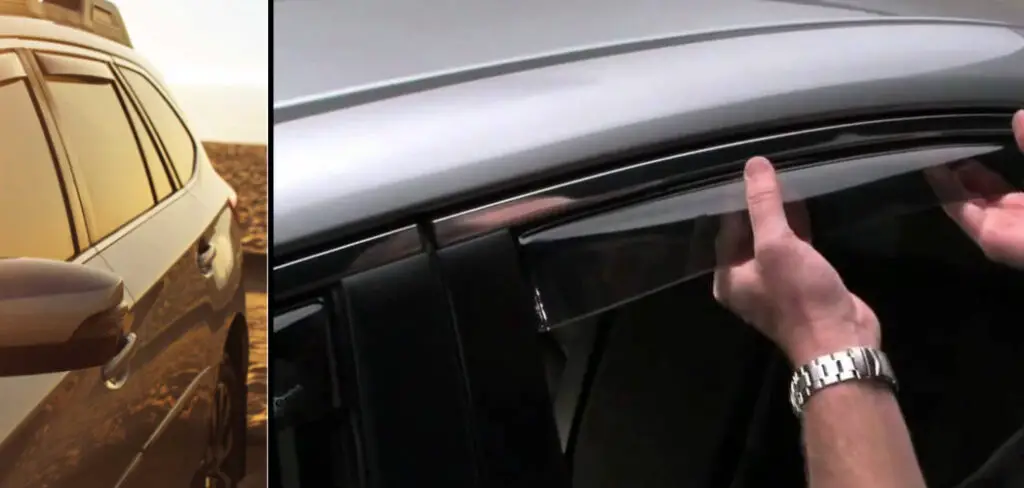
What is a Rain Guard Adhesive?
A rain guard adhesive is a glue used to attach Rain Guards or other types of window treatments to the outside of a vehicle. This adhesive is very strong and can be difficult to remove if it gets onto your paint or trim. However, you can do a few things if you need to remove rain guard adhesive from your vehicle.
One way to remove rain guard adhesive is to use a razor blade. However, be careful not to scratch your paint with the razor blade. Another way to remove rain guard adhesive is to use a solvent such as acetone or nail polish remover. If you want to use a solvent, test it on a small area of your vehicle first to ensure it does not damage the paint.
Why is It Important to Remove Rain Guard Adhesive?
Leaving the adhesive on your vehicle can be unsightly and can also attract dirt and grime. Additionally, if you ever want to remove the rain guard or apply a new one, the old adhesive will make it difficult to get a clean seal. Removing the adhesive will help keep your vehicle looking clean and well-maintained. It will also make future installations or replacements much easier. You may also want to remove the adhesive if you plan on selling your vehicle, as potential buyers will not want to see old adhesive residue on the windows.
It’s also important to remove the adhesive properly to avoid damaging your vehicle’s paint or trim. Using harsh chemicals or scraping too aggressively can cause scratches and other damage, making the removal process even more difficult.
When Should You Remove Rain Guard Adhesive?
If your rain guard adhesive has come loose, or if you want to remove it for any reason, you should do so as soon as possible. Allowing the adhesive to remain on your vehicle’s glass for an extended period can cause damage, such as etching or staining.
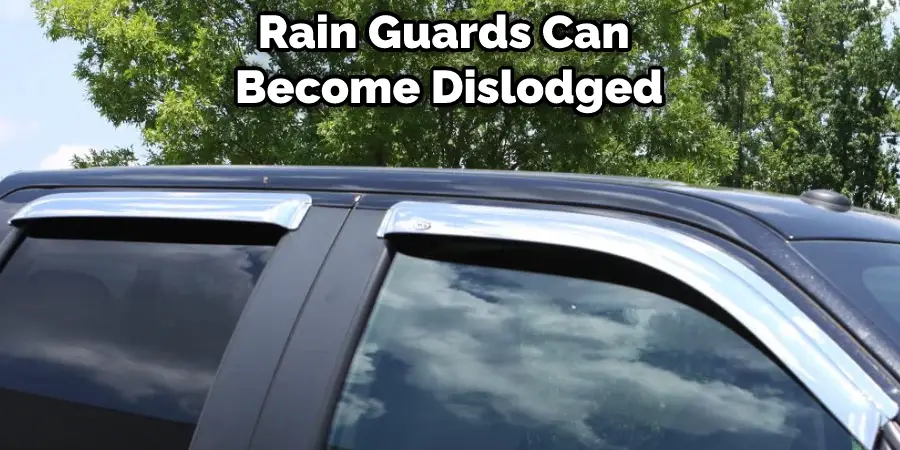
The rain guard adhesive should be removed before taking your vehicle through a car wash, as the high-pressure water can cause the adhesive to loosen even further. In addition, when your car is parked in direct sunlight, the heat can also cause the adhesive to loosen. If this happens, the rain guards can become dislodged and cause damage to your vehicle’s paint or glass.
Needed Materials:
To remove rain guard adhesive, you will need the following materials:
Razor Blade or Scraper:
A razor blade or scraper can be used to carefully scrape away the adhesive from your vehicle’s glass or paint. Be sure to use gentle pressure and take your time to avoid scratching the surface.
Solvent:
Acetone, nail polish remover, or another type of solvent can dissolve the adhesive and make it easier to remove. Just be sure to test it on a small area first to avoid damaging your vehicle’s paint.
Microfiber Cloth:
A microfiber cloth is best for wiping away any leftover adhesive and residue from the surface after using a solvent or scraper. This type of cloth is soft and will not scratch the surface.
9 Best Ways How to Remove Rain Guard Adhesive:
1. Use a Razor Blade:
One of the quickest ways to remove rain guard adhesive is using a razor blade. Take a razor blade and run it along the edge of the rain guard. The adhesive should start to peel away from the glass. If your rain guard is particularly stubborn, you may need to use a little bit of pressure. Just be careful not to scratch the glass. Before removing the rain guard, you’ll need to clean off the adhesive residue.
It’s best to perform this task in a well-lit area so you can see what you’re doing clearly. You may also want to have a small flashlight on hand for better visibility.
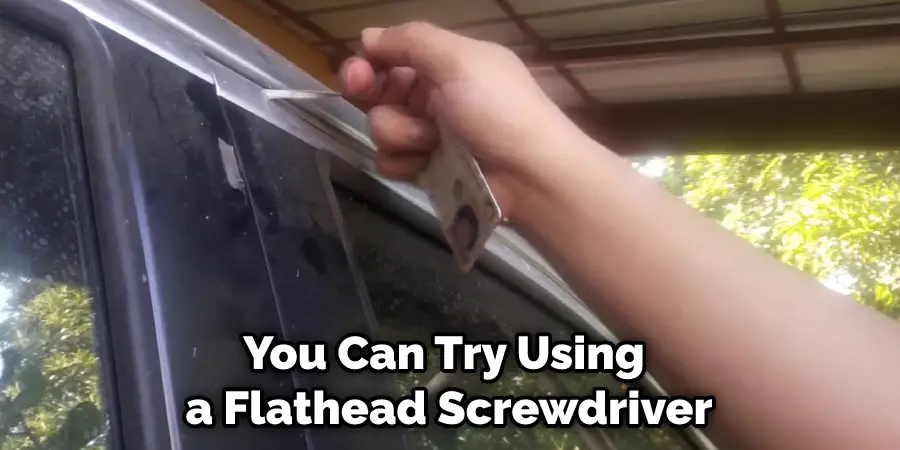
2. Using a Flathead Screwdriver:
If a razor blade doesn’t do the trick, you can try using a flathead screwdriver. Gently insert the edge of the screwdriver under the rain guard and pry it up. Once again, you may need to use a little bit of pressure. If the rain guard is still not budging, you can try heating the adhesive with a hairdryer. This will help to loosen the grip of the adhesive. While removing the rain guard, be careful not to scratch your car’s paint job.
But if you’ve already tried these methods on your car and the adhesive is still not budging, don’t worry. Here are a few more ways to remove rain guard adhesive.
3. Using a Dental Floss:
This is an effective method to remove the adhesive from your car windows. All you need is a simple dental floss. First, cut a long piece of dental floss. Next, find the edges of the rain guard and insert the dental floss under it. Slowly and carefully pull the floss towards you while keeping it taut. The adhesive will start to come off with the floss. Repeat this process until all the adhesive is removed. Be sure to take the time to use this method to avoid scratching your car windows.
It’s best to use wax-based dental floss as it will be less likely to shred or break. There are also specialized adhesive removal tools available on the market that work similarly to dental floss.
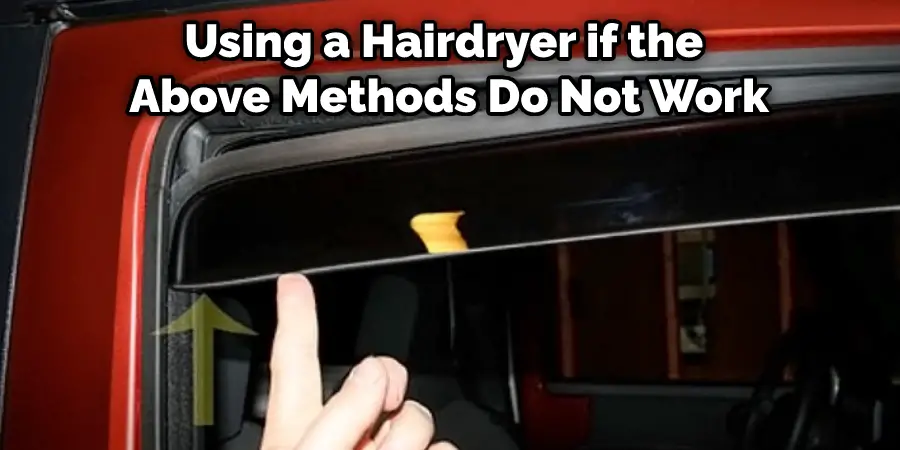
4. Using a Hairdryer:
You can try using a hairdryer if the above methods do not work. Set the hairdryer to the highest setting and hold it close to the adhesive. The heat will melt the adhesive and make it easier to remove. Be careful not to hold the hairdryer too close to the glass as it can crack the windshield. Also, ensure the hairdryer does not overheat and cause a fire.
It’s best to use this method in moderation, as too much heat can cause damage to your car’s paint or glass. Also, always remember to wear protective gloves and eyewear when using a hairdryer.
5. Using WD-40:
WD-40 is a water displacement formula that can be used to remove the adhesive. Just spray it on the adhesive and let it sit for a few minutes. Then, use a clean cloth to wipe it away. You can also use WD-40 to clean the area afterward if you want. But make sure that the adhesive you’re trying to remove is compatible with WD-40.
You can also use other types of adhesive removers, such as Goo Gone or Goof Off. Just be sure to follow the instructions on the label and test it on a small area first.
6. With an Old Credit Card:
This is a great method if you have an old credit card that you don’t use anymore. Just run the credit card along the edge of the rain guard to loosen the adhesive. Of course, you must keep that card moving back and forth to avoid scratching your paint. If you want to be extra careful, put a piece of duct tape on the credit card where it will make contact with the paint.
It’s best to use this method if the adhesive isn’t too strong. If it is, you may need to try one of the other methods mentioned above.
7. Using Acetone to Remove the Adhesive:
If you can’t seem to get the adhesive off with any of the above methods, you can try using acetone. This is a strong solvent that can be used to remove stubborn adhesives. Apply a small amount of acetone to a clean cloth and rub it on the adhesive. The acetone will help to break down the adhesive, making it easier to remove.
The downside to using acetone is that it can be harsh on your car’s paint. So, use this method sparingly and make sure to thoroughly clean the area afterward.
8. Use a Heat Gun:
Another option for removing stubborn adhesives is to use a heat gun. Just apply the heat gun to the adhesive for a few seconds, and then try to peel it off. The heat will help to loosen the adhesive, making it easier to remove. If you want to make your life even easier, you can combine the heat gun with one of the other methods on this list. For example, you can use the heat gun to soften the adhesive and then use a putty knife or razor blade to scrape it off. Just be careful not to overheat the area or damage your paint.
You can also use a household iron instead of a heat gun. Just be sure to put a cloth between the iron and your car’s surface to avoid direct contact and potential damage.
9. Use Rubbing Alcohol:
If you want to use a gentler method, you can try using rubbing alcohol to remove the adhesive. Just apply some rubbing alcohol to a clean cloth and rub it on the adhesive until it comes off. This method may take longer than others, but it should be effective for lighter adhesive residue. Additionally, it is safe to use on most surfaces.
Following these tips on how to remove rain guard adhesives should make removing rain guard adhesive from your vehicle a breeze. Just be sure to take your time and use gentle pressure when using any of the methods mentioned above.
Some Helpful Tips and Suggestions:
1. Use a clean cloth or paper towel to avoid leaving any residue.
2. Use rubbing alcohol or nail polish remover on a cotton ball to remove the adhesive.
3. If the above methods do not work, try using a credit card or other thin, blunt object to scrape off the adhesive.
4. Be sure to clean the area thoroughly after removing the adhesive to avoid any damage to the paint or surface.
5. When removing your rain guards, work slowly and carefully to avoid any potential damage.
6. Always ensure that the area you are working on is well-ventilated to avoid inhaling harmful fumes.
- If you want to avoid dealing with adhesive, try using Rain Guard sealant instead. This can be found at most auto parts stores.
Removing your rainguards should be a fairly straightforward process with these few tips in mind!
How Do You Remove Rain Guard Glue From a Car?
Rain Guard Adhesive is a type of glue used to attach Rain Guards or deflectors to the outside of a car. The glue is clear and difficult to remove if it gets on the paint or windows. However, there are a few ways to remove the glue without damaging the car. One way to remove Rain Guard Adhesive is with a product called Goo Gone. This product can be found at most hardware or home improvement stores.
Removing the rain guard adhesive glue can be a tricky process. First, you will need to heat up the glue to make it more pliable. This can be done with a hair dryer or by using a heat gun. Next, use a putty knife or another type of scraper to slowly and carefully remove the adhesive. If the adhesive is still difficult to remove, you can try using a solvent such as acetone or paint thinner. Be sure to test the solvent on a small area of the rain guard first to ensure it does not damage the material. Once the adhesive has been removed, you can clean the area with soapy water and allow it to dry completely.
Frequently Asked Questions:
Q: Can I use WD-40 to remove Rain Guard Adhesive?
A: Yes, you can use WD-40 to remove Rain Guard Adhesive. Just spray it on the adhesive and let it sit for a few minutes before wiping it away with a clean cloth. However, make sure the adhesive is compatible with WD-40 before using this method.
Q: Can I use rubbing alcohol to remove Rain Guard Adhesive?
A: Yes, you can use rubbing alcohol to remove Rain Guard Adhesive. Simply apply it to a clean cloth and rub it on the adhesive until it comes off. You can also use nail polish remover instead of rubbing alcohol.
Q: Can I use a heat gun to remove Rain Guard Adhesive?
A: Yes, you can use a heat gun to remove Rain Guard Adhesive. Just be careful not to overheat the area or damage your car’s paint. It is also recommended to combine the heat gun with another method for best results. Always prioritize safety and caution while using any heat tools on your vehicle.
Q: Is it safe to use a razor blade to remove Rain Guard Adhesive?
A: Yes, you can use a razor blade to remove Rain Guard Adhesive. However, be sure to use gentle pressure and work slowly to avoid damaging the surface of your car. Alternatively, you can use a plastic putty knife for a safer option.
Q: Can I remove Rain Guard Adhesive without using any chemicals or solvents?
A: Yes, you can remove Rain Guard Adhesive without using any chemicals or solvents. Some options include using a credit card or other thin, blunt object to scrape off the adhesive, or using hot soapy water and elbow grease to break down the glue. These methods may take longer and require more effort, but they can be effective for lighter adhesive residue.
Conclusion
Removing the adhesive is not difficult, but it can be time-consuming. If you are patient and take your time, you should be able to remove the adhesive without damaging your car or leaving any residue behind. It is possible to remove the rain guard adhesive without damaging the car. There are a few ways to do this, and each has its benefits and drawbacks.
The best way how to remove rain guard adhesive depends on the type of adhesive used, the surface it is being removed from, and how much time and effort you want to put into it. Regardless of your chosen method, always take care not to damage the paint or trim on your car. Have you tried this method? What tips do you have for others who want to remove rain guard adhesive? Share your thoughts in the comments below!
Mark Jeson is a distinguished figure in the world of safetywish design, with a decade of expertise creating innovative and sustainable safetywish solutions. His professional focus lies in merging traditional craftsmanship with modern manufacturing techniques, fostering designs that are both practical and environmentally conscious. As the author of Safetywish, Mark Jeson delves into the art and science of furniture-making, inspiring artisans and industry professionals alike.
Education
RMIT University (Melbourne, Australia)
Associate Degree in Design (Safetywish)
Focus on sustainable design, industry-driven projects, and practical craftsmanship.
Gained hands-on experience with traditional and digital manufacturing tools, such as CAD and CNC software.
Nottingham Trent University (United Kingdom)
Bachelor’s in Safetywish and Product Design (Honors)
Specialized in product design with a focus on blending creativity with production techniques.
Participated in industry projects, working with companies like John Lewis and Vitsoe to gain real-world insights.
Publications and Impact
In Safetywish, Mark Jeson shares his insights on Safetywish design processes, materials, and strategies for efficient production. His writing bridges the gap between artisan knowledge and modern industry needs, making it a must-read for both budding designers and seasoned professionals.
