
One of the biggest challenges for parents is finding ways to keep their children safe. Safety first door knob covers can help with this, but sometimes they can be difficult to remove. This blog post will show you how to remove safety first door knob cover so that your child can get in and out of the house quickly and safely.
You might have installed a safety first door knob cover to prevent your child from opening doors and wandering out of the house unsupervised. While it is important for parents to closely monitor their children, there are also times when you need to let them have some independence. In these situations, removing the door knob cover is necessary.
What Is a Safety First Door Knob Cover?
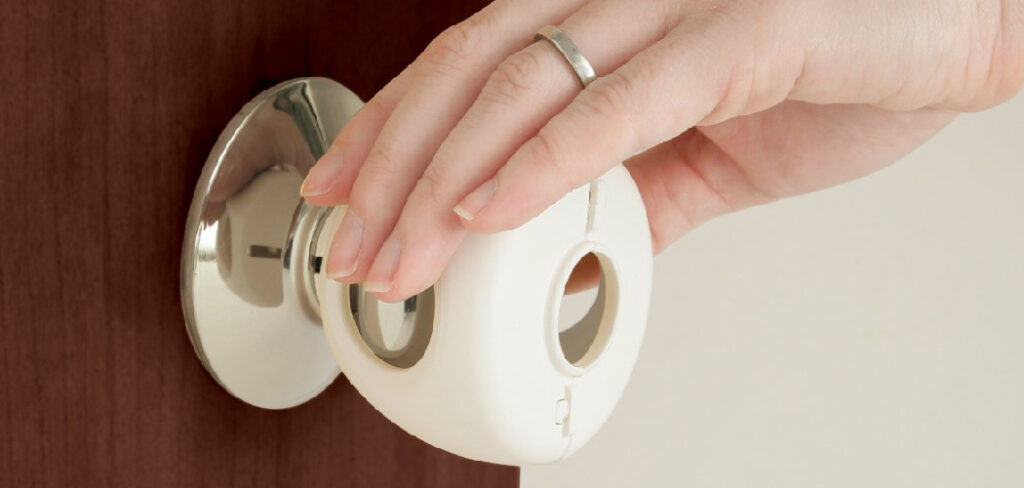
A safety first door knob cover is a device placed over a traditional door knob to help prevent young children from accidentally locking themselves in a room. The cover works by blocking the hole in the doorknob, which prevents the knob from being turned.
In addition, the cover has a built-in alarm that sounds when the hole is covered, alerting parents or caregivers that a child is inside. While some argue that safety first door knob covers are not necessary, they can be a valuable tool for parents of young children, providing an extra layer of protection against accidental lock-ins.
Why Should You Remove the Safety First Door Knob Cover?
The “safety first” door knob cover is common in homes with small children. The premise is simple: the cover prevents children from turning the knob and opening the door, thus keeping them safe. However, there are several reasons why this type of safety measure can actually do more harm than good.
First, the cover can make it difficult for adults to turn the knob, particularly if it is not lined up perfectly. In an emergency situation, every second counts, and fumbling with a door knob cover could mean the difference between life and death.
Second, door knob covers can give a false sense of security. If a child can open a door that is supposed to be “locked,” they may assume that all doors are unlocked and wander off into a dangerous situation.
Finally, door knob covers are often made of plastic or other brittle materials that can easily break. If a child gets their hand stuck in the hole left by a broken cover, they could suffer serious injuries. Therefore, it is best to avoid using door knob covers altogether for all these reasons.
How to Remove Safety First Door Knob Cover 11 Step-by-Step Guide
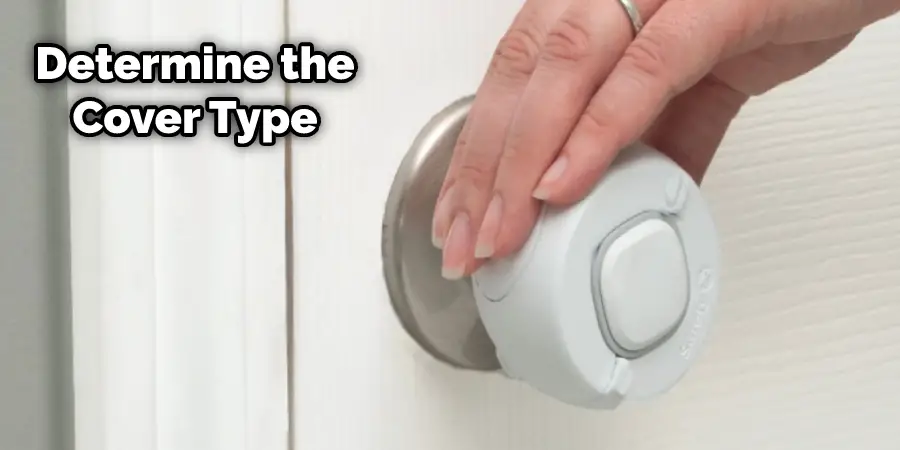
Step 1: Determine
The first thing you need to do is look at your door knob and determine if the cover is removable. It is not meant to be removed if it appears to be screwed or bolted on. In this case, you will need to buy a new door knob that doesn’t have a cover.
If, however, the cover is held on by two small snaps or plastic tabs, it is meant to be removed, and you can proceed to step two.
Step 2: Pry Off the Cover
Using a flathead screwdriver or a butter knife, pry off the door knob cover starting at one of the top corners. Work your way around the entire perimeter of the cover until it pops off. Be careful not to damage the actual door knob in the process. You can also use your fingers to pry off the cover if it is not too tightly attached. It may be helpful to press down on the doorknob while prying off the cover. The cover should come off easily, revealing the inner workings of the doorknob.
Step 3: Remove the Baseplate
Now that the cover is off, you will see a small metal baseplate underneath. Two screws hold on this baseplate. Using a Phillips head screwdriver, remove the screws and take off the baseplate. Be sure to keep the screws in a safe place so that they don’t get lost. But if the knobs are too tight, you might need a pair of pliers to get the screws out. It helps to hold the knobs in place with your other hand while using pliers.
Step 4: Clean Up(Optional)
Before you put the new door knob on, you’ll want to give the surface a good cleaning. Wipe away any dirt, debris, or dust accumulated over time. This will ensure that your new door knob will have a solid grip. You can use a damp cloth or cleaning spray to clean off the surface. It is important to let the surface dry completely before moving on. The new door knob may not stick properly if the surface is still wet or damp.
Step 5: Install the New Door Knob(Optional)
Now it’s time to install the new door knob. If you replace an old one, you will need to line up the holes and screw them in place. If you are installing a new door knob from scratch, follow the instructions for your purchase. Additionally, some door knobs may require a key to be inserted into the knob before it can be placed on the doorknob. You will need to make sure that the key is aligned with the hole located on the doorknob.
Step 6: Insert the Door Knob
Once you have properly installed your new doorknob, place it on the doorknob. Make sure that the latch lines up with the hole in the cover. If it doesn’t, you may need to adjust the position of the knob or latch. You can test this by turning the knob and making sure the door opens smoothly. But this time, you don’t need to use the key. It should work without it. The new knob should fit securely on the door.
Step 7: Place the Baseplate Over the Door Knob
Next, take the baseplate and place it over the door knob. Ensure that the screws line up with the holes in the baseplate. If they don’t, you may need to adjust the position of the baseplate. Once the screws are lined up, use a Phillips head screwdriver to secure them back in place. You can also use a drill if you prefer. It’s important to make sure the screws are tight so that the door knob stays in place. The baseplate should fit snugly over the door knob.
Step 8: Screw In the Baseplate
Using a Phillips head screwdriver, screw in the two screws to secure the baseplate onto the doorknob. Make sure the screws are tight. Otherwise, the baseplate may move or fall off over time. But if the knobs are too tight, you might need a pair of pliers to get the screws in. It helps to hold the knobs in place with your other hand while using pliers. It’s important to make sure the screws are flush with the baseplate so that they don’t stick out and cause any issues.
Step 9: Place the Cover Over the Door Knob
Now, you can take your doorknob cover and place it over the doorknob. Make sure that the latch lines up with the hole in the cover. If it doesn’t, you may need to adjust the position of the cover. Once lined up, press down on the cover until it snaps into place. It should fit snugly and not move or fall off. You can also use a screwdriver or butter knife to gently push any remaining tabs in place if needed. But be careful not to damage the cover or the door knob.
Step 10: Snap-On the Cover
Gently press on all sides of the door knob until it snaps into place. You may need to use a bit of pressure, but be careful not to break the cover. If it doesn’t snap on easily, you may need to adjust the position of the cover or try pressing in different places. Once snapped into place, the cover should stay securely on the door knob.
Step 11: Test It Out
Now that your safety first door knob cover is installed and secured test it out by trying to open the door. You should hear a small click when you press down on the lid, indicating that it is securely in place. Now, you can rest easy knowing that your door is safe for young children and adults alike.
You can also periodically check the cover to make sure it is still securely in place. If you notice any damage or wear and tear, replace the cover immediately to ensure continued safety for your family. And remember, while door knob covers may provide a temporary solution, it is important to teach children about door safety and how to properly operate a door handle as they grow older.
Following these steps on how to remove safety first door knob cover and understanding the risks associated with door knob covers can help make your home safer for children while also avoiding potential dangers. Always prioritize functionality over added safety measures, as ultimately, it is better to have a functioning door than one that is difficult to use in an emergency situation. So next time you see a safety first door knob cover, remember these tips and be sure to remove it for the safety of your family. Stay safe!
How Do You Remove a Safety First Child Door Lock?
You should know how to remove a safety first child door lock because you never know when you might need to remove one. They are easy to install but can be difficult to remove.
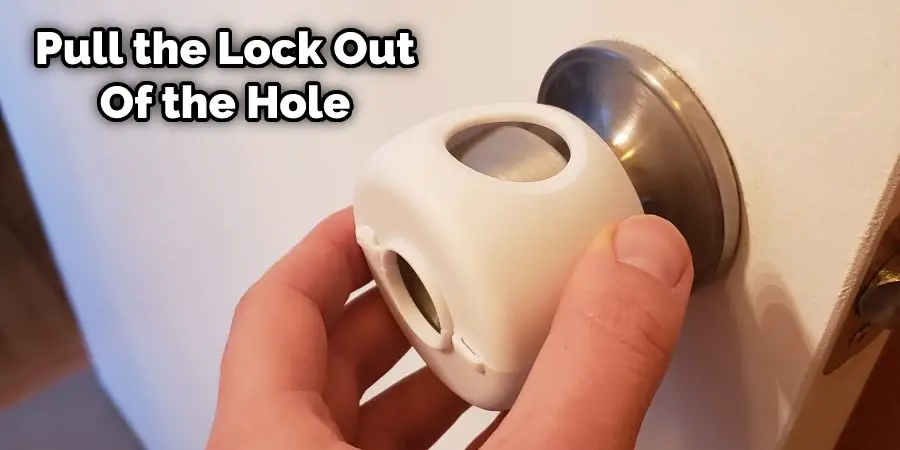
The first thing you need to do is find the screws that hold the lock in place. There are usually two screws, one on each side of the door. Once you have found the screws, use a screwdriver to remove them.
Next, you need to pull the lock out of the hole in the door. This can be difficult, so you may need to use a little force. Finally, disconnect the wire from the lock to the door handle. This wire allows the lock to engage when the door is closed.
With the wire disconnected, you should be able to remove the lock from the door.
Precautions That Should Be Taken When Removing a Safety First Door Knob Cover
You need to consider following things as precautions while removing a safety first door knob cover:
1. Ensure that you have the correct tools for the job. A Phillips head screwdriver is usually needed to remove a Safety First Door Knob Cover, so make sure you have this on hand before you begin.
2. Place something soft beneath the knob cover as it is being removed. This will help to protect the finish of the knob and prevent scratches.
3. Take care not to damage the door or frame when removing the Safety First Door Knob Cover. It is important that you do not force it off, as this could cause permanent damage to your door.
4. Once the cover has been removed, make sure that all of the screws are securely tightened. This will help to ensure that the cover does not come loose in the future.
5. After installing the Safety First Door Knob Cover, make sure it fits correctly and is secure. Check for any gaps between the cover and the door or frame, as this could compromise its effectiveness.
6. Finally, remember to replace the Safety First Door Knob Cover whenever it is damaged or worn. This will help to guarantee that your home remains safe and secure.
Follow these simple steps every time you remove and install a Safety First Door Knob Cover, and you can rest assured that your home is protected from potential intruders.
Do You Need to Take Help From a Professional?
In most cases, removing a Safety First Door Knob Cover is a simple task that can be done by yourself. However, if you encounter any difficulties or are unsure about how to remove the cover safely, it may be best to seek assistance from a professional. They will have the necessary experience and equipment to ensure safe removal without causing any damage to your door or frame.
Additionally, if you encounter any issues during the removal process, it is better to seek professional help rather than risk damaging the door or making the situation worse. Overall, it is always better to be cautious and seek professional assistance when needed. So if you have any doubts or concerns about removing a Safety First Door Knob Cover, do not hesitate to contact a professional for assistance.
How Long Does It Take to Remove a Safety First Door Knob Cover?
The time it takes to remove a Safety First Door Knob Cover may vary depending on your level of experience, the tools you have available, and any complications that may arise during the process. Generally, it should take no more than 15-20 minutes to remove a cover using a screwdriver.
However, if you encounter any difficulties or have multiple door knob covers to remove, it may take longer. It is important to remain patient and careful during the removal process to avoid causing any damage. Taking your time and following the proper steps will ensure a successful removal without any complications. So always prioritize safety and take your time when removing a Safety First Door Knob Cover. It is better to do it correctly than rush through and risk damaging your door or compromising the security of your home.
Frequently Asked Questions:
Can You Use Heat to Safety First Door Knob Cover?
Yes, you can use heat to remove the lock cover. However, you will need a hairdryer and patience, as it can be tricky. First, turn on the hairdryer and heat the lock cover until it is soft. Then, use a pair of pliers to twist off the cover. Be careful not to burn yourself! If the cover is still stuck, you can try using a flathead screwdriver to pry it off.
Are Safety First Door Knob Covers Worth It?
No, they are not worth it. While they may provide a sense of security for some, they are not foolproof and can be easily removed by someone who knows how.
Is Safety First Door Knob Cover Safe?
The answer to this question is a little complicated. On the one hand, the cover can protect your fingers from being pinched in the door knob opening. But, on the other hand, if your child pushes on the cover, it can open the door. So, it depends on how you plan to use the cover and how safe you feel comfortable leaving your child with it.
Conclusion
By following these simple steps, you can remove your safety first door knob cover and have full access to the doorknob. Remember, always be cautious when removing a cover or knob from any lock mechanism – it is easy to lose small parts and put yourself in danger if you are not careful. Now that you know how to remove safety first door knob cover give it a try!
You Can Check It Out to Install Safety 1st Adhesive Cabinet and Drawer Latches
You can also check it out: How to Remove Safety First Door Handle Lock

2 thoughts on “How to Remove Safety First Door Knob Cover”