
Replacing airbags is a crucial task that ensures the safety of your vehicle’s occupants in the event of a collision. Airbags are a vital component of any modern vehicle’s safety system, and their proper installation is essential for optimal performance.

This guide will provide an overview of how to replace airbags, highlighting the tools, precautions, and procedures necessary to complete the process safely and effectively.
When Should You Replace Airbags
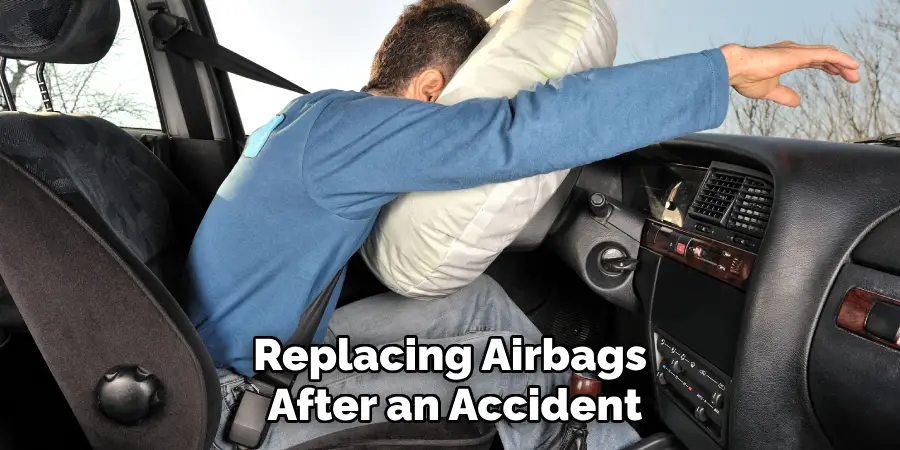
Airbags should be replaced immediately after they deploy in a collision to ensure the continued safety of the vehicle’s occupants. Deployment renders airbags unusable, as they are designed for a single use only. Additionally, airbags may need to be replaced if they are found to have defects, have been recalled by the manufacturer, or show signs of damage due to water, heat, or other environmental factors.
It’s also important to consider replacing airbags in older vehicles, as components can degrade over time, potentially impacting their reliability. Regular maintenance and inspection by a professional can help determine if an airbag replacement is required.
Importance of Proper and Legal Replacement
Replacing airbags properly and adhering to legal requirements is crucial for ensuring the safety of all vehicle occupants. Improper installation or the use of counterfeit or substandard airbags can compromise their functionality, increasing the risk of injury during a collision. Legal standards are in place to ensure that replacement airbags meet strict safety guidelines, providing the same level of protection as the original.
Working with certified professionals and using manufacturer-approved parts is essential to maintain compliance with these regulations and avoid potential legal or insurance issues. Taking these steps not only safeguards the effectiveness of the airbag system but also contributes to overall road safety.
Types of Airbags
Modern vehicles are equipped with various types of airbags designed to provide comprehensive protection for occupants during a collision. The most common type is the front airbag, which deploys from the steering wheel and dashboard to protect the driver and front passenger. Side airbags are usually located in the side of the seats or in the door panels, offering protection during side-impact crashes by shielding the torso and pelvis.
Curtain airbags, also known as side head airbags, deploy from the roofline and provide coverage for the head, helping to prevent severe injuries from side impacts or rollovers. Additionally, some vehicles come with knee airbags, designed to protect the lower extremities, and rear-seat airbags, which are aimed at enhancing safety for backseat passengers. Each type of airbag plays a crucial role in creating a safer environment for all occupants in the event of an accident.
10 Methods How to Replace Airbags
1. Begin with a Thorough Diagnostic and Safety Inspection
Replacing airbags after an accident or due to a malfunction begins with a full diagnostic assessment and a strict adherence to safety protocols. Airbags are explosive safety devices, and improper handling can result in accidental deployment, injury, or damage. Before touching any components, use an OBD-II scanner with SRS (Supplemental Restraint System) capabilities to scan the system for active fault codes.
These codes can reveal whether a single airbag was deployed or if additional components such as seatbelt pretensioners or impact sensors were also triggered. This step sets the stage for safe and efficient replacement, identifying every affected part of the airbag system.
2. Disconnect the Battery and Wait to Discharge the System
Airbags rely on a stored electrical charge to deploy instantly during a collision. For safety, disconnect the negative terminal of the battery before any work begins. After disconnecting, wait a minimum of 10 to 30 minutes to allow any residual current in the capacitors and airbag circuits to discharge completely.
In some procedures, it may be recommended to turn the ignition switch to the “on” position before disconnecting the battery to aid in energy discharge (check your service manual). Never rush this step—accidental deployment while handling can be dangerous and expensive.
3. Remove Interior Panels and Access the Airbag Assembly
Depending on the airbag’s location—steering wheel, dashboard, side curtain, or seat—interior panels may need to be removed carefully to access the module. For steering wheel airbags, locate the retaining screws (usually Torx or Allen head) on the back of the wheel. Dashboard and side curtain airbags often require removing panels or even the entire dash assembly.
Use trim removal tools to prevent scratching or cracking plastic parts. Be methodical and label screws and parts for proper reassembly. This stage is where patience pays off to avoid accidental damage to the vehicle’s interior.
4. Carefully Disconnect and Remove the Airbag Module
Each airbag module is connected by specialized electrical connectors, often colored yellow or orange and featuring built-in locking tabs for safety. These connectors must be gently disengaged—never pulled or yanked. Release the locking clip first and then unplug the connector.

Once disconnected, carefully lift the airbag module from its housing. Keep it facing up and place it in a safe area, away from electrical sources, heat, or static. Treat all airbags—even deployed ones—with the assumption they could still be dangerous. Disposal or storage must follow local safety regulations.
5. Inspect and Replace Associated Safety Components
Airbag replacement doesn’t end with the bag itself. In many cases, seatbelt pretensioners, clock springs, and impact sensors must also be replaced or tested for functionality. The airbag control module (ACM or SRS module) may store crash data or lock itself after deployment. Some modules can be reset using professional software, while others must be physically replaced.
Seatbelt pretensioners that were triggered will be locked or retracted and cannot be reused. Check all components for heat damage, torn wiring, melted connectors, or broken mounts. Replacing only the airbag without addressing related damage is a serious safety oversight.
6. Install the Replacement Airbag with Precision
After ensuring all damaged components are removed, and wiring is verified, position the new airbag in place. Make sure it’s an exact match for the original—airbags are specific to make, model, trim, and even seating configuration. Reconnect the airbag’s electrical connector, ensuring a secure and fully seated fit with locking tabs engaged.
Use factory torque specs to tighten mounting bolts, which is vital for ensuring the airbag deploys in the correct direction and manner. Avoid over-tightening, which may crack plastic brackets or damage mounting points. Always keep the airbag facing away from you during handling.
7. Replace and Reset the Airbag Control Module if Necessary
In vehicles where the airbag control module cannot be reset, a replacement is mandatory. The module is typically located under the center console or front seats and may be bolted to the vehicle floor. Carefully remove the module and install a new or professionally reset unit, making sure all harnesses are reconnected and secured.
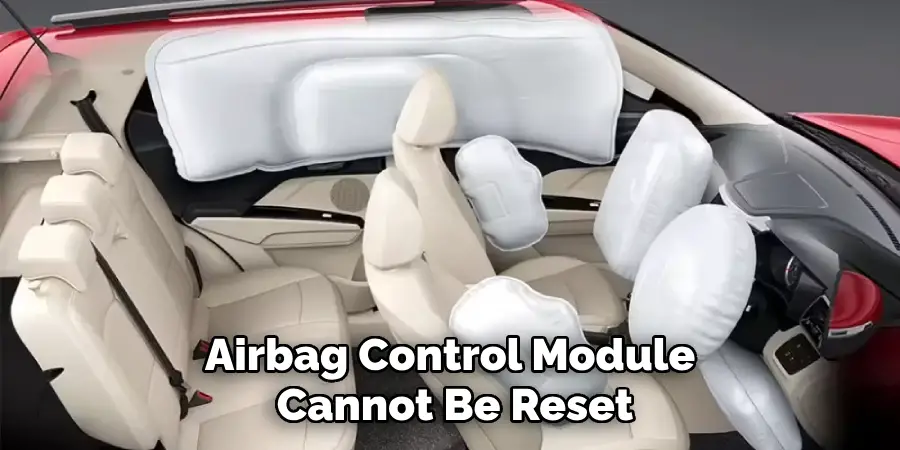
Some modules must be programmed to the specific vehicle using dealer software or an advanced scan tool. A faulty or improperly configured module can cause the airbag warning light to remain on or prevent the airbags from deploying altogether.
8. Clear Fault Codes and Calibrate the System with a Diagnostic Tool
Once the new airbag and all related components are installed, reconnect the battery and use your diagnostic scan tool to read and clear any stored SRS codes. Most systems require code clearing before the airbag light will turn off. Additionally, perform a calibration of seat sensors, occupant detection systems, or weight sensors, if applicable.
Some vehicles require special initialization steps such as turning the ignition on and off or waiting for specific beeps. Confirm that the system reports “no DTCs” (diagnostic trouble codes) and that the airbag light remains off after the vehicle starts.
9. Conduct a Final Visual and Functional Inspection
With the system cleared and operational, perform a final visual inspection of all replaced components. Double-check that all connectors are plugged in, all bolts are torqued properly, and all trim panels are reinstalled securely. Turn the steering wheel to ensure freedom of movement without resistance (especially if the clock spring was replaced).
Check the seatbelt tensioners for smooth operation. Confirm that the airbag light turns on for a few seconds during startup and then turns off, which is the standard behavior in most vehicles to indicate normal operation.
10. Test Drive and Monitor the System
The final step in replacing an airbag is to take the vehicle for a low-speed test drive in a controlled environment. During the drive, pay close attention to the dashboard for any warning lights or fault indicators. Check all functions of steering, braking, and electronic systems.
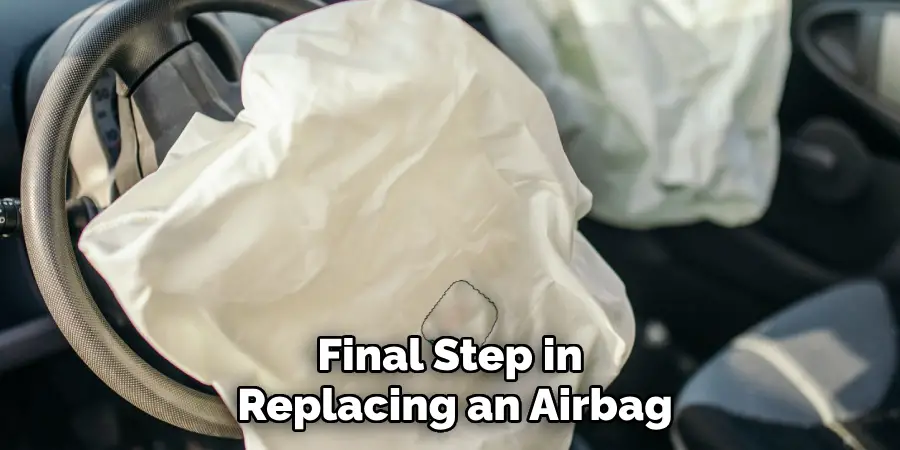
Use the scan tool again post-drive to ensure that no new codes have appeared. If all systems remain clear and the airbag warning light does not reappear, you can be confident that the replacement was successful. If faults recur, recheck connectors, grounding points, or sensor positions.
Conclusion
Replacing airbags is not a casual repair—it’s a precision procedure that protects lives. The entire system must be treated with care, from initial diagnostics to final test drives. Only use approved components, follow OEM service procedures, and take no shortcuts with safety. If unsure, consult a certified technician or have the work professionally completed. Thanks for reading, and we hope this has given you some inspiration on how to replace airbags!
Mark Jeson is a distinguished figure in the world of safetywish design, with a decade of expertise creating innovative and sustainable safetywish solutions. His professional focus lies in merging traditional craftsmanship with modern manufacturing techniques, fostering designs that are both practical and environmentally conscious. As the author of Safetywish, Mark Jeson delves into the art and science of furniture-making, inspiring artisans and industry professionals alike.
Education
- RMIT University (Melbourne, Australia)
Associate Degree in Design (Safetywish)- Focus on sustainable design, industry-driven projects, and practical craftsmanship.
- Gained hands-on experience with traditional and digital manufacturing tools, such as CAD and CNC software.
- Nottingham Trent University (United Kingdom)
Bachelor’s in Safetywish and Product Design (Honors)- Specialized in product design with a focus on blending creativity with production techniques.
- Participated in industry projects, working with companies like John Lewis and Vitsoe to gain real-world insights.
Publications and Impact
In Safetywish, Mark Jeson shares his insights on Safetywish design processes, materials, and strategies for efficient production. His writing bridges the gap between artisan knowledge and modern industry needs, making it a must-read for both budding designers and seasoned professionals.
