
Do you find yourself constantly adjusting the sensors on your motion lighting system? Are they going off in unlikely places or not working at all? It could be time to replace the batteries in your motion sensor. Replacing a motion sensor battery is surprisingly simple, but it does require that you follow some necessary steps to ensure everything works correctly.
In this post on how to replace motion sensor battery, we’ll cover all of the details you need to know about replacing a motion sensor battery including the materials and tools needed and step-by-step instructions for getting this task done quickly and easily.
Step-by-step Guidelines on How to Replace Motion Sensor Battery
Step 1: Gather the Necessary Materials
You will need a new battery, a flat-head screwdriver, and a Phillips head screwdriver. If your motion sensor is a battery-backed unit, you may also need an additional set of batteries. But, don’t worry if you don’t have any extra batteries – most sensor units come with a backup set of batteries included. You may also need a ladder if your motion sensor is located high up on the wall.
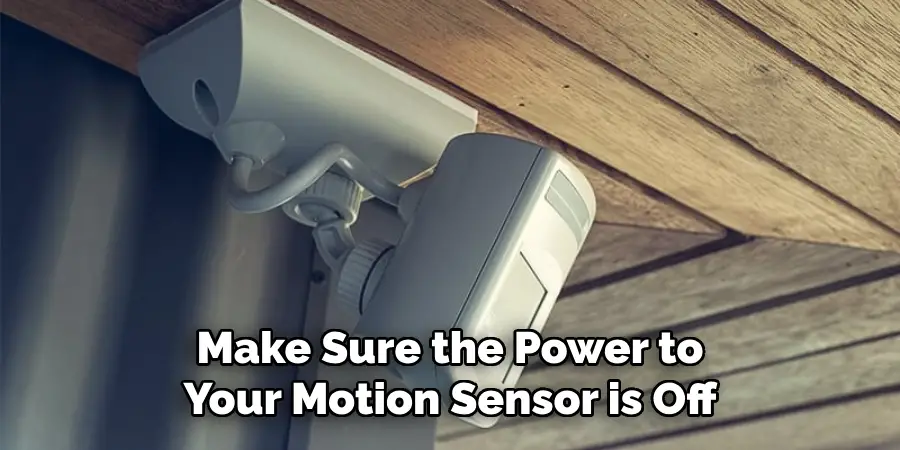
Step 2: Turn off the Power to Your Motion Sensor
Before you begin working, make sure the power to your motion sensor is off. You can do this by unplugging the unit or turning off the breaker that powers it. It’s important to do this step first, so you don’t accidentally electrocute yourself while working. It’s also important to note that the power must remain off while you work. But, if you need to turn it on to test the sensor, make sure to turn it off again afterward.
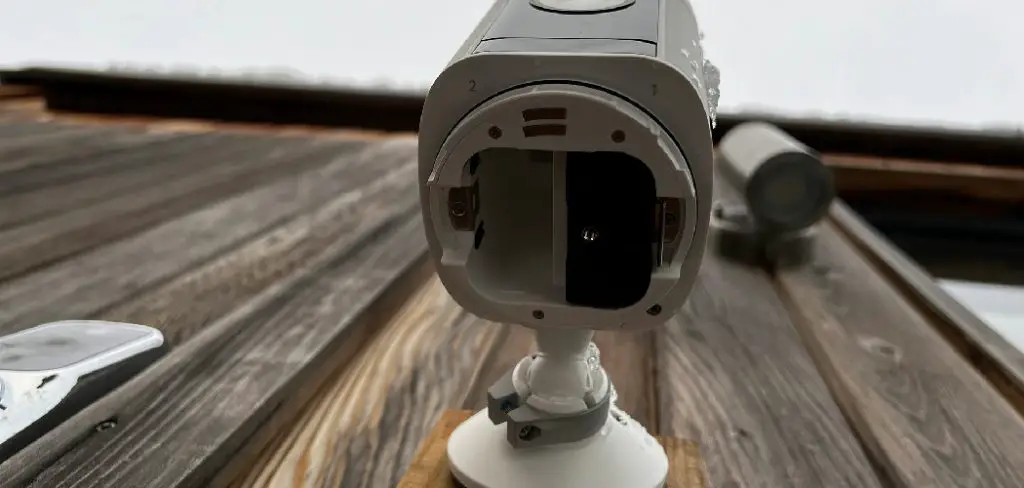
Step 3: Remove the Battery Cover Plate
Once you’ve turned off the power, locate the battery cover plate and remove it with a flat-head screwdriver. The cover plate should be clearly marked as such and will likely have several small screws holding it in place.
It’s important to keep track of these screws, as you will need them when it comes time to reassemble the sensor. If your motion sensor is battery-backed, you may have to remove additional cover plates.
Step 4: Take Out Old Batteries and Insert New Ones
Now that you’ve removed the battery cover plate, take out any old batteries and insert new ones. Make sure they are placed correctly according to any instructions provided with your motion sensor.
This is also a good time to check your backup batteries, if you have any, and replace them as well. It’s important to use the same type of battery that was originally installed in your motion sensor.
Step 5: Reattach the Battery Cover Plate
Once you’ve inserted new batteries, reattach the battery cover plate and secure it into place with the small screws. This is an important step, as it will keep the batteries secure and ensure that your motion sensor works properly.
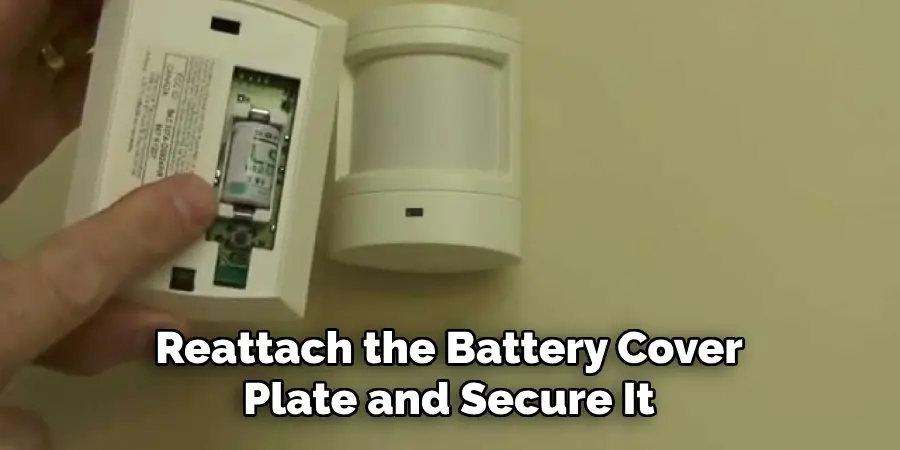
If you are replacing a battery-backed unit, make sure to reattach all of the necessary cover plates and screws. You may also want to double-check that all of the screws are tight before moving on to Step 6.
Step 6: Check Connections and Wire Contacts
Now it’s time to check connections and wire contacts. Make sure all of your connections are firmly in place and that all wires are properly connected before moving on to the next step. It’s important to make sure everything is secured and in good working order, as any loose wires or connections could lead to your motion sensor not functioning correctly.
Step 7: Replace Any Broken or Damaged Parts
If any parts of your motion sensor are broken or damaged, replace them now before continuing. This may include power cords, switches, or other components. You should be able to find most of the parts you need to replace at your local hardware store. If you’re unsure of what parts to buy, refer to the instructions that came with your motion sensor. This step is important for ensuring everything works properly.
Step 8: Test Your Motion Sensor
When you’ve finished replacing any broken or damaged parts, test your motion sensor to make sure it is working properly. Flip the power switch back on and wait a few moments to see if it responds correctly.
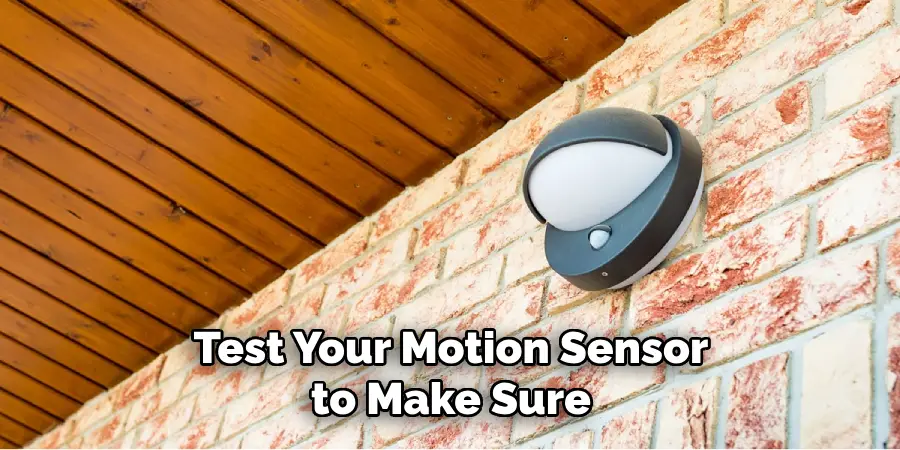
It’s important to make sure that your motion sensor is working before you close up the battery cover plate, as this will ensure that everything is functioning correctly. It’s also a good idea to write down any settings you may have changed, so you can easily refer back to them later.
Step 9: Clean the Motion Sensor
If you notice dust or grime buildup on your motion sensor, take this opportunity to clean the unit. Use a soft cloth and some gentle cleaning solution to wipe away any dirt or debris that may have accumulated over time.
You should also check for any signs of corrosion on your battery contacts, and clean these as well. This step will not only help keep your motion sensor in good working order but will also help it last longer. If you’re replacing a battery-backed unit, make sure to clean the battery contacts before reattaching the cover plate.
Step 10: Adjust Settings as Necessary
Once you’ve tested your motion sensor and made sure everything is working properly, adjust its settings accordingly. You can do this either manually by accessing the device’s control panel or through the app on your smartphone. But, make sure to adjust the settings as necessary – for example, if you’ve replaced a battery-backed unit, you may need to reset the sensitivity settings.
Step 11: Turn On Power and Test Again
Finally, turn the power back on and test your motion sensor once more to make sure everything is working properly. That’s it – you’re done! Always make sure to turn the power off and on again after replacing a battery, and refer back to these steps if you ever need help replacing your motion sensor’s battery again. With this information, you can keep your motion sensor up and running for a long time to come!
Now that you know how to replace motion sensor battery, you can easily keep your lighting system up and running without any disruptions. Remember, if you have any questions or concerns, always consult your user manual before attempting this project yourself. Good luck!

Do You Need to Take Help From a Professional?
Replacing a motion sensor battery is usually a fairly straightforward process, but if you have any questions or concerns, it may be best to contact an electrician for help.
A professional can inspect the system and ensure everything is working properly before you begin making any changes. Additionally, they can help diagnose any problems that may arise during the replacement process and offer solutions to get your motion lighting system up and running again in no time.
How Much Will It Cost?
The cost of replacing a motion sensor battery will depend on the type and brand of device, as well as who you hire to do the work. If you choose to replace the battery yourself, you can usually find a compatible replacement for $5-$10.
However, if you decide to hire an electrician, their fees will vary depending on how much work needs to be done. In most cases, you can expect to pay anywhere from $50-$100 for professional service.
Replacing a motion sensor battery is a simple process that doesn’t require any complicated tools or equipment. By following the steps outlined in this post, you can easily get your lighting system up and running again in no time! So what are you waiting for? Get started today!
Frequently Asked Questions
Q: How Often Should I Replace Motion Sensor Battery?
A: It depends on the type and brand of the device, but as a general rule of thumb, you should replace the motion sensor battery at least once a year.
Q: What Type of Batteries Do Motion Sensors Use?
A: Most motion sensors use standard AA or AAA batteries, but if yours uses something different, make sure to check the manufacturer’s instructions for the correct type.
Q: Can I Replace My Motion Sensor Battery Without Hiring an Electrician?
A: Yes! Replacing a motion sensor battery is usually quite simple and doesn’t require any complicated tools or equipment. Just follow the steps outlined in this post and you should be able to get the job done without needing professional help.
Q: Are There Any Safety Precautions I Should Take When Replacing My Motion Sensor Battery?
A: Absolutely! Before you replace your motion sensor battery, make sure to turn off the power to the unit and double-check all of your connections. Additionally, if you notice any broken or damaged parts during the process, be sure to replace them before continuing.
Conclusion
Replacing the motion sensor battery is an effective way to keep your home secure and can be done in a few easy steps. With a flat-head screwdriver, needle-nose pliers and a fresh battery, you can make sure your motion sensor lights are doing their job properly. Remember that different brands of motion sensors might have slightly different opening techniques but overall the instructions should be fairly similar.
Make sure to check out other helpful tutorials for information on how to replace additional components of your motion sensor device as well as additional home security tips in order to stay safe. So don’t hesitate – go ahead and start making changes today so you can feel more secure when it comes time to relax at night. Thanks for reading this article on how to replace motion sensor battery.
Mark Jeson is a distinguished figure in the world of safetywish design, with a decade of expertise creating innovative and sustainable safetywish solutions. His professional focus lies in merging traditional craftsmanship with modern manufacturing techniques, fostering designs that are both practical and environmentally conscious. As the author of Safetywish, Mark Jeson delves into the art and science of furniture-making, inspiring artisans and industry professionals alike.
Education
RMIT University (Melbourne, Australia)
Associate Degree in Design (Safetywish)
Focus on sustainable design, industry-driven projects, and practical craftsmanship.
Gained hands-on experience with traditional and digital manufacturing tools, such as CAD and CNC software.
Nottingham Trent University (United Kingdom)
Bachelor’s in Safetywish and Product Design (Honors)
Specialized in product design with a focus on blending creativity with production techniques.
Participated in industry projects, working with companies like John Lewis and Vitsoe to gain real-world insights.
Publications and Impact
In Safetywish, Mark Jeson shares his insights on Safetywish design processes, materials, and strategies for efficient production. His writing bridges the gap between artisan knowledge and modern industry needs, making it a must-read for both budding designers and seasoned professionals.
