
Have you ever heard a loud banging sound coming from your garage in the middle of the night? Chances are it’s likely your garage door sensor is malfunctioning. While fixing a broken garage door may seem daunting, this can actually be done in a few simple steps without needing to call in an expensive repairman.
In this informative guide on how to fix a garage door sensor, we’ll show you how to quickly diagnose and repair any common issues with your garage door sensors – so you can get back to enjoying the peace and quiet at home!
Needed Tools and Materials
Given below are the tools and materials that may be needed to fix a garage door sensor:
- Socket Wrench
- New Garage Door Sensor
- Electrical Tape
- Ladder (for hard-to-reach areas)
12 Step-by-step Guidelines on How to Fix a Garage Door Sensor
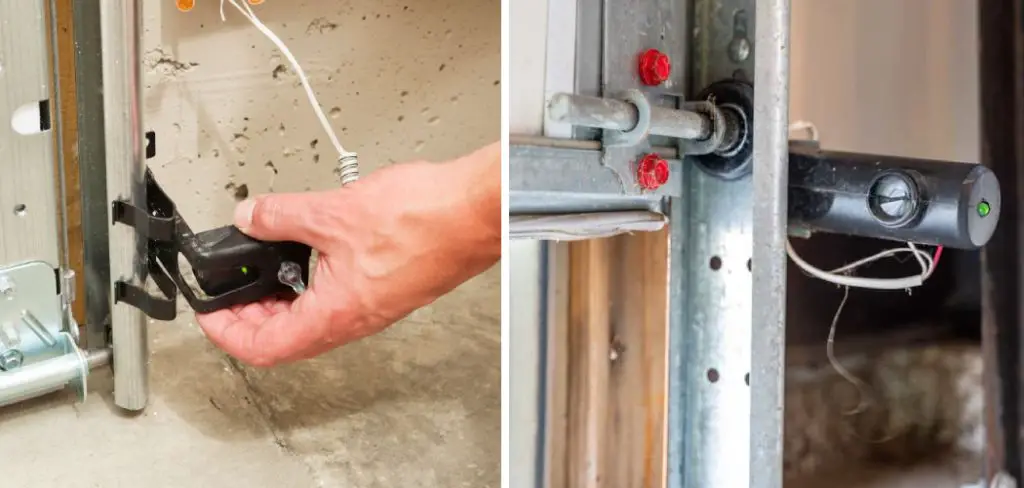
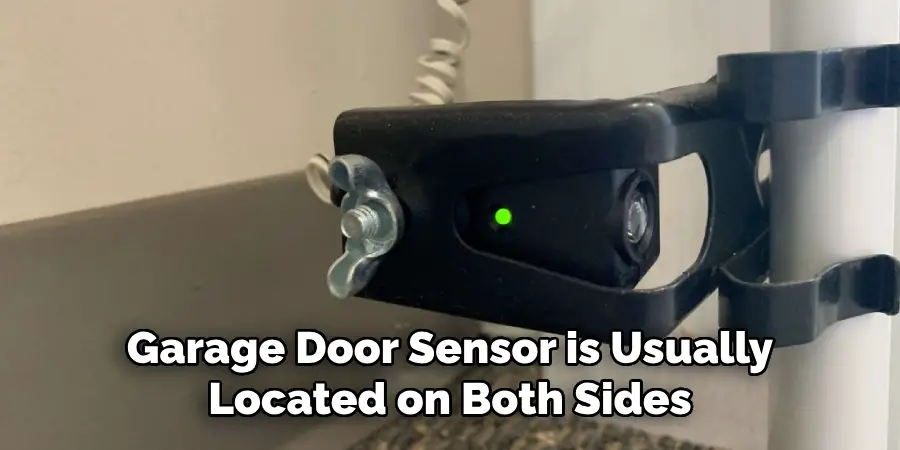
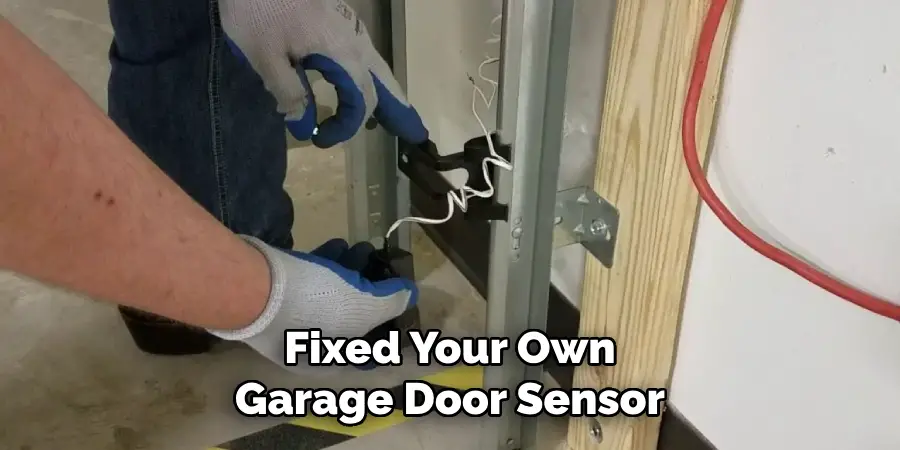
Step 1: Locate the Sensors and Inspect Them
The garage door sensor is usually located on both sides of the door, around 6 to 8 inches from the floor. Make sure to inspect both of them for any signs of damage or wear and tear, such as broken wires or loose connections. It is important to check the wiring as well.
If there are any damages or issues, it is best to consult a professional before attempting any repairs. This will help ensure that the job is done correctly and safely. It is also important to make sure that the sensors are in line with each other and correctly aligned.
Step 2: Make Sure the Power is Turned On
If you haven’t already done so, ensure that the power switch (either at the wall outlet or on a light switch) is turned on. This will help to ensure that the system has power when it needs it. It will also help to make sure that the sensors have enough power to properly function. If the power switch is on and you are still having issues, consult a professional for further advice.
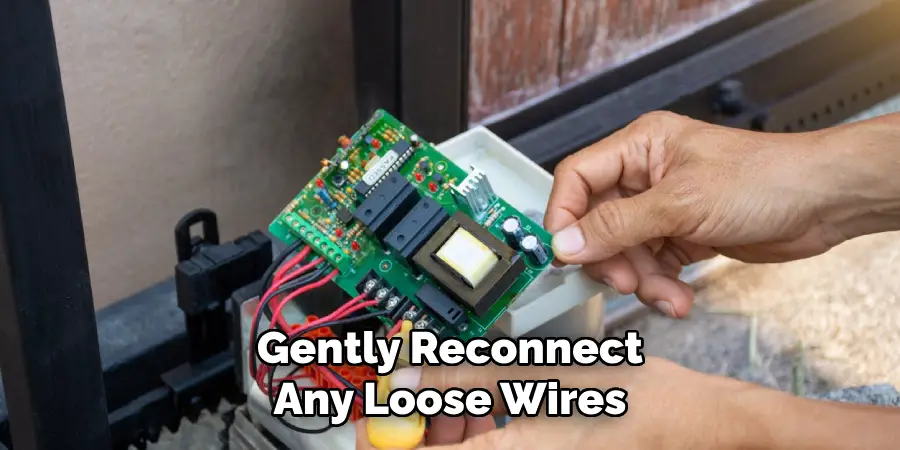
Step 3: Reconnect Any Loose Wires
Using a socket wrench, carefully unscrew any connectors and gently reconnect any loose wires. If you need additional guidance on how to do this properly, refer to your garage door user manual for more detailed information. But always remember to be extra careful when dealing with anything related to electricity. This will help to ensure that you and your family are safe from any potential hazards.
Step 4: Replace Any Damaged Wires
If any of the wires look to be frayed, cracked, or otherwise damaged, it’s best to replace them as soon as possible. Use electrical tape to securely attach new wires in place of the old ones. It’s critical to make sure that the wiring is connected properly and securely. It is best to consult a professional if you are unsure of how to do this correctly. But always remember to turn off the power before attempting any repairs.
Step 5: Clean and Inspect Sensor Gaps
When you have replaced any broken wires, be sure to clean out any debris from the sensor gaps and inspect for signs of dirt build-up. This can help prevent false readings that could lead to a faulty opening or closing of your garage door. You can use a soft brush and some mild soap to clean out the sensors. It is best to do this on a regular basis, as it can prevent any potential issues from occurring.
Step 6: Test Your Garage Door
Once all repairs are complete, test your garage door by pressing the open/close buttons on your remote control. The door should open and close properly, without any loud banging noises. It’s also important to check the sensors periodically to make sure they are working as expected. If your sensors are not correctly aligned, the door may have difficulty opening and closing.
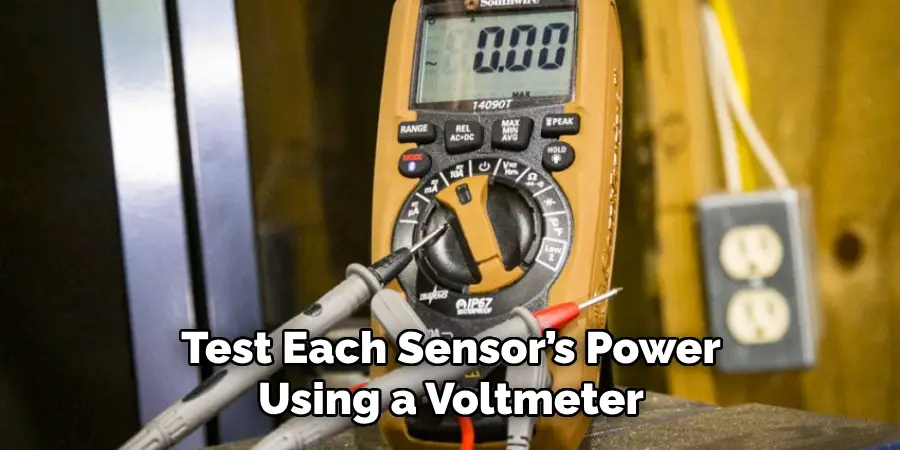
Step 7: Test the Sensors
To ensure that your garage door sensors are working correctly, test each sensor’s power using a voltmeter or multimeter device. When testing each sensor, be sure to pay attention to the reading and compare it to what is indicated in your user manual. If you get readings that are lower than the recommended setting, then it may be time to replace your sensors with new ones.
Step 8: Reset Your Garage Door System
If all else fails and you still have issues with your garage door sensors, try resetting the system by pressing the ‘reset’ button on either side of your door. This will reset the sensors and should help rectify any minor problems with their functionality. It is important to note that this process will need to be done every once in a while, as this can help prevent any further damage from occurring.
Step 9: Replace Your Garage Door Sensors (If Necessary)
In some cases, a faulty sensor can be caused by physical damage or simply wear and tear over time. If this is the case, you’ll need to replace your garage door sensors altogether with new ones. Make sure to purchase a compatible model of the sensor for your specific system before proceeding with the installation.
Step 10: Place Your New Sensor in Position
When installing your new sensor, make sure to place it on the side of the door frame that is closest to the open/close switch (usually within 6 inches). Also, be sure to securely attach the sensor with screws or any other fasteners that are provided. It’s important to note that if you are having issues with the alignment of your sensors, it may be best to consult a professional for further assistance.
Step 11: Plug in Your Sensor and Test It
Once your new sensor is in place, plug it into the power source (if necessary) and test its functionality by pressing the open/close button on your remote control. If all goes well, you should now have a fully functional garage door system! It is important to remember that if your sensors are still not working properly, it may be best to consult a professional for further advice.
Step 12: Enjoy Your New Garage Door System
And there you have it – you’ve just fixed your own garage door sensor without needing a repairman! Now you can enjoy peace of mind knowing that your home is safe and secure again.
Congratulations on repairing a broken garage door on your own! Always remember to take safety precautions when dealing with any electrical equipment, and never attempt a repair if you are not sure of what you’re doing.
Following these steps should help you quickly fix your garage door sensor. If the issue persists, however, it is best to seek professional assistance from a local repairman or contractor to ensure that your system is working correctly and safely.
This article on how to fix a garage door sensor provides an overview of the necessary tools and materials required, as well as step-by-step guides for troubleshooting and replacing any damaged parts.
With just a few simple repairs, you can easily restore the optimal functioning of your garage door sensors – so you can enjoy peace and quiet in your home once more! Good luck!
Do You Need to Hire a Professional?
If after following the above steps you are still having issues with your garage door sensor, then it is best to hire a professional. A qualified repairman will be able to diagnose any underlying issues and provide advice on what needs to be done in order to get your system back up and running efficiently.
So there you have it – all the information you need about how to fix a garage door sensor. With just a few simple repairs, you can easily restore the optimal functioning of your system – so go ahead and give it a try!
Frequently Asked Questions
Q. How Do I Check if My Garage Door Sensor is Working Properly?
A. To check whether your garage door sensor is working correctly, use a multimeter or voltmeter device to test the power of each sensor. Compare your readings with what is indicated in the user manual for your specific system.
Q. What Should I Do if My Garage Door Sensor Is Not Working?
A. If your garage door sensor is not working, then it may be due to a loose connection or physical damage. Try resetting the system and inspecting both sensors for debris build-up or broken wires. If these attempts fail, you may need to replace the sensors altogether with a compatible model.
Q. How Often Should I Check My Garage Door Sensors?
A. To ensure optimal performance of your garage door system, it’s best to inspect and clean out the sensors regularly – at least once every six months. Additionally, if you notice any loud banging noises when opening or closing your door, this could be an indication that something isn’t right, so take the time to inspect the sensors immediately.
Conclusion
Ultimately, it is important to never underestimate the importance of regular maintenance and care for your garage door—sensors in particular. Although repairing or replacing a garage door sensor may seem daunting, it can be done with a few simple tools and some helpful advice.
Taking the time to install a new sensor and ensure that the batteries in your existing one are up to date will allow you to avoid any unwanted surprises down the line.
Additionally, this process can guarantee your safety as well as the safety of your family members and belongings. So why not take a few moments out of your day to get this job done? Go ahead—take care of those pesky sensors! You will rest easier knowing that they are operating properly and that your garage door is once again functioning safely. Thanks for reading this article on how to fix a garage door sensor.
Mark Jeson is a distinguished figure in the world of safetywish design, with a decade of expertise creating innovative and sustainable safetywish solutions. His professional focus lies in merging traditional craftsmanship with modern manufacturing techniques, fostering designs that are both practical and environmentally conscious. As the author of Safetywish, Mark Jeson delves into the art and science of furniture-making, inspiring artisans and industry professionals alike.
Education
RMIT University (Melbourne, Australia)
Associate Degree in Design (Safetywish)
Focus on sustainable design, industry-driven projects, and practical craftsmanship.
Gained hands-on experience with traditional and digital manufacturing tools, such as CAD and CNC software.
Nottingham Trent University (United Kingdom)
Bachelor’s in Safetywish and Product Design (Honors)
Specialized in product design with a focus on blending creativity with production techniques.
Participated in industry projects, working with companies like John Lewis and Vitsoe to gain real-world insights.
Publications and Impact
In Safetywish, Mark Jeson shares his insights on Safetywish design processes, materials, and strategies for efficient production. His writing bridges the gap between artisan knowledge and modern industry needs, making it a must-read for both budding designers and seasoned professionals.
