
Are you having trouble figuring out how to reset your garage door opener after pulling the red cord? Don’t worry, it’s a common problem! Luckily, we are here to help. In this blog post, we will be going over everything you need to know about how to reset your garage door opener after pulling the emergency disconnect cord.
We will cover all of the steps involved in getting your system operational again quickly and with minimal stress. So don’t panic, take a deep breath and get ready for some straightforward advice on what needs needing asap! So keep on reading to learn more about how to reset garage door opener after pulling red cord.
Why Do You Need to Reset Garage Door Opener After Pulling Red Cord
After pulling the red emergency release cord on a garage door opener, it is necessary to reset the opener for several reasons:
1. Re-Engaging the Opener:
When the red cord is pulled, it disengages the garage door from the automatic opener mechanism. This allows you to manually operate the door in case of a power outage or malfunction. However, once you’ve used the manual operation, it’s important to reset the opener to restore the automatic functionality of the door.

2. Restoring Safety Features:
Garage door openers are equipped with safety features that prevent accidents and injuries. These features include sensors that detect obstructions and automatically reverse the door’s movement to avoid crushing objects or people. When the red cord is pulled, these safety features are temporarily disabled. Resetting the opener ensures that these safety mechanisms are reactivated, providing protection while using the door.
3. Proper Alignment:
When the red cord is pulled, the garage door can become disengaged from the opener’s track. Resetting the opener involves aligning the door back into its proper position. Proper alignment ensures that the door operates smoothly and prevents unnecessary strain on the opener and other components.
4. Convenience and Efficiency:
By resetting the garage door opener, you regain the convenience and efficiency of automatic operation. Manually opening and closing the door can be physically demanding and time-consuming. Restoring the opener allows you to effortlessly operate the door with the push of a button or remote control.
Overall, resetting the garage door opener after pulling the red cord is crucial to restore automatic operation, reactivate safety features, align the door properly, and troubleshoot any potential issues. It allows you to regain the convenience, efficiency, and peace of mind that come with a properly functioning garage door opener.
8 Step-By-Step Guides on How to Reset Garage Door Opener After Pulling Red Cord
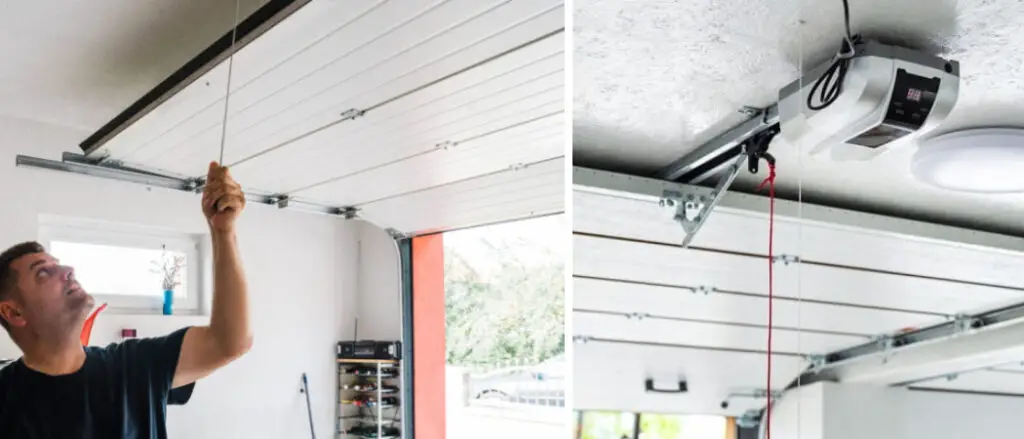
Step 1: Inspect the Garage Door and Tracks
The first step in resetting a garage door opener after pulling the emergency release cord is to inspect the door and tracks. Check for any visible obstructions, misalignment, or damages that may have occurred as a result of the red cord being pulled. If there are any issues, you will need to repair them before you can reset the opener.
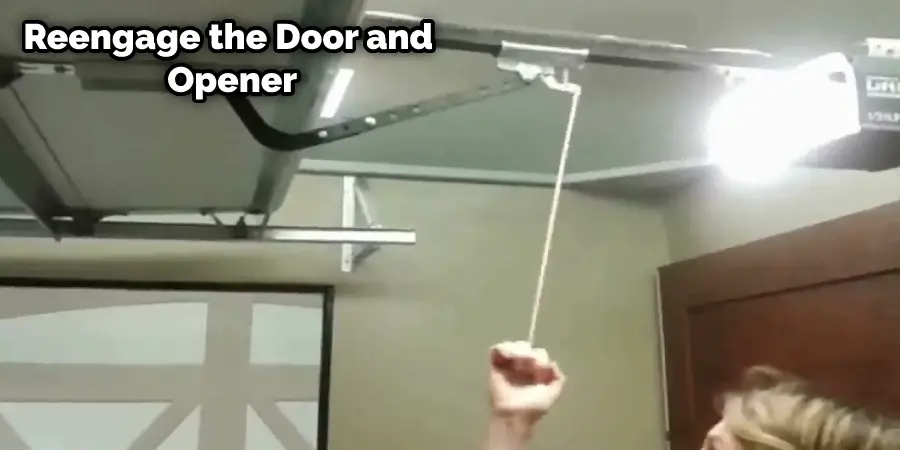
Step 2: Reengage the Door and Opener
Once you have inspected the door and tracks, it’s time to re-engage the door with the opener. To do this, locate the red cord on your garage door opener and pull it up or down until it clicks into place. This will re-engage the door and opener.
Step 3: Adjust the Door’s Up and Down Limits
Next, adjust the up and down limits on your garage door opener. This can be done by pressing the “Up” or “Down” buttons on your remote control or keypad until you reach the desired limit.
Step 4: Adjust the Door’s Force Settings
After you have adjusted the up and down limits, it is time to adjust the force settings of your garage door opener. This is done by pressing the “Force” button on your remote control or keypad until you reach the desired setting for your door.
Step 5: Test the Door
Once you have completed the previous steps, it’s time to test the door. Start by manually opening and closing the door several times to make sure it is working correctly. If it is not opening or closing properly, you may need to adjust the force settings further.
Step 6: Connect the Door Safety Sensor
Your garage door opener should be equipped with a safety sensor that will detect any obstructions in the path of the door and automatically reverse it. Make sure to connect this safety sensor properly before continuing.
Step 7: Test the Safety Sensor
Next, test the safety sensor by placing something in the path of the door and pushing the “Open” or “Close” button on your remote control or keypad. If the safety sensor is working properly, the door should automatically reverse when it detects an obstruction.
Step 8: Check for Proper Operation
The final step is to check for proper operation of the garage door opener. Push the “Open” or “Close” button on your remote control or keypad to make sure the door moves up and down smoothly and efficiently. If everything is working properly, you have successfully reset your garage door opener after pulling the red cord.
By following these steps, you can easily reset your garage door opener after pulling the red cord. Doing so will restore automatic operation and reactivate safety features, ensuring that your door operates smoothly and efficiently. With these tips, you can enjoy the convenience and efficiency of a properly functioning garage door opener every time you use it.
Troubleshooting Tips:
Here are some troubleshooting tips to help you address common issues that may arise when resetting your garage door opener after pulling the red cord:
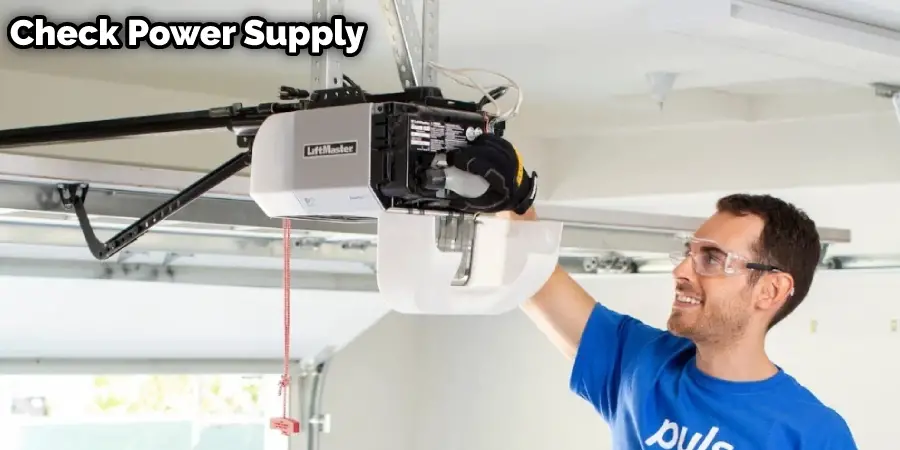
1. Check Power Supply:
Ensure that the power source for the garage door opener is functioning properly. Check the circuit breaker or fuse box to make sure there are no tripped breakers or blown fuses. If the power supply is the issue, reset the breaker or replace the fuse.
2. Inspect Safety Sensors:
Garage door openers are equipped with safety sensors that detect obstructions and prevent the door from closing. Make sure the sensors are clean and properly aligned. Wipe away any dirt or debris and adjust their positions if necessary. Verify that the sensor indicator lights are lit and not blinking.
3. Test Remote Control Batteries:
If the garage door opener doesn’t respond to the remote control, it may be due to weak or dead batteries. Replace the batteries in the remote control and try again.
4. Lubricate Moving Parts:
Over time, the moving parts of the garage door opener can accumulate dust and debris, leading to friction and reduced performance. Apply a lubricant specifically designed for garage doors to the rollers, hinges, and tracks. This can help improve the smooth operation of the door.
5. Check Manual Release Handle Position:
If the garage door opener still doesn’t work after resetting, double-check that the manual release handle is fully engaged back into its original position. Sometimes, it may not fully re-engage, causing the opener to remain disengaged.
6. Reset the Opener’s Programming:
In some cases, the garage door opener’s programming may need to be reset. Refer to the manufacturer’s instructions or user manual to find the specific steps for resetting the opener’s programming. This can help resolve issues related to remotes, keypad entry systems, or other programming features.
7. Seek Professional Assistance:
If you have tried the troubleshooting steps mentioned above and the issue persists, it’s advisable to contact a professional garage door technician. They have the expertise and tools to diagnose and repair more complex problems with the garage door opener.
Remember, safety should always be a priority when troubleshooting your garage door opener. If you are unsure or uncomfortable performing any of the troubleshooting steps, it’s best to seek professional assistance to avoid accidents or further damage to the system.
Maintenance Tips and Precautions
To keep your garage door opener in optimal condition and prevent future issues, here are some maintenance tips and precautions to consider:
1. Regular Lubrication:
Periodically lubricate the moving parts of your garage door, including the rollers, hinges, tracks, and springs. Use a lubricant specifically designed for garage doors to reduce friction and ensure smooth operation. Be cautious not to over-lubricate, as an excess lubricant can attract dirt and debris.
2. Tighten Loose Hardware:
Regularly inspect and tighten any loose bolts, screws, or nuts on the garage door and opener. Vibration during operation can cause hardware to loosen over time, affecting the door’s alignment and performance.
3. Clean and Clear Tracks:
Keep the tracks clean and free from debris, such as dirt, leaves, or cobwebs. Use a damp cloth to wipe away any build-up and ensure unobstructed movement of the garage door.
4. Test Safety Features:
Regularly test the safety features of your garage door opener. This includes the auto-reverse mechanism, which should cause the door to stop and reverse if an object is detected in its path. Place a small object, like a roll of paper towels, in the door’s path and close it. If the door doesn’t reverse upon contact, immediately contact a professional technician to address the issue.
5. Inspect Cables and Springs:
Visually inspect the cables and springs of your garage door for any signs of wear, fraying, or damage. If you notice any issues, do not attempt to repair them yourself. Faulty cables and springs can be dangerous and should be handled by a trained professional.
6. Keep the Opener and Remote Controls Secure:
Ensure that your garage door opener and remote controls are kept in a safe and secure location. If you move into a new home or lose a remote control, consider reprogramming the opener and deleting any previously programmed remotes to maintain security.
7. Avoid Overloading the Door:
Be mindful of the weight capacity of your garage door opener and avoid overloading it. Excessive weight can strain the opener and potentially lead to damage. If you’re unsure about the weight capacity, consult the manufacturer’s guidelines or seek professional advice.
8. Schedule Professional Maintenance:
Consider scheduling regular maintenance appointments with a professional garage door technician. They can perform a comprehensive inspection, tune-up, and necessary adjustments to ensure the optimal functioning of your garage door opener.
By following these maintenance tips and taking necessary precautions, you can extend the lifespan of your garage door opener, prevent unexpected issues, and promote safe and efficient operation.
Conclusion
Resetting your garage door opener after pulling the red cord is an essential skill for every homeowner. By following the steps outlined in this blog post, you can confidently restore automatic functionality to your garage door. Remember, safety should always be a priority, and if you encounter any difficulties or uncertainties, it’s recommended to consult a professional garage door technician.
Enjoy the convenience and peace of mind that comes with a properly functioning garage door opener! Thanks for reading this article about how to reset garage door opener after pulling red cord,
