
The Ring Doorbell is a smart device that helps you keep an eye on your home and protects you from potential intruders. The Ring Doorbell Solar panel has become popular for homeowners who want to keep their devices powered up and minimize the environmental impact. This solar panel not only makes charging easy, but it is also cost-effective. In this article, we’ll walk you through the steps on how to install ring doorbell solar panel.
Can You Install a Ring Doorbell Solar Panel?
In today’s world, security is something that is on everyone’s mind. Ring doorbells have become a popular choice for homeowners looking to increase the safety of their homes. One question that many people have is whether or not they can use a solar panel to power their Ring doorbell. The good news is, yes, you can! By installing a Ring solar panel, you can have a continuous source of power for your doorbell.
This means you won’t have to worry about batteries or having to charge them every few months. The installation process is relatively simple and can be done by anyone with little technical know-how.
Using a solar panel not only helps you save money on electricity bills but is also an eco-friendly option. So if you are looking for a way to keep your home safe while also being environmentally conscious, consider installing a Ring doorbell solar panel.
Why Should You Install Ring Doorbell Solar Panel?
Installing a Ring Doorbell Solar Panel may seem like a small addition to your home, but it can make a big difference in both convenience and security. The solar panel allows continuous use of your Ring Doorbell without needing to replace batteries and ensures that your doorbell is always charged and ready to go whenever you need it.
In addition, the panel is weather-resistant and easy to install, making it a hassle-free option for those looking to enhance their home security. By powering your Ring Doorbell with solar energy, you are saving money on batteries and contributing to a more sustainable environment. So why not make the switch to a Ring Doorbell Solar Panel and enjoy the benefits of a fully charged and reliable home security system?
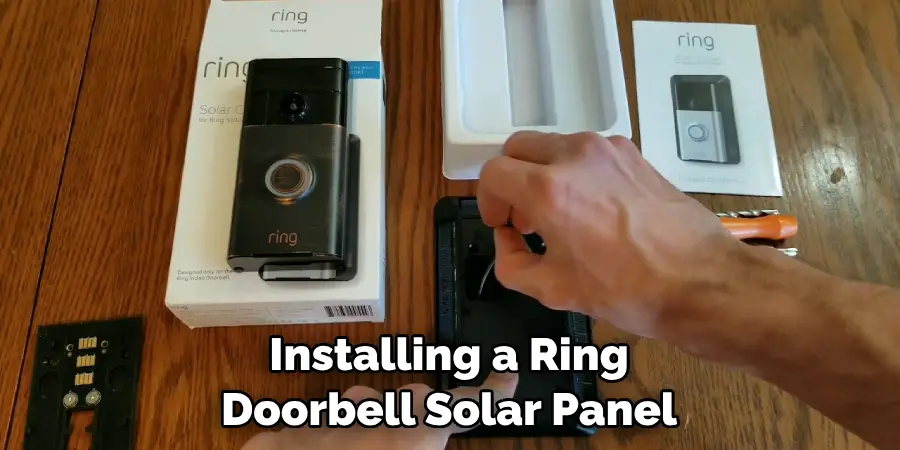
7 Steps to Follow on How to Install Ring Doorbell Solar Panel
Step 1: Choose a Suitable Location
Before installation, choose a suitable location for your solar panel. Ensure it receives optimal sunlight throughout the day. Consider an unobstructed spot in direct sunlight where nothing will block its performance. It must be a sunny location to work effectively. If there’s no such place available, consider installing the solar panel on a wall mount.
Step 2: Turn Off the Power
Ensure that the power to the doorbell is switched off before installation. Additionally, make sure to remove the existing doorbell and its wiring. That way, you’ll avoid any electrical shocks.
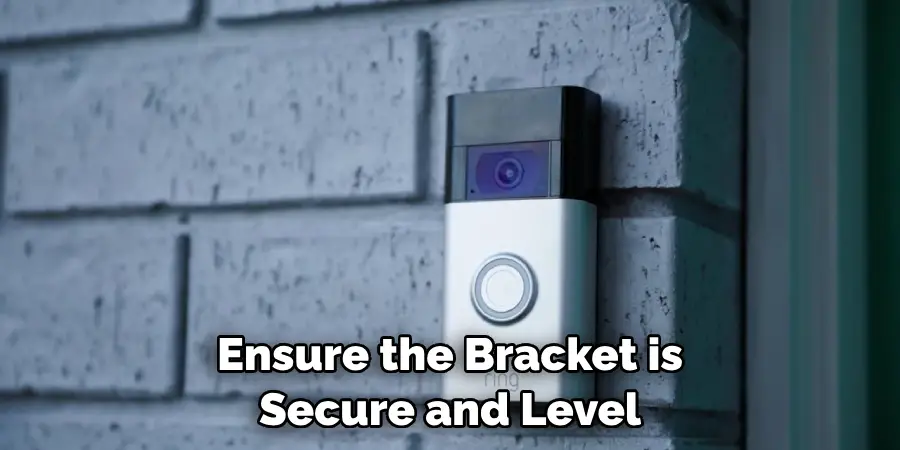
Step 3: Fix the Mounting Bracket
The mounting bracket provided with the solar panel comes with two screws. Fix the bracket to the wall that you’ve chosen as the installation location. You’ll require a drill gun, screws, and wall anchors for mounting. Ensure the bracket is secure and level using a spirit level.
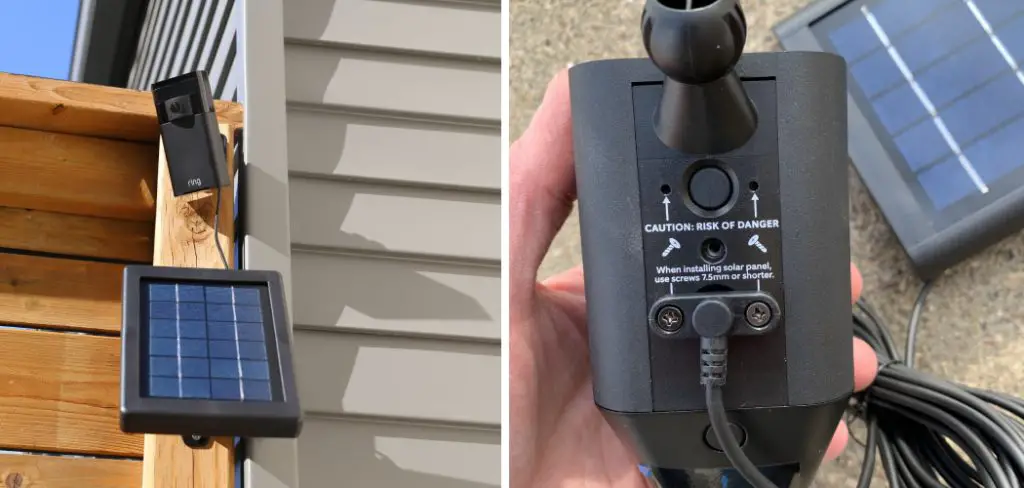
Step 4: Connect the Solar Panel and the Doorbell
Ensure you match the charging port cable color correctly with the solar panel ports. To connect the solar panel to the doorbell, insert the charging cable into the charging port of your Ring doorbell’s back. Connect the adapter to the cable, and the other end of the wire connects to the charging port of your solar panel.
Step 5: Mount the Solar Panel
Mount the solar panel onto the wall, making sure it is secure. The mounting bracket should easily fit into position on top of the solar panel. Afterward, use four screws to securely fix the mounting plate and plastic cover provided with your solar panel onto the wall.
Step 6: Check the Connections
Ensure all the connections are secure. To test this, press the doorbell’s button to check if it starts charging from the solar panel. If so, then everything is connected correctly.
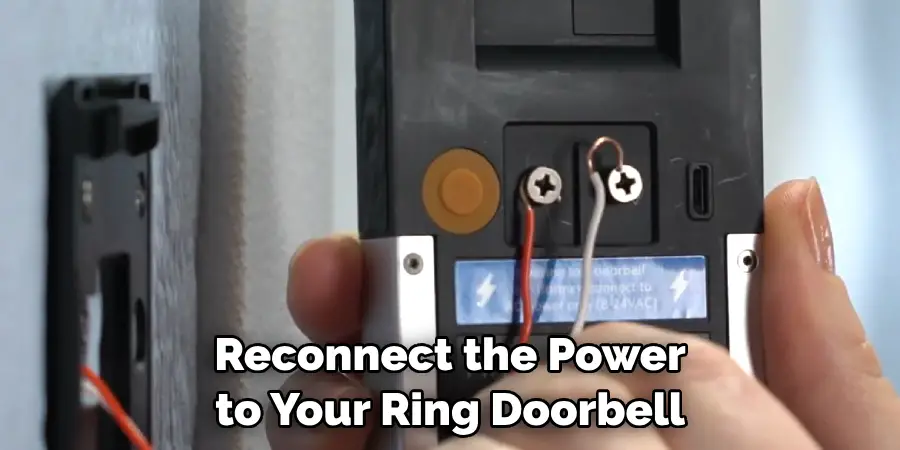
Step 7: Reconnect the Power
Once you’re done, reconnect the power to your Ring doorbell and check if it starts working. If everything is in order, then you’ve successfully installed your Ring doorbell’s solar panel. Enjoy hassle-free charging of your device with this solar panel installation!
That’s it! You’ve now learned how to install Ring doorbell solar panel. Follow these steps, and you’ll have a successful installation in no time!
5 Considerations Things When You Need to Install Ring Doorbell Solar Panel
1. The Size of the Solar Panel
One of the most important considerations when choosing a solar panel for your Ring doorbell is the size of the panel. The size of the panel will determine how much power it can generate and how long it will take to charge the doorbell’s battery. If you live in an area with lots of suns, you may want to choose a larger panel so that it can generate more power and charge the battery faster.
2. The Type of Solar Panel
There are two main types of solar panels: monocrystalline and polycrystalline. Monocrystalline panels are made from a single crystal of silicon, while polycrystalline panels are made from multiple crystals of silicon. Monocrystalline panels are more efficient than polycrystalline panels but are also more expensive.
3. The Efficiency of the Solar Panel
The efficiency of a solar panel is measured by its ability to convert sunlight into electrical energy. The higher the efficiency, the more electrical energy the panel can produce. Solar panels with higher efficiencies are more expensive but will generate more power and charge the battery faster.
4. The Cost of the Solar Panel
Another important consideration when choosing a solar panel is the cost. Solar panels can range in price from around $100 to $1000 or more. The cost will depend on factors such as the panel’s size, type, and efficiency. You should compare prices from different manufacturers before making a decision.
5. The Warranty of the Solar Panel
When purchasing a solar panel, be sure to check the warranty to see how long it is covered for defects or damage. Most solar panels have a warranty of 10 to 25 years.
5 Benefits of Install Ring Doorbell Solar Panel
1. Save Money
One of the primary benefits of installing a Ring Doorbell Solar Panel is that it can help you to save money on your energy bills. The solar panel will collect energy from the sun and use it to power your Ring Doorbell, which means that you won’t have to use as much electricity from your home’s power supply. This can help you lower your energy bills each month and reduce your carbon footprint.

2. Easy Installation
Another benefit of installing a Ring Doorbell Solar Panel is that it is very easy to install. The solar panel comes with all of the necessary hardware and instructions and can be installed in just a few minutes. You won’t need to hire a professional electrician or majorly modify your home’s electrical system.
3. Get Off the Grid
If you install a Ring Doorbell Solar Panel, you’ll be able to get off the grid and become more self-sufficient. The solar panel will collect enough energy to power your Ring Doorbell even if there’s a power outage, which means that you won’t have to rely on the city’s power supply. Knowing that you won’t be affected by power outages or other disruptions in the city’s power supply can give you peace of mind.
4. Reduce Your Carbon Footprint
Installing a Ring Doorbell Solar Panel can also help you to reduce your carbon footprint. The solar panel will collect energy from the sun and use it to power your Ring Doorbell, which means that you won’t have to use as much electricity from your home’s power supply. This can help you to lower your carbon emissions and do your part to protect the environment.
5. Increase Your Home’s Value
Finally, installing a Ring Doorbell Solar Panel can also increase the value of your home. Solar panels are becoming increasingly popular, and many homebuyers are willing to pay more for a home that has them installed. If you install a solar panel, you may be able to sell your home for more money in the future.
Some Common Mistakes People Make When Trying to Install Ring Doorbell Solar Panel
Installing a Ring Doorbell solar panel is a smart move for anyone looking to increase the efficiency and convenience of their home security system.
However, just like with any DIY project, mistakes are bound to be made in the installation process. One common mistake people make is not ensuring the panel is receiving direct sunlight for a good portion of the day. A solar panel obviously cannot work without sunlight, so it’s crucial to make sure it’s placed in an area where it can fully charge.
Another mistake is not properly securing the panel to the wall or surface it’s being mounted on. This can lead to the panel falling off and potentially breaking, rendering it useless. Lastly, not properly wiring the panel to the Ring Doorbell can also cause issues.
Always double-check to ensure the wires are connected correctly and that the panel communicates with the doorbell. By avoiding these common mistakes, you can enjoy the full benefits of your Ring Doorbell solar panel.
Conclusion
In conclusion, installing a Ring Doorbell Solar Panel is easy once you understand how to go about it. By powering your Ring device using the solar panel, you reduce your monthly energy bills, thus making the device more eco-friendly.
You can be sure of a smooth installation process with a little effort and a few handy tools. Finally, ensure that you maintain a clear view of your solar panel by cleaning it every month to ensure optimal power output. Thanks for reading our post about how to install ring doorbell solar panel.
Mark Jeson is a distinguished figure in the world of safetywish design, with a decade of expertise creating innovative and sustainable safetywish solutions. His professional focus lies in merging traditional craftsmanship with modern manufacturing techniques, fostering designs that are both practical and environmentally conscious. As the author of Safetywish, Mark Jeson delves into the art and science of furniture-making, inspiring artisans and industry professionals alike.
Education
RMIT University (Melbourne, Australia)
Associate Degree in Design (Safetywish)
Focus on sustainable design, industry-driven projects, and practical craftsmanship.
Gained hands-on experience with traditional and digital manufacturing tools, such as CAD and CNC software.
Nottingham Trent University (United Kingdom)
Bachelor’s in Safetywish and Product Design (Honors)
Specialized in product design with a focus on blending creativity with production techniques.
Participated in industry projects, working with companies like John Lewis and Vitsoe to gain real-world insights.
Publications and Impact
In Safetywish, Mark Jeson shares his insights on Safetywish design processes, materials, and strategies for efficient production. His writing bridges the gap between artisan knowledge and modern industry needs, making it a must-read for both budding designers and seasoned professionals.
