
Turning off a septic alarm can be an essential skill for homeowners who want to maintain their system efficiently and avoid unnecessary panic. A septic alarm is designed to alert you when there is a potential issue with your septic system, such as high water levels or pump failures.
Understanding how to properly turn off the alarm not only helps you address the problem promptly but also ensures the longevity and functionality of your septic system. In this guide on how to turn off septic alarm, we will walk you through the necessary steps to safely and effectively turn off your septic alarm.
What is a Septic Alarm?
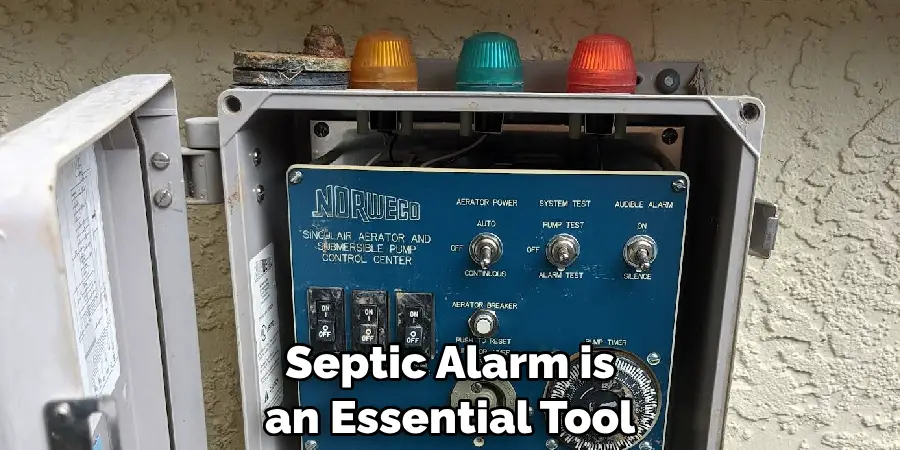
Before learning how to turn off septic alarm, it is essential to understand what it is and why it exists. A septic alarm is a small electrical device installed on or near the tank in your septic system. It works by detecting high water levels in the tank or pump failures and alerting you with an audible or visual signal.
The purpose of a septic alarm is to warn homeowners of potential issues with their septic system before they become major problems. This can save you from costly repairs and protect your property from sewage backups or pollution.
You may also come across a term called “alarm float” when researching septic alarms. The alarm float is a small ball-shaped device that triggers the alarm when it reaches a certain level in the tank, indicating high water levels.
Reasons for Turning Off Septic Alarm
Although a septic alarm is an essential tool for monitoring your system, there are instances when you may need to turn it off temporarily. One of the most common reasons is during routine maintenance or pump replacements. In such cases, turning off the alarm can prevent false alarms and ensure accurate readings.
Another reason for turning off a septic alarm is if it continues to sound even after addressing any potential issues with your system. This could indicate a malfunction in the alarm itself, and turning it off can help troubleshoot the problem.
8 Step-by-step Guidelines on How to Turn Off Septic Alarm
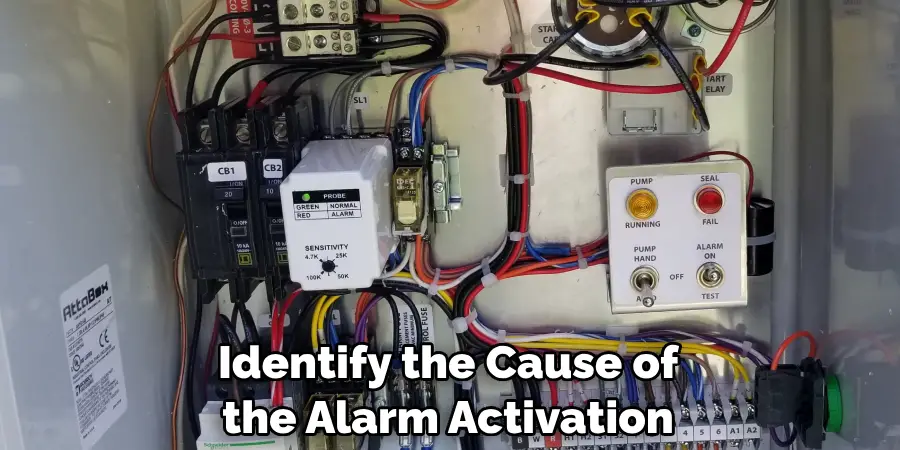
Step 1: Identify the Type of Alarm
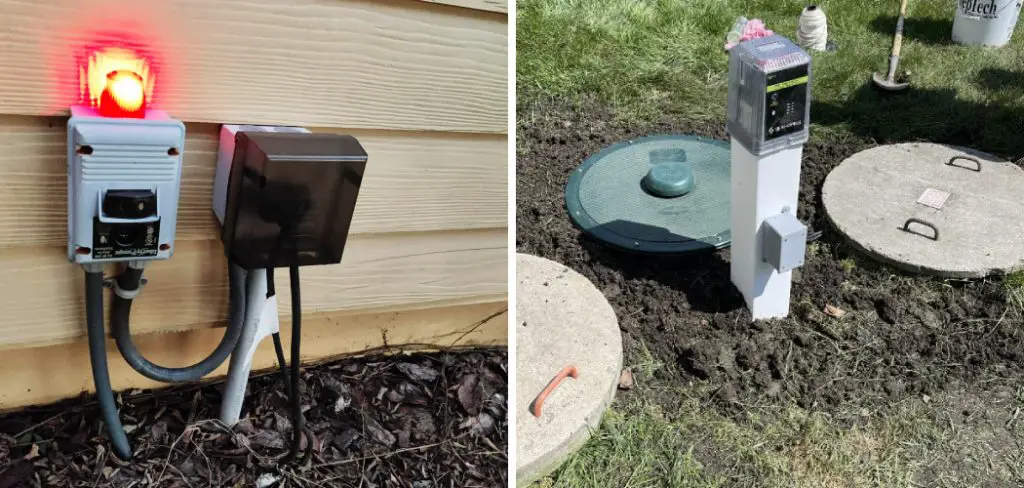
The first step in turning off your septic alarm is to identify the type of alarm system you have installed. Septic alarms generally come in two main types: external and internal alarms. External alarms are typically mounted outside the house, near the septic tank or control panel, while internal alarms may be located in the basement or utility room.
Additionally, alarms can be audible, visual, or a combination of both. Understanding the type of alarm you have will help you locate it quickly and follow the appropriate procedure for turning it off.
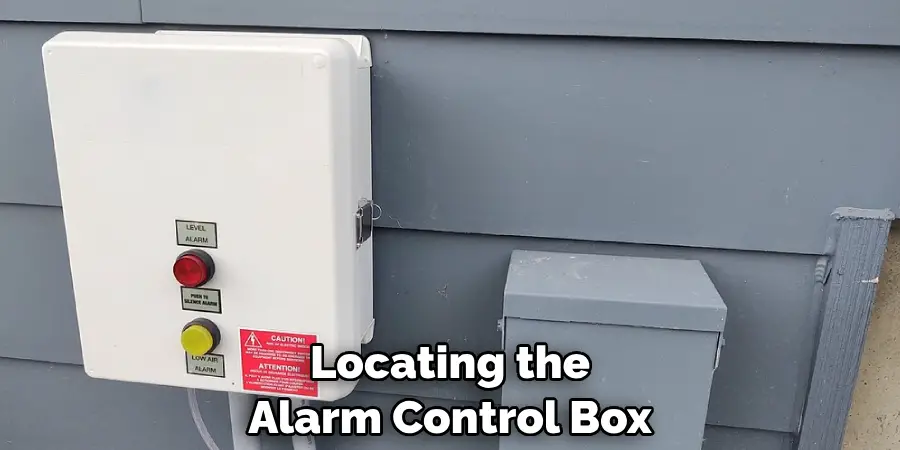
Step 2: Locate the Alarm Control Box
Once you have identified the type of alarm system installed, the next step is to locate the alarm control box. The control box is typically mounted near the septic tank, pump chamber, or in a nearby shed or utility area. It houses the components that manage the alarm system, including the audible and visual signals.
To find the control box, follow the wiring from the alarm float or septic system to where it connects with the control box. If you have an internal alarm system, the control box might be situated in the basement, garage, or a utility room within your home. Once located, you will be able to turn off the alarm by following the specific instructions for your system.
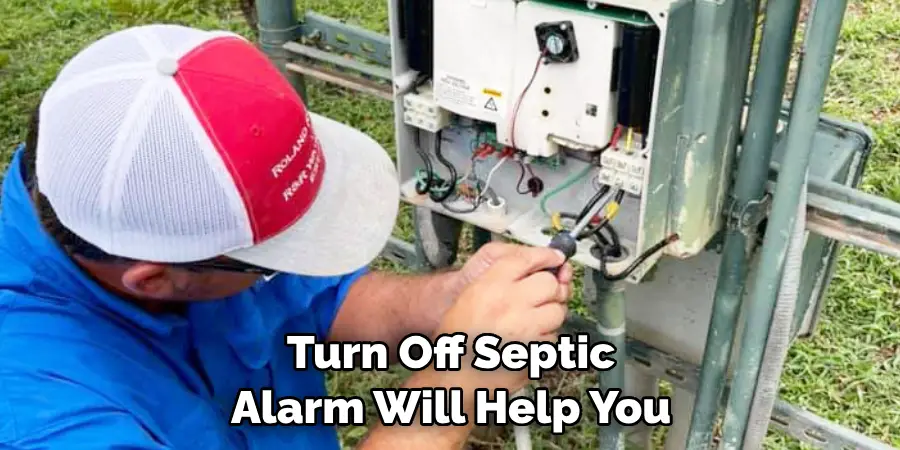
Step 3: Identify the Power Source
After locating the alarm control box, the next crucial step is to identify the power source for the septic alarm system. The alarm system is typically connected to your home’s main electrical circuit, and understanding its power source will enable you to safely turn off the alarm. Check around the control box for any power cords or wiring that connects to an electrical outlet or circuit breaker.
In some cases, the power source may be a dedicated circuit breaker within your home’s electrical panel. If this is the case, identify the breaker labeled for the septic system or alarm and prepare to switch it off if necessary. Knowing the power source is essential for safely disabling the alarm without disrupting other electrical systems in your home.
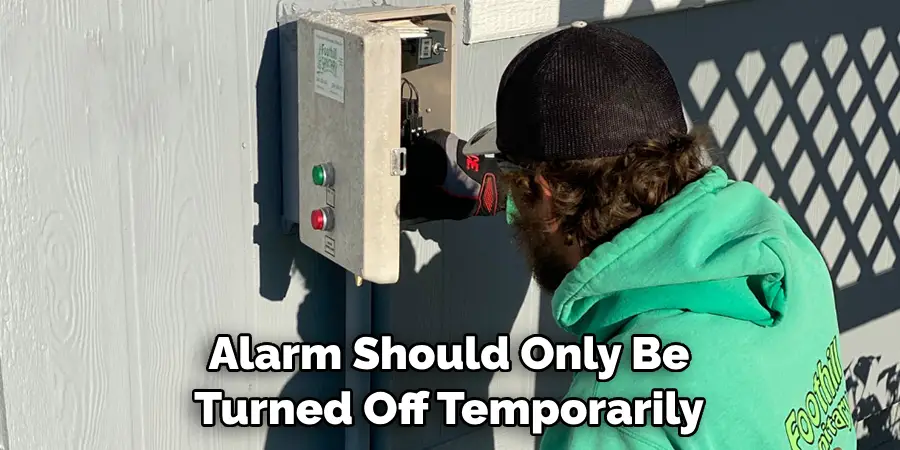
Step 4: Turn Off the Alarm Switch
Once you have identified the power source and located the alarm control box, the next step is to turn off the alarm switch. The alarm control box will typically have a designated switch or button to disable the alarm temporarily. Look for labels such as “Alarm Silence,” “Mute,” or a similar indication.
Flip the switch or press the button to deactivate the alarm. This action should silence the audible alarm and reset any visual indicators. It’s important to note that turning off the alarm switch does not resolve the underlying issue with your septic system; it merely stops the alarm from sounding. Make sure to address the root cause of the alarm to ensure the proper functioning of your septic system in the long run.
Step 5: Disconnect the Power Source
If turning off the alarm switch does not silence the alarm or if additional troubleshooting is needed, the next step is to disconnect the power source entirely. This can be done by unplugging the alarm system from the electrical outlet if it is connected via a power cord. Make sure to verify that you are unplugging the correct device to avoid any unintended power interruptions to other systems.
In cases where the septic alarm is connected directly to your home’s electrical system via a circuit breaker, you will need to locate the dedicated breaker for the septic alarm or system. This breaker is typically labeled accordingly in your electrical panel.
Once identified, switch the breaker to the “off” position to cut the power to the alarm system. By disconnecting the power source, you ensure that the alarm will not sound while you address any underlying issues with your septic system. Always exercise caution and follow safety protocols when working with electrical components.

Step 6: Remove the Alarm Float
With the alarm system powered down, the next step is to remove the alarm float. The alarm float is a mechanical switch inside the septic tank that triggers the alarm when high water levels are detected. To remove it, you will first need to access the septic tank. This typically involves lifting the septic tank cover or opening the access hatch.
Once you have access to the inside of the septic tank, locate the alarm float. It is usually attached to a pole or mounted near the pump. Carefully detach the float from its mounting mechanism, taking care not to damage any surrounding components. Some alarm floats may be secured with clamps, screws, or other fasteners that need to be loosened or removed. Once detached, you can either temporarily disable the float by disconnecting its wiring or replace it altogether.
Step 7: Check for Any Blockages or Malfunctions
With the alarm float removed, this is an excellent opportunity to inspect your septic system for any potential blockages or malfunctions. Use a flashlight to check for clogs or damage in the pipes and pump chamber. Clear any visible debris or obstructions that may be causing issues with your system’s functioning.
If everything appears clear and functional, you may need to troubleshoot other components of your septic system, such as the pump or control panel. Refer to manufacturer instructions or seek professional assistance if needed. Addressing any underlying issues will help prevent false alarms in the future and ensure the proper functioning of your septic system.
Step 8: Restore Power and Test Alarm System
After addressing any potential issues with your septic system, it’s time to restore power and test the alarm system. Reconnect the power source by plugging in the alarm system or turning on the dedicated circuit breaker.
Next, turn on the alarm switch to activate the audible and visual signals. Observe if the alarm sounds as expected when water levels rise or if there are any other indicators of a malfunctioning septic system. If everything appears to be working correctly, you can rest assured that your septic alarm is now functioning correctly.
Following these steps on how to turn off septic alarm will help you safely turn off your septic alarm and troubleshoot any underlying issues. Remember to regularly maintain your septic system and address any potential problems promptly to prevent future alarms and ensure the proper functioning of your septic system. Always follow safety guidelines when dealing with electrical components, and seek professional assistance if needed.
Troubleshooting Alarm Activation
If your septic alarm continues to activate even after following the steps to disable it and checking for obvious issues, further troubleshooting may be required. Here are some additional steps to help diagnose and resolve persistent alarm activations:
Step 1: Inspect the Control Panel
Begin by examining the septic system’s control panel. Look for any error codes or warning lights that could indicate specific issues with the system. Refer to the manufacturer’s manual for guidance on interpreting these codes and suggested corrective actions.
Step 2: Test the Floats
The alarm float is crucial in detecting high water levels, but other float switches in your system might also need checking. These include the pump float and high-level float. Ensure they are free of debris and are moving freely without any obstructions. Use a multimeter to check their electrical continuity and confirm they are operational.
Step 3: Check Wiring and Connections
Loose or corroded wiring can cause the septic alarm to malfunction. Inspect all wiring connections in the control box and around the alarm float. Tighten any loose wires and replace any corroded or damaged connectors. Ensure that the system has a good electrical ground.
Step 4: Evaluate the Pump Performance
A malfunctioning pump can lead to frequent alarm activations. Check the pump’s impeller for blockages or damage and test the motor to ensure it is operating correctly. If the pump is not working as intended, it may need to be repaired or replaced.
Step 5: Examine the Drain Field
Problems with the drain field can also trigger septic alarms. Ensure the drain field is properly absorbing wastewater and check for signs of pooling water or excessively lush vegetation, which may indicate a blockage or saturation issue.
Step 6: Consult a Professional
If you are unable to identify the cause of the alarm activation, it is advisable to consult a professional septic service provider. They can perform a thorough inspection of your system and identify any underlying problems that require expert attention.
By systematically troubleshooting each component, you can isolate the cause of recurring septic alarm activations and ensure your system functions reliably. Regular maintenance and prompt attention to issues will help keep your septic system running smoothly and prevent future alarms.
Maintenance and Care of Septic Alarms
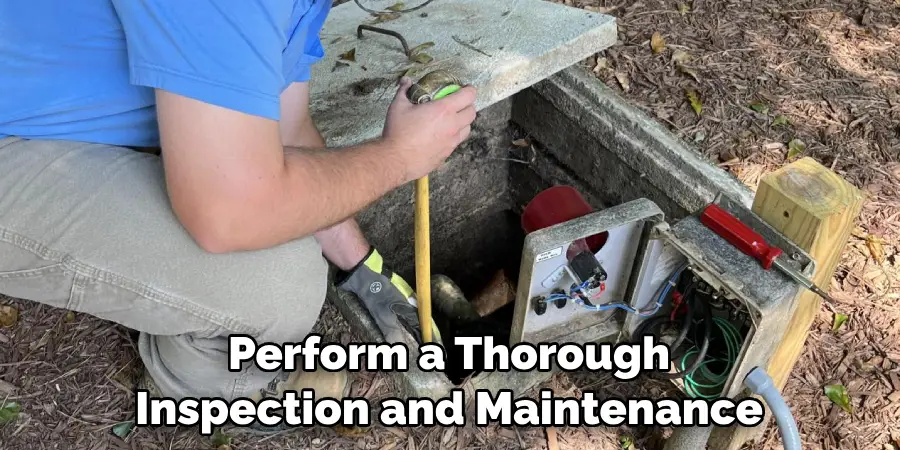
Proper maintenance and care of your septic alarm system are essential for ensuring it operates reliably and prevents environmental hazards. Regular checks and preventive measures can extend the life of your system and avoid costly repairs.
Regular Inspections
Conduct routine inspections of your septic alarm system, ideally every few months. During these inspections, check for any signs of wear and tear in the control panel, alarm float, and wiring. Examine the system for any signs of water damage or corrosion, and ensure that all components are securely mounted and free of debris.
Clean the Alarm Float
The alarm float can accumulate dirt and grime over time, affecting its ability to detect high water levels accurately. Clean the float periodically by gently wiping it with a damp cloth. Avoid using harsh chemicals or abrasive materials that could damage the float or its mounting components.
Test the Alarm System
Regularly test your septic alarm system to verify that it is functioning correctly. To do this, simulate a high water level condition by manually raising the alarm float or adding water to the tank. Make sure that both the audible and visual alarms activate as expected. Document any issues and address them promptly.
Check Electrical Connections
Inspect electrical connections for any signs of wear, corrosion, or loose wiring. Tighten any loose connections and replace damaged wires. Ensure that the alarm system has a proper electrical ground to prevent malfunctions. If you are not comfortable working with electrical components, seek professional assistance.
Perform Preventive Pump Maintenance
A well-maintained pump reduces the chances of false alarms. Perform regular maintenance on your septic pump, such as checking the impeller for blockages, testing the motor, and ensuring the pump is free of debris. Address any signs of malfunction immediately to keep the pump working efficiently.
Professional Servicing
Schedule annual servicing with a professional septic system service provider. Professionals can perform a thorough inspection and maintenance check, ensuring that all components, including the alarm system, are in optimal working condition. They can also address any complex issues that may not be easily identifiable during routine checks.
Educate Household Members
Educate everyone in your household on the importance of the septic alarm system and how to respond if an alarm is triggered. Make sure they understand how to silence the alarm temporarily and whom to contact in case of an emergency.
By adhering to a regular maintenance routine and seeking professional help when needed, you can ensure the longevity and reliability of your septic alarm system. Proper care not only helps in preventing nuisances from false alarms but also plays a crucial role in maintaining the overall health of your septic system.
Frequently Asked Questions
Q1: How Often Should I Check My Septic Alarm System?
A: It is recommended that routine checks be conducted every few months, with more thorough inspections at least once a year. The frequency may vary depending on the size of your household and system usage. You should also perform checks after any heavy rainfall or extreme weather conditions. The key is to be proactive and address any issues promptly.
Q2: What Causes False Alarms in a Septic System?
A: False alarms can occur due to a variety of reasons, including clogged or malfunctioning pumps, damaged alarm floats, loose wiring connections, and problems with the drain field. Regular maintenance and prompt attention to these issues can help prevent false alarms.
Q3: Can I Turn Off My Septic Alarm?
A: No, you should not turn off your septic alarm. The alarm serves as an important warning system for potential issues with your septic system. Instead of turning it off, troubleshoot the cause of the activation or contact a professional for assistance. The alarm should only be turned off temporarily if it is malfunctioning or being serviced.
Conclusion
In conclusion, a properly functioning septic alarm system is vital for maintaining the health and safety of your home’s septic system. By following the outlined steps—locating the control box, identifying the power source, turning off the alarm switch, disconnecting the power source if necessary, removing the alarm float, checking for blockages or malfunctions, and restoring power—you can effectively troubleshoot and silence your septic alarm.
It is important to remember that while these steps help manage the alarm, they do not address the root cause of the issue. Regular maintenance and timely repairs are essential to ensure your septic system operates efficiently. Should you encounter any complexities or uncertainties during this process, seeking professional assistance is highly recommended. Protecting your septic system ultimately contributes to the well-being of your entire household.
Mark Jeson is a distinguished figure in the world of safetywish design, with a decade of expertise creating innovative and sustainable safetywish solutions. His professional focus lies in merging traditional craftsmanship with modern manufacturing techniques, fostering designs that are both practical and environmentally conscious. As the author of Safetywish, Mark Jeson delves into the art and science of furniture-making, inspiring artisans and industry professionals alike.
Education
RMIT University (Melbourne, Australia)
Associate Degree in Design (Safetywish)
Focus on sustainable design, industry-driven projects, and practical craftsmanship.
Gained hands-on experience with traditional and digital manufacturing tools, such as CAD and CNC software.
Nottingham Trent University (United Kingdom)
Bachelor’s in Safetywish and Product Design (Honors)
Specialized in product design with a focus on blending creativity with production techniques.
Participated in industry projects, working with companies like John Lewis and Vitsoe to gain real-world insights.
Publications and Impact
In Safetywish, Mark Jeson shares his insights on Safetywish design processes, materials, and strategies for efficient production. His writing bridges the gap between artisan knowledge and modern industry needs, making it a must-read for both budding designers and seasoned professionals.
