
A garage door opener without sensors can be extremely handy and provide convenience, especially when you need to open or close your garage door quickly. In some cases, it may even be necessary if your garage does not have traditional sensors installed. Wiring up an opener without the use of sensors requires careful attention and should not be attempted by anyone without prior knowledge or experience.
There are several advantages to hiring a garage door opener without sensors. One advantage is that it requires fewer electrical components than wiring with traditional safety sensors, making the overall installation simpler and more cost-effective. Additionally, wiring without sensors eliminates the need for alignment and calibration of the sensors, which can be time-consuming and difficult. In this blog post, You will learn in detail how to wire a garage door opener without sensors.
Tools You Will Need
- Screwdriver
- Drill with bits
- Electrical tape
- Pliers
- Utility knife
- Wire cutters/strippers
- Wall anchors
- Jumper wires (optional)
- Wall switch/button to control the garage door opener
- Garage door opener without sensors.
Step-by-Step Processes for How to Wire a Garage Door Opener Without Sensors
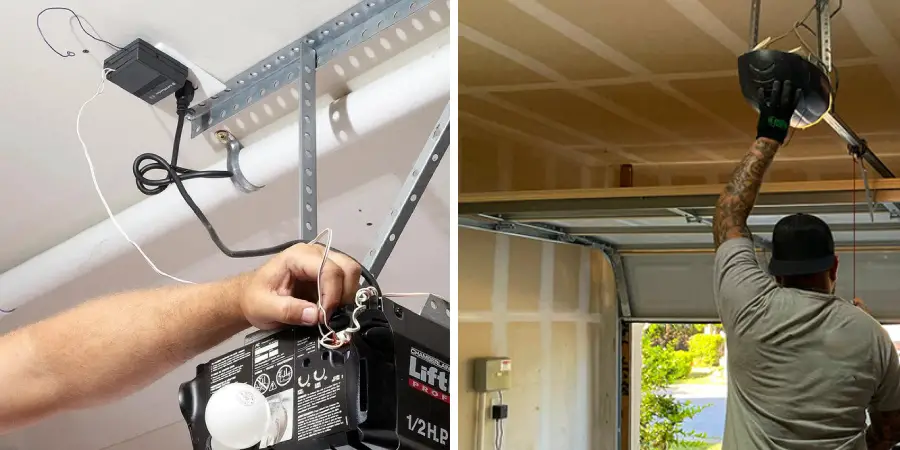
Step 1: Inspect Your Garage Door
Before you begin wiring your garage door opener, it is important to inspect the area around the door and make sure there are no obstructions. Once you have inspected the space around your garage door and removed all obstacles, prepare your wiring kit by gathering all necessary tools. This includes wire cutters, electrical tape, and wire nuts.
Step 2: Connect the Two Wires to the Motor
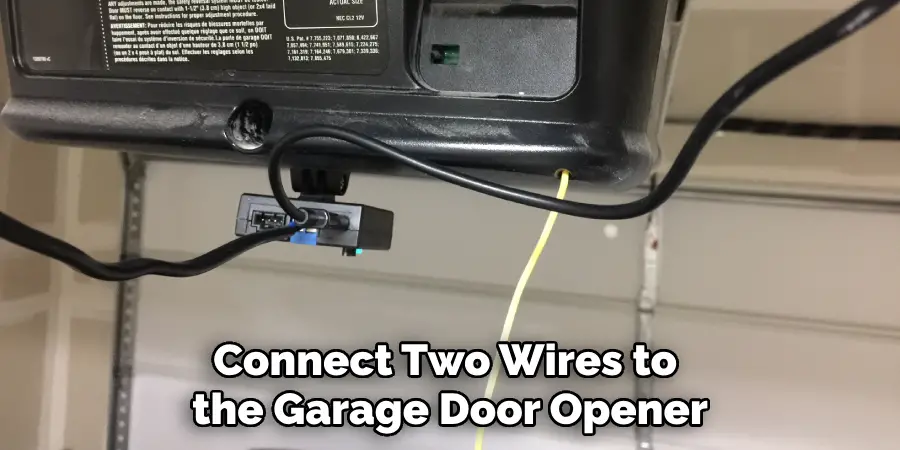
Connect two wires to the garage door opener motor using your wire cutters. These connections should be secure and tight in order to ensure they stay connected while you work with them. Once you have connected two wires from the motor, connect an extension wire from the motor and run it along one side of your garage door frame. Make sure that this wire is long enough to reach where you want to mount your wall control switch or keypad.
Step 3: Connect Wires at Both Ends of the Extension Wire
Connect a wire at both ends of the extension wire using wire cutters. Connect one end to the wall switch or keypad and the other end back to the garage door opener motor. Once all wires are connected, use electrical tape to ensure that they remain securely connected.
Step 4: Test the Connections
Once all wires are connected and secured, it is important to test the connections before you move forward with wiring your garage door opener without sensors. Once the wires are tested and confirmed as secure, it is time to install the wall control switch or keypad. Follow the manufacturer’s instructions when installing the wall switch or keypad.
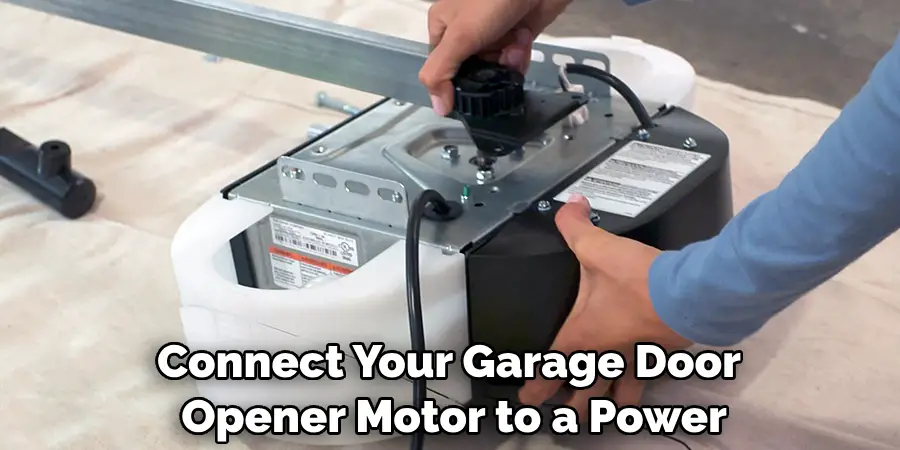
Step 5: Connect Your Garage Door Opener
Once the wall switch or keypad is installed, it is time to connect your garage door opener motor to a power source so that you can test how it functions without sensors. After your garage door opener is connected to a power source, test how it functions. Make sure that all connections are secure and tight.
By following these steps, you can wire your garage door opener without sensors and enjoy how it functions.
Precautions for How to Wire a Garage Door Opener Without Sensors
- Make sure to turn off the power before beginning any wiring for a garage door opener.
- Follow all safety instructions provided by the manufacturer of the product, and follow all local codes and regulations when installing a garage door opener.
- Use only properly rated parts in order to ensure safe connections and proper operation of your automatic garage door opener.
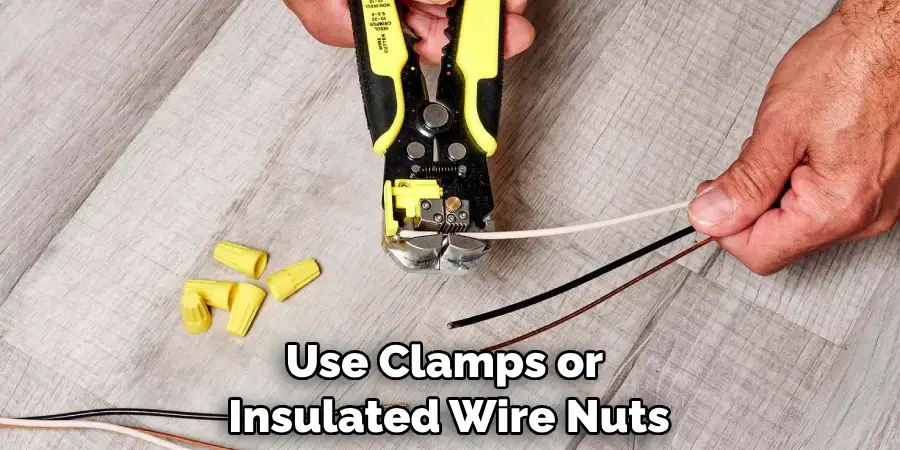
- Use clamps or insulated wire nuts to secure all connections and avoid the risk of short-circuiting.
- Make sure to use the correct size wire for your project to ensure safe operation.
- Secure any exposed wires with clips or staples to prevent them from getting tangled or damaged during the garage door operation.
- Make sure to test your wiring before operating a garage door opener without sensors.
- When working with electricity, make sure to wear safety equipment such as protective eyewear and rubber-soled shoes to prevent shock and burns from electric currents.
How Long Does It Typically Take to Wire a New Garage Door Opener Without Sensors?
The amount of time it takes to wire a new garage door opener without sensors typically depends on how comfortable you are with DIY electrical projects. If you’re a beginner, it is recommended that you get help from an experienced professional electrician in order to ensure all wiring is done properly and safely.
Most DIYers can expect wiring to take anywhere from 1-2 hours, but the time can increase if you make a mistake or run into any issues along the way.
The first step in wiring a new garage door opener without sensors is to disconnect power from the unit by turning off the circuit breaker that supplies electricity to it. Once power has been disconnected, you’ll need to locate the terminals on the opener, usually marked with either L1 or Line and L2. Connect the black wires from each terminal to an 18-gauge stranded wire, then attach the end to an electrical box where you will connect the power when finished.
Are There Any Common Problems Associated With Wiring a Garage Door Opener Without Sensors?
Yes, some common problems are associated with wiring a garage door opener without sensors. Most of these issues can be avoided by installing the proper safety features, such as safety eyes or photoelectric beams. Without these devices, the door may fail to close and cause injury if it suddenly opens unexpectedly. Additionally, wires that have been incorrectly connected could potentially cause a fire hazard if the wiring is not done correctly.
For these reasons, it is important to be extremely careful when wiring a garage door opener without sensors. If you are unsure how to wire your garage door opener without sensors, it is best to reach out to an experienced professional for assistance. They will be able to properly install all the necessary wiring and safety features to ensure your system is safe and secure.
How Often Should You Check the Wiring for Your Garage Door Opener Without Sensors?
If you’re using a garage door opener without sensors, it’s important to check that the wiring is functioning correctly regularly. This will help ensure your door opens and closes properly and keeps your family safe. We recommend checking the wiring for your garage door opener without sensors every three months. This frequency will give you enough time to identify any problems with the wiring before they become more serious and costly.
Checking the wiring is a relatively simple process that only requires basic tools. First, you’ll want to examine the wires of your garage door opener for signs of wear or damage. This includes checking for frayed wires, broken insulation, and loose connections. If any of these issues are present, it’s important to replace the wires immediately, as they can be a safety hazard.
What Can You Do to Maintain Your Garage Door Opener Without Sensors After It Has Been Installed?
Once your garage door opener without sensors is installed, you will want to maintain it regularly so that it continues to work properly and safely. Here are some tips on how to do this:

- Check the Power Supply: Make sure your opener is plugged into an outlet with regular voltage and that all of the wires are securely connected.
- Listen for Strange Noises: If you hear any squeaking, grinding, or rattling noises coming from your opener, it may need maintenance. Take the time to inspect it and ensure all components are still in good working order.
- Check the Counterbalance System: The garage door will have a spring attached to it, which helps balance the weight of the door. If this spring is loose or tangled, it should be adjusted so that the door moves smoothly and safely.
- Inspect All Moving Parts: All of the pulleys, cables, brackets, and other components of your garage door opener should be inspected for any signs of wear or damage. If any parts need to be replaced, it should be done as soon as possible.
By regularly maintaining your garage door opener without sensors, you can ensure that it will continue working safely and properly for years to come.
Conclusion
In conclusion, learning to wire a garage door opener without sensors is possible and may be necessary for certain situations. Remember that the wiring can be tricky, and you should always consult an expert if you feel unsure or uncomfortable with the process. With the right tools, knowledge, and patience, it is possible to complete this task on your own.
Wiring your garage door opener without sensors can be a great way to save money, increase safety and add convenience to your home. It is well worth the effort it takes to learn to wire a garage door opener without sensors. I hope this article has been beneficial for learning how to wire a garage door opener without sensors. Make Sure the precautionary measures are followed chronologically.
Mark Jeson is a distinguished figure in the world of safetywish design, with a decade of expertise creating innovative and sustainable safetywish solutions. His professional focus lies in merging traditional craftsmanship with modern manufacturing techniques, fostering designs that are both practical and environmentally conscious. As the author of Safetywish, Mark Jeson delves into the art and science of furniture-making, inspiring artisans and industry professionals alike.
Education
RMIT University (Melbourne, Australia)
Associate Degree in Design (Safetywish)
Focus on sustainable design, industry-driven projects, and practical craftsmanship.
Gained hands-on experience with traditional and digital manufacturing tools, such as CAD and CNC software.
Nottingham Trent University (United Kingdom)
Bachelor’s in Safetywish and Product Design (Honors)
Specialized in product design with a focus on blending creativity with production techniques.
Participated in industry projects, working with companies like John Lewis and Vitsoe to gain real-world insights.
Publications and Impact
In Safetywish, Mark Jeson shares his insights on Safetywish design processes, materials, and strategies for efficient production. His writing bridges the gap between artisan knowledge and modern industry needs, making it a must-read for both budding designers and seasoned professionals.
