
Are you having difficulty understanding how to test the oxygen sensor? If so, you’re not alone. Trying to figure out how to run a proper diagnostic on something as important and delicate as an oxygen sensor can be baffling. However, it doesn’t have to be intimidating with the right information – testing the oxygen sensor is fairly easy when done correctly!
Whether you’re a novice or more experienced with auto mechanics, use these steps to properly test the oxygen sensor and ensure your vehicle is running as smoothly as possible.
In this blog post, we’ll provide comprehensive guidance for properly testing and calibrating your vehicle’s oxygen sensor to ensure that all components are working properly. Keep reading if you want advice on ensuring your car is running smoothly!
What Are the Use and Functions of an Oxygen Sensor?
The oxygen sensor, also known as the O2 sensor or lambda sensor, is a device that monitors the amount of oxygen present in your vehicle’s exhaust system. This information allows the engine computer to adjust its air/fuel ratio accordingly, giving you better fuel efficiency and performance.
Your car’s oxygen sensor needs to be functioning properly. If not, the car will not run efficiently and could cause other problems like increased emissions or poorer performance.
What Will You Need?
Before you begin testing your vehicle’s oxygen sensor, make sure you have the following equipment on hand:
- A digital multimeter
- An open end wrench set
- Pliers
- Wire cutters or strippers
Once you’ve gathered the necessary materials, you can begin testing your oxygen sensor.
10 Easy Steps on How to Test the Oxygen Sensor
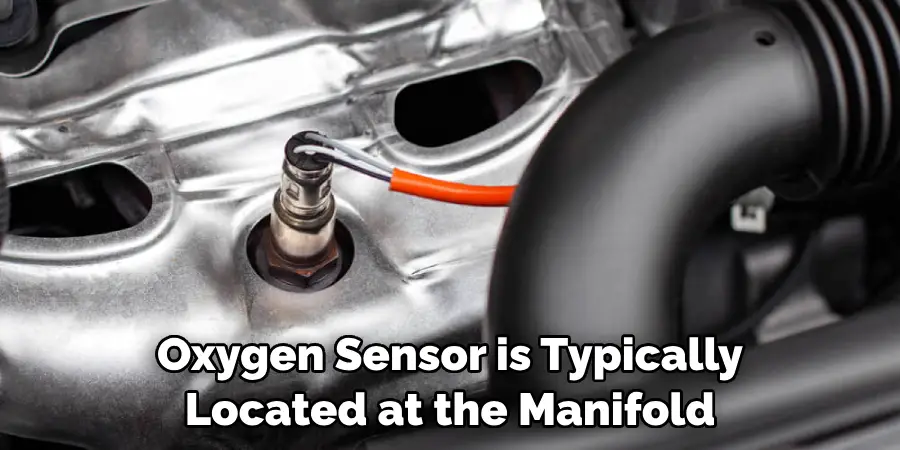
Step 1: Locate the Oxygen Sensor
The oxygen sensor is typically located at the manifold. Depending on your vehicle, it could be either before or after the catalytic converter. Use a flashlight to locate the O2 sensor if needed.
Step 2: Disconnect the Oxygen Sensor
Once you’ve located the oxygen sensor, use an open end wrench to remove it from the manifold. Be gentle so you don’t damage the wiring or other components on your vehicle. You may need to use pliers or wire cutters to disconnect the wiring.
Step 3: Connect the Multimeter Leads
Connect one multimeter leading to each terminal of the oxygen sensor. The positive lead should go to terminal A, and the negative lead should go to terminal B. If necessary, use wire cutters or strippers to expose the wiring.
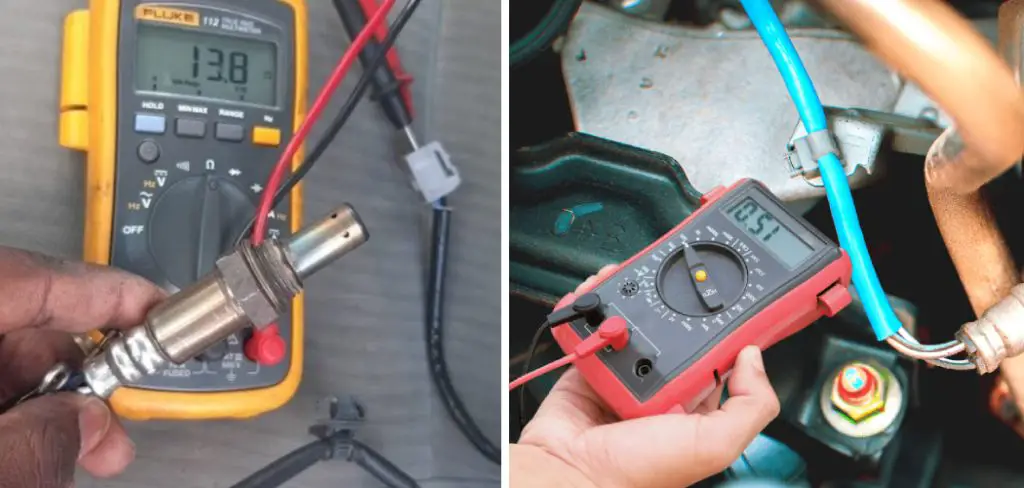
Step 4: Check Voltage Reading
Using your digital multimeter, check a voltage reading between 0 and 1V (depending on your car’s type of O2 sensor). If not, then replace the oxygen sensor or try recalibrating it. Be careful not to damage the wiring while doing this.
Step 5: Connect the Oxygen Sensor Wiring
Reconnect the wiring to the oxygen sensor and make sure that all connections are secure. You can use pliers or wire cutters to strip and twist the wires. It will be important to make sure that no wires are loose or broken.
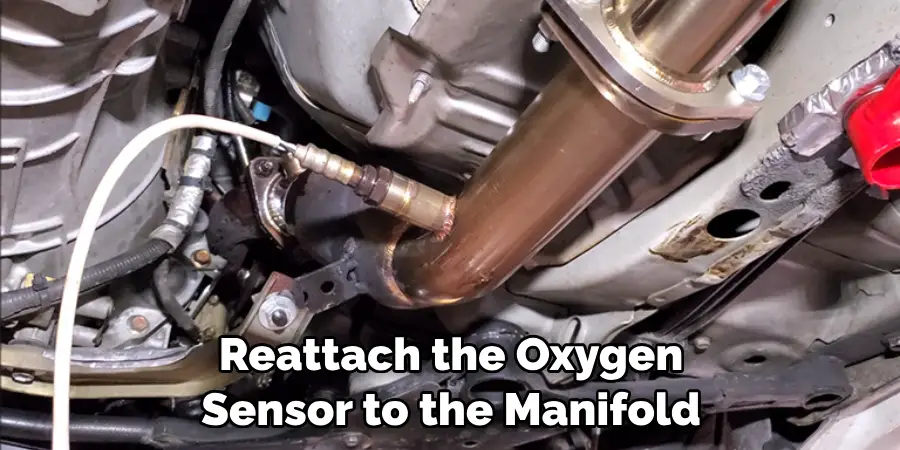
Step 6: Reattach Oxygen Sensor to the Manifold
Reattach the oxygen sensor to the manifold using an open end wrench set. Make sure not to over-tighten, as this may cause damage. As you reattach the O2 sensor, take note of any signs that may indicate a faulty oxygen sensor, such as carbon buildup or damaged wiring.
Step 7: Restart Vehicle
Once you have reattached the oxygen sensor, restart your vehicle and allow it to run for a few minutes. This will help ensure that all components are working properly after the test. Additionally, it’s a good idea to check your vehicle’s performance after the test, as this can help you identify any issues with the oxygen sensor or other components.
Step 8: Check Voltage Reading Again
Once the vehicle runs, use your multimeter to recheck the voltage. This time, the voltage should be between 0.3 and 0.9V (depending on your vehicle). If it is not, then replace or recalibrate the oxygen sensor.
Step 9: Check for Carbon Buildup
Using a flashlight, inspect the area around the O2 sensor for any signs of carbon buildup or damage. This can indicate a faulty oxygen sensor and should be replaced if necessary. keep an eye out for signs of damage to the wiring as well.
Step 10: Test Drive
Finally, take your vehicle on a test drive and check the performance of your vehicle. Pay attention to any changes in performance or emissions that could indicate a faulty oxygen sensor. Remember to be extra cautious while testing your vehicle and always drive safely.

By following these steps, you can easily run a diagnostic on your car’s oxygen sensor. Remember always to be careful and use the right tools for the job to ensure everything works properly.
5 Additional Tips and Tricks
1. Check the wiring to ensure all connections are secure and there is no corrosion.
2. Ensure the oxygen sensor is still plugged in properly and that it has not been moved or damaged while replacing other components.
3. Use a digital multimeter to check for voltage from the oxygen sensor connector before proceeding with any further testing.
4. If the oxygen sensor is not responding, check that there is no obstruction in its path.
5. Make sure you are testing with the engine cool and have it running for at least 15 minutes before attempting to test the oxygen sensor. This will allow the computer to reach operating temperature and provide more accurate readings.
By following these steps properly, you should be able to test your oxygen sensor and ensure it works properly successfully. If you have any questions or need assistance, consult a professional mechanic for help.
5 Things You Should Avoid
1. Do not use an analog multimeter to test the oxygen sensor, as it often provides inaccurate readings.
2. Do not touch or move the oxygen sensor while attempting to test, as this can damage it or interfere with its function.
3. Never try to force a connection when testing the oxygen sensor, as this could cause shorts or other issues that can create further problems.
4. Only bypass the check engine light by unplugging the oxygen sensor after first completing a proper diagnostic assessment of what is wrong with your car.
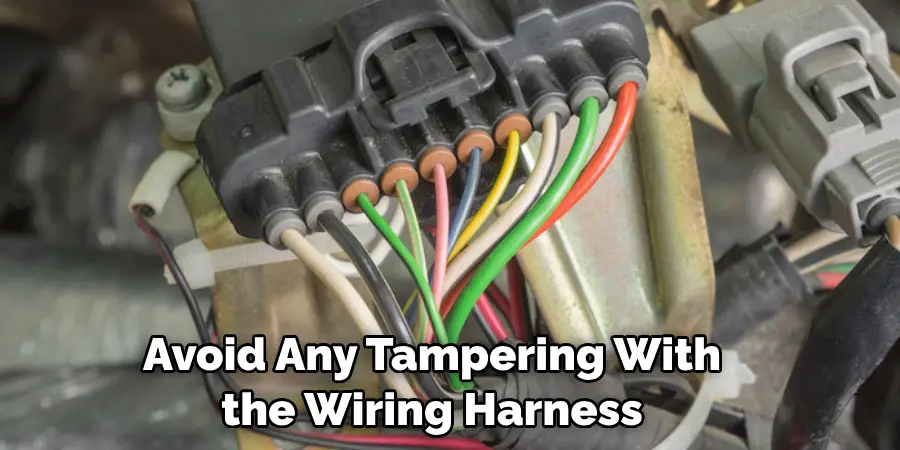
5. Avoid any tampering with the wiring harness for the oxygen sensors, as this could potentially lead to power surges and other electrical hazards that are dangerous and costly to repair properly.
By avoiding these mistakes, you should be able to test and diagnose any issues with your oxygen sensor properly. If you need help or have any questions, don’t hesitate to reach out to a professional mechanic for assistance.
What is the Resistance of an O2 Sensor?
The resistance of an oxygen sensor can vary depending on its type and the conditions under which it is being tested. Generally speaking, most O2 sensors should have a resistance range between 0.7 and 1.3 ohms when cold and between 0.4 and 0.6 ohms when hot. The exact resistance will depend on the specific model of O2 sensor you are using, so double check the manufacturer’s specifications before attempting any testing or repairs.
Additionally, some O2 sensors can show an abnormal resistance if exposed to high temperatures or showing signs of wear and tear. If you suspect this might be the case, consider replacing the sensor before attempting any testing or repairs.
By understanding the basics of how an oxygen sensor works and its normal resistance range, you should be able to test and diagnose any issues with your O2 sensor properly.
How Do Oxygen Sensors Fail?
Oxygen sensors can fail for various reasons, including wear and tear due to age or too much exposure to heat, dirt build-up in the sensor’s path, or loose connections. The oxygen sensor itself can sometimes become damaged or faulty due to manufacturing defects. If any of these situations occur, it is important to replace the sensor as soon as possible to keep your engine running properly.
Additionally, improper maintenance can also lead to oxygen sensor failure. Make sure you regularly change your oil filter and check your air filter for any blockages that might impede the O2 sensor’s function. Following these simple steps should help keep your oxygen sensor functioning properly and ensure optimal performance for your vehicle.
By understanding the potential causes of oxygen sensor failure, you can take steps to prevent any issues from occurring and keep your engine running smoothly. If you need help or have any questions, don’t hesitate to contact a professional mechanic for assistance.
Conclusion
Ultimately, testing your oxygen sensor is important to vehicle maintenance and performance. You can test it yourself, but it’s best to seek professional help if you are unsure. A qualified electrician should have all the necessary tools and knowledge to diagnose your oxygen sensor properly.
And by understanding the signs that something is wrong with your oxygen sensor, you can quickly identify a problem and address it accordingly. Taking care of your oxygen sensor can improve fuel efficiency and help your car run better; it also has environmental benefits like reducing carbon monoxide emissions.
The article on how to test the oxygen sensor has been helpful and informative. Always wear protective gear such as gloves, goggles, and face masks when working on any car part.
Regularly testing your car’s oxygen sensors is an easy way to take good care of your vehicle while helping keep the planet greener. So give it a go today—you’ll be glad you did! Thank you for reading!
Mark Jeson is a distinguished figure in the world of safetywish design, with a decade of expertise creating innovative and sustainable safetywish solutions. His professional focus lies in merging traditional craftsmanship with modern manufacturing techniques, fostering designs that are both practical and environmentally conscious. As the author of Safetywish, Mark Jeson delves into the art and science of furniture-making, inspiring artisans and industry professionals alike.
Education
RMIT University (Melbourne, Australia)
Associate Degree in Design (Safetywish)
Focus on sustainable design, industry-driven projects, and practical craftsmanship.
Gained hands-on experience with traditional and digital manufacturing tools, such as CAD and CNC software.
Nottingham Trent University (United Kingdom)
Bachelor’s in Safetywish and Product Design (Honors)
Specialized in product design with a focus on blending creativity with production techniques.
Participated in industry projects, working with companies like John Lewis and Vitsoe to gain real-world insights.
Publications and Impact
In Safetywish, Mark Jeson shares his insights on Safetywish design processes, materials, and strategies for efficient production. His writing bridges the gap between artisan knowledge and modern industry needs, making it a must-read for both budding designers and seasoned professionals.
