
Your garage door keypad is a convenient feature that allows you and your family to access your garage without fumbling for remote controls or keys. However, like all battery-operated devices, your LiftMaster keypad will eventually need a fresh power source to continue functioning properly. When you notice the keypad responding slowly, the LED light dimming, or complete unresponsiveness, it’s time for a battery replacement.

Learning how to change battery in liftmaster garage door opener keypad is a simple DIY task that takes just a few minutes and requires no special tools or technical expertise. This straightforward maintenance procedure can save you the frustration of being locked out of your garage and the expense of calling a technician.
Why Changing Your LiftMaster Keypad Battery Matters
Regular battery maintenance ensures reliable access to your garage and prevents the inconvenience of being locked out during bad weather or late at night. A functioning keypad provides security and convenience for your entire household, eliminating the need to carry garage door remotes or worry about losing them. Additionally, maintaining your wireless entry system helps preserve the longevity of the keypad itself, as low batteries can cause the device to malfunction or become permanently damaged. Prompt battery replacement also prevents potential security issues that could arise from an unreliable access system.
Most homeowners can complete this task in under five minutes with nothing more than a new battery and perhaps a small screwdriver. The process involves locating the battery compartment, removing the old battery, and installing a fresh replacement. This guide will walk you through each step clearly and thoroughly, ensuring you can restore your keypad’s functionality quickly and confidently.
9 Step-by-Step Guide: How to Change Battery in Liftmaster Garage Door Opener Keypad
Step 1: Identify the Keypad Model and Battery Type
Before beginning the replacement process, examine your LiftMaster garage door keypad to identify its specific model number, which is typically printed on a label on the back or inside the battery compartment. Different LiftMaster models may use various battery types, including 9-volt, AA, or specialty lithium batteries.
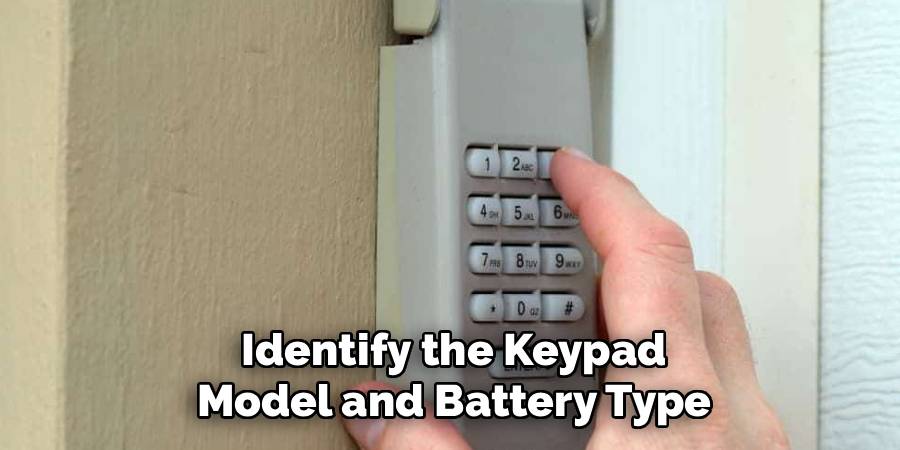
Check your owner’s manual or the existing battery to determine the correct replacement type. Having the right battery on hand prevents delays and ensures optimal performance. Take note of the keypad’s mounting method as well, whether it’s attached with screws, clips, or adhesive backing, as this information will be helpful during the removal process.
Step 2: Gather Necessary Tools and Supplies
Most battery replacements require minimal tools, but having the right items ready streamlines the process. You’ll need a fresh battery that matches your keypad’s specifications, and possibly a small Phillips head or flathead screwdriver depending on your model. Some keypads have battery compartments that open with finger pressure alone, while others may require gentle prying with a small tool. Keep a clean cloth handy to wipe away any dirt or moisture from the keypad during the process. If your keypad has been exposed to weather elements, having a dry cloth ensures good contact between the new battery and the terminals.
Step 3: Remove the Keypad from Its Mounting Location
Carefully detach the keypad from its mounting position on your garage wall or door frame. Most LiftMaster keypads are designed for easy removal, either by lifting them straight up from mounting brackets or by pressing release tabs on the sides. Some models may have screws that need to be loosened before removal. Handle the keypad gently to avoid damaging the buttons or LED display. If the keypad seems stuck, check for hidden tabs or screws rather than forcing it, as excessive pressure can crack the plastic housing. Once removed, move to a well-lit indoor area where you can work comfortably and see the details clearly.
Step 4: Open the Battery Compartment Cover
Locate the battery compartment, which is typically on the back of the keypad unit. The cover may slide off, lift up with tabs, or require gentle prying depending on your specific model. Some covers have arrows or markings indicating the direction to slide or push for opening. Be patient and gentle during this step, as forcing the cover can break the plastic tabs that hold it in place. If you encounter resistance, double-check that you’re following the correct opening method for your model. Once open, you should see the battery compartment with the old battery inside, along with positive and negative terminal markings.
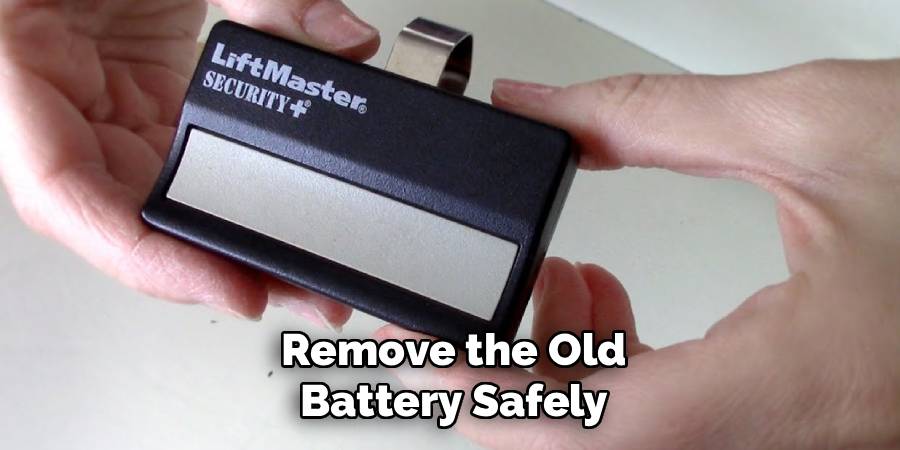
Step 5: Remove the Old Battery Safely
Carefully lift out the old battery, noting its orientation within the compartment. Most batteries have clear positive and negative markings, and the compartment should have corresponding symbols or markings to guide proper installation. If the battery appears corroded or has white or greenish buildup on the terminals, avoid direct skin contact and clean the compartment with a dry cloth before installing the new battery. Dispose of the old battery responsibly at a recycling center or retailer that accepts used batteries. Take a moment to inspect the battery terminals in the keypad for any corrosion or damage that might affect the connection with the new battery.
Step 6: Install the Fresh Battery
Insert the new battery into the compartment, ensuring correct orientation by matching the positive and negative ends with the terminal markings. The battery should fit snugly without forcing, and you should hear or feel a slight click when it’s properly seated. Make sure the battery makes good contact with both terminals and sits flat in the compartment. Avoid touching the battery terminals with your fingers, as oils from your skin can interfere with electrical contact. If the battery seems loose, check that you have the correct type and size, as an improper fit can cause intermittent operation or complete failure of the keypad system.
Step 7: Test the Keypad Function Before Reassembly
Before closing the battery compartment, test the keypad to ensure the new battery is working correctly. Press several buttons and observe whether the LED indicator light illuminates brightly and consistently. Enter your programmed access code to verify that the keypad communicates properly with your garage door opener. If the keypad doesn’t respond or the LED appears dim, remove and reinstall the battery, checking that it’s making proper contact with the terminals. This testing step prevents you from reassembling the unit only to discover it still doesn’t work properly, saving time and frustration.
Step 8: Reassemble and Remount the Keypad
Close the battery compartment cover, ensuring it clicks or slides securely into place. All tabs and connections should align properly without gaps or loose areas that could allow moisture to enter. Return to your garage and remount the keypad in its original position, making sure it’s level and firmly attached to prevent it from falling or shifting over time. Test the mounting by gently pressing on the keypad to ensure it doesn’t move or come loose. The keypad should be positioned at a convenient height for all family members while remaining protected from direct exposure to rain or sprinkler systems.

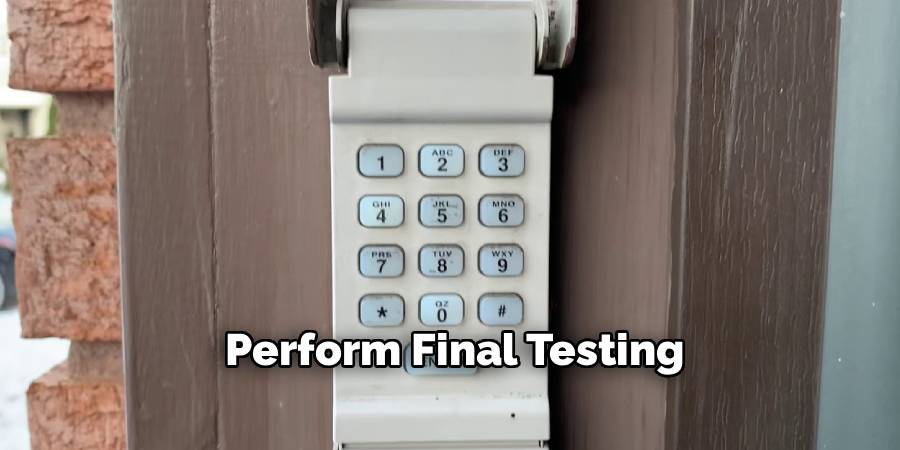
Step 9: Perform Final Testing of Your LiftMaster Keypad System
Conduct a comprehensive test of your newly serviced wireless entry system by trying multiple functions from various distances. Test the keypad from inside your garage, from the driveway, and from the maximum recommended range to ensure consistent performance. Verify that all programmed codes work correctly and that the garage door responds promptly to commands. Check that the LED indicator functions properly during code entry and that any backlight features work as expected. If you have multiple garage doors or have programmed different codes for various functions, test each one to ensure complete system functionality after the battery replacement process.
Frequently Asked Questions (FAQ)
How Often Should I Replace My LiftMaster Keypad Battery?
Most LiftMaster keypad batteries last 1-2 years with normal use, though this can vary based on usage frequency, weather conditions, and battery quality. Signs that indicate replacement time include dim LED lights, slow response times, or complete unresponsiveness. Cold weather can reduce battery life temporarily, while extreme heat may shorten overall battery lifespan. Consider replacing batteries annually as preventive maintenance.
What Type of Battery Does My LiftMaster Keypad Use?
LiftMaster keypads use different battery types depending on the model. Common types include 9-volt alkaline batteries, AA batteries, or specific lithium batteries. Check your owner’s manual, the existing battery label, or the compartment markings for exact specifications. Using the wrong battery type can damage the keypad or cause poor performance. When in doubt, contact LiftMaster customer service with your model number for confirmation.
Why Doesn’t My Keypad Work After Battery Replacement?
Several issues could prevent proper function after battery replacement. First, verify the battery is installed correctly with proper positive/negative orientation. Check that battery terminals are clean and making good contact. Ensure you’re using the correct battery type and that it’s fresh, not expired. The keypad may need reprogramming after extended power loss, so consult your manual for reset procedures.
Can Weather Affect My Keypad’s Battery Life?
Yes, extreme temperatures significantly impact battery performance and lifespan. Cold weather temporarily reduces battery capacity, while hot conditions accelerate chemical breakdown inside batteries. Moisture from rain or humidity can also affect connections. Choose high-quality alkaline or lithium batteries for better weather resistance, and consider more frequent replacements in extreme climates.
Should I Clean My Keypad During Battery Replacement?
Absolutely! Battery replacement provides an excellent opportunity for maintenance cleaning. Use a dry cloth to wipe away dirt, spider webs, or moisture from the keypad surface and battery compartment. Avoid using water or cleaning solutions that could damage electronics. Clean battery terminals gently if you notice any corrosion. Regular cleaning extends keypad life and ensures reliable operation.
Conclusion
Successfully mastering how to change battery in liftmaster garage door opener keypad ensures you’ll never be locked out due to a dead battery and maintains the security and convenience your garage access system provides. This simple maintenance task requires no special skills or expensive tools, making it an easy addition to your regular home maintenance routine.
Remember that proactive battery replacement is always better than waiting for complete failure. By checking your keypad’s performance regularly and replacing batteries annually, you ensure consistent operation and avoid the inconvenience of discovering a dead battery when you need access most. Keep spare batteries on hand and make this simple task part of your seasonal home maintenance checklist. Your future self will appreciate the foresight when your keypad continues working flawlessly year after year.
Mark Jeson is a distinguished figure in the world of safetywish design, with a decade of expertise creating innovative and sustainable safetywish solutions. His professional focus lies in merging traditional craftsmanship with modern manufacturing techniques, fostering designs that are both practical and environmentally conscious. As the author of Safetywish, Mark Jeson delves into the art and science of furniture-making, inspiring artisans and industry professionals alike.
Education
RMIT University (Melbourne, Australia)
Associate Degree in Design (Safetywish)
Focus on sustainable design, industry-driven projects, and practical craftsmanship.
Gained hands-on experience with traditional and digital manufacturing tools, such as CAD and CNC software.
Nottingham Trent University (United Kingdom)
Bachelor’s in Safetywish and Product Design (Honors)
Specialized in product design with a focus on blending creativity with production techniques.
Participated in industry projects, working with companies like John Lewis and Vitsoe to gain real-world insights.
Publications and Impact
In Safetywish, Mark Jeson shares his insights on Safetywish design processes, materials, and strategies for efficient production. His writing bridges the gap between artisan knowledge and modern industry needs, making it a must-read for both budding designers and seasoned professionals.
