
Changing an oil pressure sensor is a straightforward maintenance task that can help ensure your engine operates smoothly and efficiently. The oil pressure sensor is a crucial component that monitors the oil pressure in your vehicle and alerts you to any potential problems. If this sensor malfunctions, it can lead to inaccurate readings on your dashboard, potentially leaving engine issues undetected. Learning how to replace the oil pressure sensor can save time and money, making it a valuable skill for vehicle owners.
Knowing how to change oil pressure sensor can save car owners time, money, and frustration while ensuring their vehicle runs smoothly. The oil pressure sensor, a small but crucial component, monitors the oil pressure inside your engine and sends this information to your car’s dashboard gauge. When the sensor is faulty, it may trigger inaccurate readings, warning lights, or even lead to engine performance issues.
Replacing an oil pressure sensor is a manageable task for beginners with a bit of patience and the right tools. Understanding this process not only boosts confidence but also extends your vehicle’s longevity by avoiding unnecessary wear caused by misdiagnosed low oil pressure. This guide provides all the essential steps to replace the sensor successfully, along with tips for performing the job safely and efficiently.
Why Is Changing the Oil Pressure Sensor Important?
The oil pressure sensor is essential because it tracks the oil pressure circulating throughout your engine. Without an accurate sensor, you may not know if your oil levels are sufficient to protect critical engine components. Prolonged low oil pressure can lead to overheating, increased friction, and ultimately serious engine damage.
When the sensor malfunctions, it may falsely indicate low or high oil pressure, creating confusion. This could prompt unnecessary mechanic visits or cause you to overlook legitimate oil pressure drops. Replacing a faulty oil pressure sensor ensures you’re getting accurate readings, allowing you to address real issues immediately.
Additionally, a properly functioning sensor improves engine efficiency, keeping oil pressure within optimal ranges. Maintaining this balance helps to ensure smooth, reliable vehicle performance and saves costly repairs down the road. Regular maintenance, including changing the oil pressure sensor when necessary, is key to protecting both your engine and your wallet.

9 Step-by-Step Guide: How to Change Oil Pressure Sensor
Step 1: Gather the Necessary Tools
Before you begin, gather all the tools required to change the oil pressure sensor. Typically, you’ll need a socket wrench, a specific oil pressure sensor socket, and possibly an extension for hard-to-reach areas. It’s also useful to have a clean rag for wiping away oil residue and gloves for protection.
Confirm you have the correct replacement sensor by checking your car’s manual or consulting a parts specialist. Using the right tools and components reduces the risk of accidental damage to surrounding parts. Start by parking your vehicle on a flat surface, allowing the engine to cool completely to avoid burns from hot oil or metal surfaces. Safety and preparation are crucial for an efficient process.
Step 2: Locate the Oil Pressure Sensor
The next step in learning how to change oil pressure sensor involves locating its position. The sensor is usually threaded into the engine block near the oil filter or oil pan. Refer to your vehicle’s service manual to pinpoint its exact location, as it can vary based on make and model.
Once you’ve located the sensor, inspect the surrounding area for any oil leaks or debris. Clean the area using a rag to ensure clear visibility and prevent grime from entering the engine when the sensor is removed. A well-prepped area minimizes complications during removal and replacement.
Step 3: Disconnect the Electrical Connector
With the sensor accessible, locate the electrical connector attached to it. This connection allows the sensor to transmit oil pressure data to your dashboard gauge. Gently press or unclip the connector to disconnect it, taking care not to damage the wires or connector housing.
Inspect the connector for any signs of wear, corrosion, or residue. If it’s dirty, wipe it clean using a soft cloth to ensure proper reconnection later. Disconnecting the sensor safely and without damaging other parts ensures a seamless replacement process.

Step 4: Remove the Faulty Oil Pressure Sensor
Using the appropriate socket wrench and sensor socket, begin loosening the old oil pressure sensor. Turn counterclockwise until the sensor is fully detached from the engine block. Be cautious, as a small amount of oil may spill during this step.
Handle the old sensor carefully, avoiding spills or damage to adjacent parts. Once removed, inspect the sensor threads and the area around its mounting hole. This helps verify whether the sensor was indeed faulty or if there were any contributing issues, such as oil clogs or blockages.
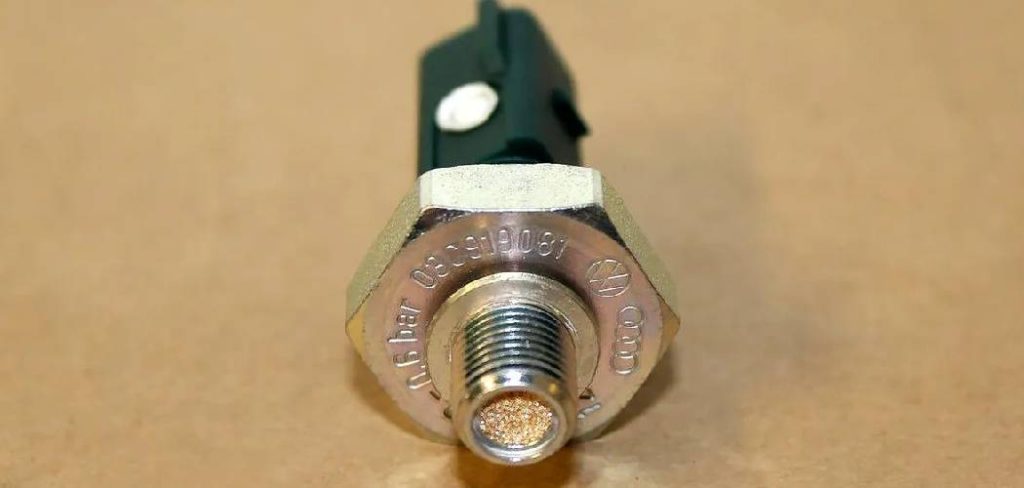
Step 5: Compare the New and Old Sensors
Before installing the new sensor, compare it to the old one to confirm they match. Check the thread size, connector design, and overall compatibility to avoid potential installation issues. A mismatched sensor can lead to false readings or damage when installed.
If everything matches, ensure the new sensor’s threads are clean and free of debris. Adding a small amount of thread sealant can help ensure a secure fit while preventing oil leaks. Confirming compatibility guarantees seamless integration and reliable performance post-installation.
Step 6: Install the New Sensor
Carefully thread the new oil pressure sensor into the engine block by hand, taking care not to cross-thread it. Once it’s securely in place, use the same socket wrench to tighten it clockwise. Avoid overtightening, as this can damage the sensor or strip the threads, compromising its performance.
After installation, check that the sensor is aligned properly and seated snugly without gaps. A secure installation ensures accurate readings and eliminates the risk of oil leaks. Taking your time with this step ensures the sensor performs optimally.
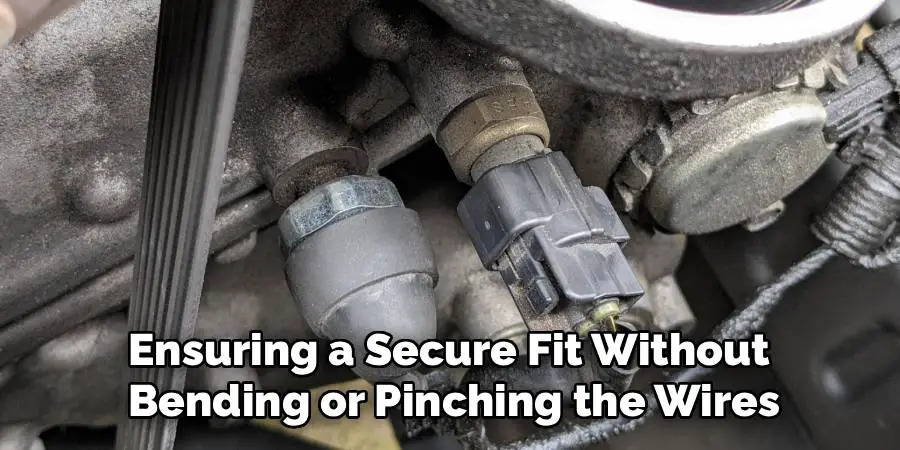
Step 7: Reconnect the Electrical Connector
Reconnect the electrical connector to the newly installed oil pressure sensor. Gently attach it, ensuring a secure fit without bending or pinching the wires. A loose or incomplete connection can result in erratic readings or dashboard warning lights.
Once connected, give the surrounding area a final inspection to confirm everything is in order. Wipe down any oil spills or residue to maintain a clean workspace. Proper reconnection completes the installation process and ensures the sensor communicates effectively with your car’s system.
Step 8: Test the Sensor
Start your vehicle and monitor the oil pressure gauge on the dashboard for proper function. The gauge should display accurate oil pressure levels without any warning lights. Listen for unusual noises or vibrations that could indicate issues with installation.
If the readings appear normal and stable, the new sensor is functioning as expected. However, if the warning light reappears or the gauge behaves erratically, recheck the sensor’s connection and alignment. Testing the sensor immediately after installation confirms its effectiveness and ensures peace of mind.
Step 9: Dispose of the Old Sensor Properly
Finally, dispose of the old oil pressure sensor responsibly. Many automotive shops or recycling centers accept used car parts for proper disposal. Avoid discarding the sensor in regular trash, as it may contain residual oil that could harm the environment.
Completing this step responsibly not only protects the environment but also keeps your workspace clean and organized for future projects.
Frequently Asked Question
What are the common signs of a faulty oil pressure sensor?
A faulty oil pressure sensor often triggers the oil pressure warning light on your dashboard. Other signs include erratic gauge readings, inaccurate oil pressure levels, or engine performance issues like knocking sounds.
Can I drive my car with a broken oil pressure sensor?
It’s not recommended. A broken sensor can produce inaccurate readings, which might cause you to overlook real oil pressure problems. Driving in such conditions could lead to engine damage if a genuine issue arises.
How long does it take to change an oil pressure sensor?
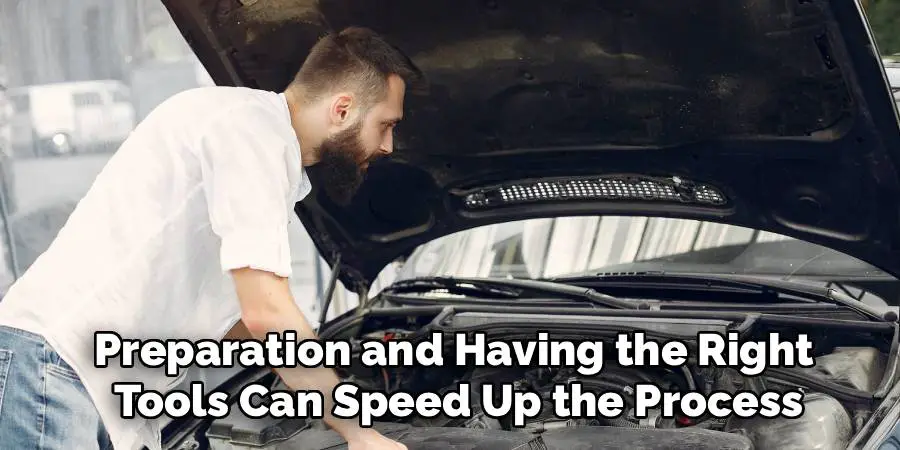
Replacing an oil pressure sensor typically takes 30–60 minutes, depending on your experience level and the accessibility of the sensor on your vehicle. Preparation and having the right tools can speed up the process.
Do I need professional help to replace an oil pressure sensor?
Replacing an oil pressure sensor is a straightforward task that most DIYers can handle. However, if the sensor is hard to reach or you’re unsure about the process, seeking professional assistance may be a safer option.
Will replacing the sensor fix oil pressure warning lights?
If the oil pressure warning light is due to a faulty sensor, replacing it will resolve the issue. However, if the warning persists, it could indicate a deeper problem within the engine or oil system.
Conclusion
Knowing how to change oil pressure sensor is an invaluable skill for any car owner, allowing you to maintain accurate oil pressure readings and protect your engine. By following this guide’s simple steps, you can replace the sensor easily and ensure your vehicle runs smoothly.
Regular maintenance and prompt attention to warning signs are key to preventing severe engine damage. Ignoring issues such as an oil pressure warning can lead to costly repairs or even complete engine failure. Always use high-quality replacement parts and, when in doubt, consult a professional mechanic to ensure your vehicle remains reliable and safe on the road.
Take control of your car’s maintenance and give this hands-on task a try. Addressing minor repairs like this not only saves money but also builds confidence in handling your vehicle’s upkeep.
Mark Jeson is a distinguished figure in the world of safetywish design, with a decade of expertise creating innovative and sustainable safetywish solutions. His professional focus lies in merging traditional craftsmanship with modern manufacturing techniques, fostering designs that are both practical and environmentally conscious. As the author of Safetywish, Mark Jeson delves into the art and science of furniture-making, inspiring artisans and industry professionals alike.
Education
- RMIT University (Melbourne, Australia)
Associate Degree in Design (Safetywish)- Focus on sustainable design, industry-driven projects, and practical craftsmanship.
- Gained hands-on experience with traditional and digital manufacturing tools, such as CAD and CNC software.
- Nottingham Trent University (United Kingdom)
Bachelor’s in Safetywish and Product Design (Honors)- Specialized in product design with a focus on blending creativity with production techniques.
- Participated in industry projects, working with companies like John Lewis and Vitsoe to gain real-world insights.
Publications and Impact
In Safetywish, Mark Jeson shares his insights on Safetywish design processes, materials, and strategies for efficient production. His writing bridges the gap between artisan knowledge and modern industry needs, making it a must-read for both budding designers and seasoned professionals.
