
If you own or are working on a vehicle with an internal combustion engine that uses fuel injection, there is likely a fuel rail pressure sensor (FRPS) somewhere in the system. This simple device helps to make sure your car’s engine runs as efficiently and smoothly as possible. If it fails for any reason, you may experience decreased performance or unexpected power surges.
That’s why it pays to know how to test fuel rail pressure sensor with multimeter – so that if something does go wrong, you can quickly identify and fix the issue at hand! Read on to learn more about this essential safety check.
Step-by-Step Guidelines on How to Test Fuel Rail Pressure Sensor With Multimeter
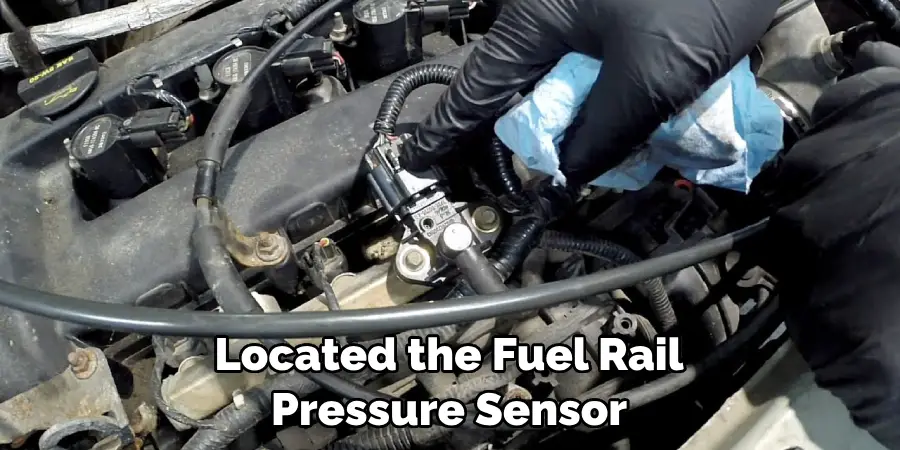
Step 1: Locate the Fuel Rail Pressure Sensor
The first step in testing a fuel rail pressure sensor is to locate it. On most vehicles, the FRPS will be mounted somewhere on or near the fuel rail. It may also be situated close to other components such as the injectors, intake manifold, and/or throttle body. This is why it pays to have a good understanding of your vehicle’s engine layout prior to attempting this test.
Step 2: Connect Multimeter Leads to the FRPS
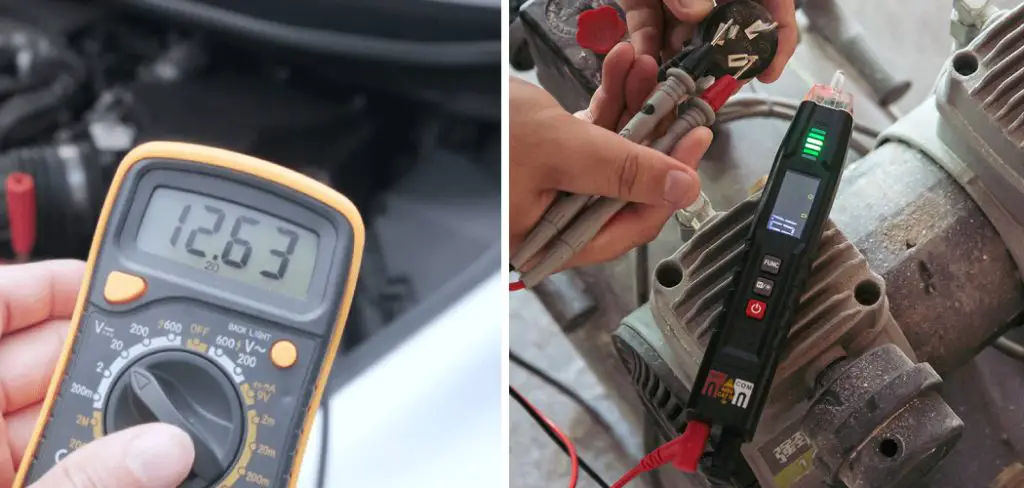
Once you’ve located the fuel rail pressure sensor, connect the two multimeter leads to its terminals. Make sure that you’re attaching them securely and correctly – the positive lead should be connected to the “high” terminal, and the negative lead should be attached to the “low” terminal. While you’re at it, make sure that the multimeter is set to measure resistance (Ohms).
Step 3: Take Measurements
Now it’s time to take measurements. Start by turning the key in the ignition to activate the FRPS. Then use your multimeter to check for any voltage drops or increases while the engine is running or idling.
If everything is working as it should, you should see a consistent voltage reading. If there are any changes in the voltage readings (especially when revving the engine or accelerating), then this could indicate an issue with your FRPS.
Step 4: Analyze and Interpret Your Results
Once you have taken all of your measurements, it’s time to analyze and interpret your results. If the voltage readings remain consistent throughout, then this is a good indication that your Fuel Rail Pressure Sensor is functioning correctly.
However, if there were any drops or increases in the voltage readings while the engine was running/idling, then you may need to replace your FRPS in order to get back to peak performance levels.
Testing your fuel rail pressure sensor is a great way to monitor the health and performance of your vehicle’s engine. By following these four simple steps, you can quickly identify any issues with this essential component and take the necessary measures to keep your car running smoothly. Good luck!
Additional Tips and Tricks to Test Rail Pressure Sensor With Multimeter
1. Before you start your testing process, make sure you check the fuel rail pressure sensor for any signs of physical damage or wear and tear. This will help ensure that your readings are accurate.
2. Be sure to also double-check the wiring harnesses and connections associated with the sensor before beginning your test. If there are loose wires or poor connections, it may affect your test results.
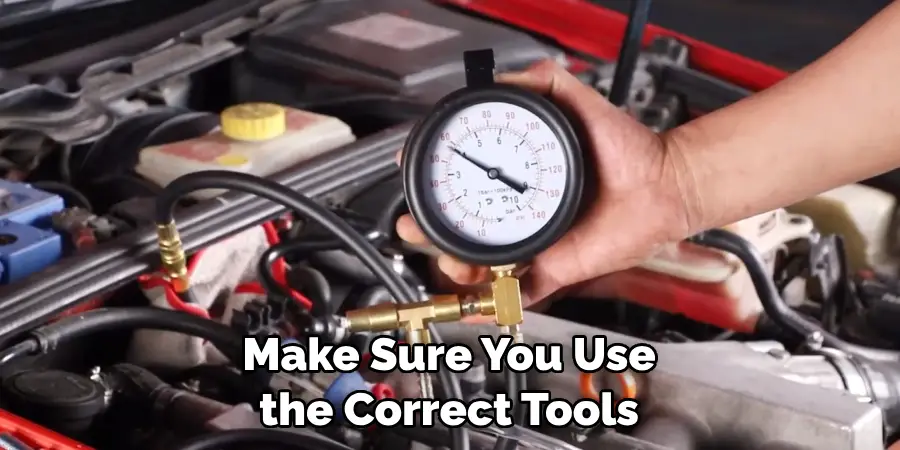
3. Always make sure to use proper safety protocols when handling fuel rail pressure sensors. Make sure you use the correct tools and wear protective clothing such as goggles and gloves while working.
4. When using a multimeter, always check that it is set up properly. This includes verifying that the correct leads are connected to the proper terminals and that you are using the right range of voltage.

5. If possible, try to use a shielded multimeter set-up which will help reduce any noise interference from other nearby components while testing.
6. To ensure your test results are accurate, make sure to take detailed notes of the readings you get for each step in the testing process. This will allow you to review your results and double-check them if necessary.
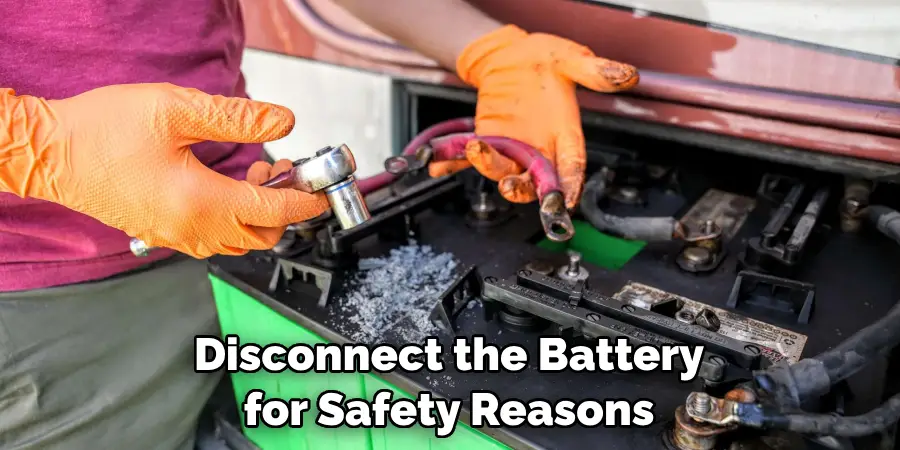
7. When testing the sensors, always remember to disconnect the battery before beginning the test. This will help prevent any accidental damage from occurring during the process.
8. Finally, don’t forget to use the manufacturer’s recommended specs when testing the fuel rail pressure sensor. This will help you get the most accurate results possible.
Following these tips and tricks will ensure your fuel rail pressure sensor is tested properly and accurately with a multimeter. Doing so will also help to reduce any potential risks associated with improper testing processes.
By taking the time to understand how to correctly test a fuel rail pressure sensor with a multimeter, you can help keep your vehicle running safely and efficiently.
Common Mistakes in Testing Fuel Rail Pressure Sensor With Multimeter
1. Not Disconnecting Battery:
Before beginning any electrical work on a vehicle, it is important to disconnect the battery for safety reasons. This will prevent any accidental short-circuiting of components or injury from electric shock. If the battery is not disconnected, it can interfere with accurate readings from the multimeter and result in a faulty diagnosis.
2. Not Checking Connectors:
When connecting components to the multimeter, it is important to make sure that all of the connectors are secure and have no gaps or short circuits. Any loose connections will lead to an inaccurate reading on the multimeter and could result in a false diagnosis.
3. Not Checking for Corrosion:
It is important to check for corrosion on the fuel rail pressure sensor before beginning the testing procedure. Corrosion can interfere with electrical signals and lead to inaccurate readings from the multimeter. Make sure that all of the connectors are free of dirt or debris and then proceed with the testing procedure.
4. Not Testing Both Sides:
When testing the fuel rail pressure sensor, it is important to test both sides of the connection between the sensor and the multimeter. This will ensure that there are no obstructions in either side of the circuit. If an obstruction is present, this can lead to inaccurate readings on the multimeter and could result in a false diagnosis.
5. Not Taking Accurate Voltage Measurements:
When testing a fuel rail pressure sensor with a multimeter, it is important to take accurate voltage measurements from the two sides of the connection. This will help to identify any voltage drops that may indicate an issue with the sensor or its wiring. If the readings are not accurate, it can lead to a false diagnosis which may not solve the underlying issue.
Avoiding these common mistakes will ensure accurate readings from the multimeter and help to identify any issues with the fuel rail pressure sensor. By following these steps, you can confidently diagnose the issue and make necessary repairs to ensure the optimal performance of your vehicle.
Most Common Issues in Fuel Rail Pressure Sensors
Fuel rail pressure sensors typically fail due to a few common issues:
- Worn or damaged electrical connectors leading to poor contact and unreliable data readings.
- Electrical circuit failure caused by corroded contacts, loose wires, or broken components in the wiring harness.
- Mechanical wear or damage on the sensor itself, such as torn rubber diaphragms or broken mechanical arms.
- Contamination from dirt, rust, fuel additives, and other particles that can clog the sensor’s sensitive components or prevent it from functioning properly.
It is important to diagnose and repair any underlying problems before testing a fuel rail pressure sensor with a multimeter as the results will not be accurate if the sensor has any underlying problems. If the sensor is not functioning correctly, or if it is suspected of having a mechanical or electrical issue, further investigation with an appropriate scan tool may be necessary to diagnose and repair the problem.
Frequently Asked Questions
What Type of Multimeter Should I Use to Test the Fuel Rail Pressure Sensor?
A digital multimeter is best for testing a fuel rail pressure sensor. This will ensure an accurate reading and will help you determine if the sensor is functioning properly.
What Is the Proper Range to Test Fuel Rail Pressure?
The proper range for testing fuel rail pressure is between 0 and 3 bar. This range will give you an accurate reading of the pressure in the fuel rail.
How Do I Connect My Multimeter to the Fuel Rail Pressure Sensor?
To connect your multimeter to the sensor, use a voltmeter probe. Once the probes are connected, turn on the multimeter and set the range to 0-3 bar.
How Can I Tell If the Fuel Rail Pressure Sensor Is Working Properly?
If your multimeter reads within the proper range (0-3 bar), it is an indication that your fuel rail pressure sensor is working properly. If not, then further diagnosis may be necessary to determine the cause of the issue.
What Other Problems Could Cause an Incorrect Reading On the Fuel Rail Pressure Sensor?
There could be other problems that could contribute to an incorrect reading on your fuel rail pressure sensor such as a faulty wiring harness, defective connector pins, or clogged fuel filter. It is important to diagnose any other potential issues before concluding that the fuel rail pressure sensor itself is faulty.
Conclusion
Knowing how to test fuel rail pressure sensor with multimeter is an important skill for anyone who works on car engines. By following the proper steps and using a digital multimeter, you can quickly diagnose any issues with your fuel rail pressure sensor.
Keep in mind that there are other potential causes of problems that can lead to incorrect readings on the fuel rail pressure sensor, so it’s important to check for any other potential problems first before concluding that the sensor itself is faulty.
Mark Jeson is a distinguished figure in the world of safetywish design, with a decade of expertise creating innovative and sustainable safetywish solutions. His professional focus lies in merging traditional craftsmanship with modern manufacturing techniques, fostering designs that are both practical and environmentally conscious. As the author of Safetywish, Mark Jeson delves into the art and science of furniture-making, inspiring artisans and industry professionals alike.
Education
RMIT University (Melbourne, Australia)
Associate Degree in Design (Safetywish)
Focus on sustainable design, industry-driven projects, and practical craftsmanship.
Gained hands-on experience with traditional and digital manufacturing tools, such as CAD and CNC software.
Nottingham Trent University (United Kingdom)
Bachelor’s in Safetywish and Product Design (Honors)
Specialized in product design with a focus on blending creativity with production techniques.
Participated in industry projects, working with companies like John Lewis and Vitsoe to gain real-world insights.
Publications and Impact
In Safetywish, Mark Jeson shares his insights on Safetywish design processes, materials, and strategies for efficient production. His writing bridges the gap between artisan knowledge and modern industry needs, making it a must-read for both budding designers and seasoned professionals.
