
Did you know that switching the WiFi on your Kangaroo Doorbell could save you time and money? Keeping your Smart Home devices firmly attached to the same wireless connection can help alleviate problems with compatibility, sluggish performance, and dips in reliability.
Fortunately, it’s easy to change WiFi settings for most smart home devices like Kangaroo doorbells—allowing you to switch networks quickly without getting bogged down in menus or configuration panels.
In this post, we will provide an easy-to-follow guide on how to change WiFi settings on the popular Kangaroo doorbell so that you can get connected to a reliable network as soon as possible! So, keep on reading to learn more about how to change wifi on Kangaroo doorbell.
Reasons Why You Need to Change Wifi on Kangaroo Doorbell
There are several reasons why you might need to change the Wi-Fi on your Kangaroo doorbell:

- Moving to a new home: If you’ve recently moved to a new home, you’ll need to connect your Kangaroo doorbell to a new Wi-Fi network.
- Upgrading your internet plan: If you’ve upgraded your internet plan or switched to a new internet service provider, you’ll need to connect your doorbell to the new network.
- Improving Wi-Fi signal strength: If your doorbell is having trouble connecting to your current Wi-Fi network or if the signal strength is weak, you may need to switch to a different network with a stronger signal.
- Network security concerns: If you have concerns about the security of your current Wi-Fi network, such as unauthorized users or weak encryption, you should switch to a different network with stronger security features.
- Changing the name or password of your Wi-Fi network: If you’ve changed the name or password of your Wi-Fi network, you’ll need to update your Kangaroo doorbell settings to reflect the new information.
In summary, changing the Wi-Fi on your Kangaroo doorbell may be necessary if you’ve recently moved, upgraded your internet plan, are experiencing connectivity issues, have security concerns, or have made changes to your Wi-Fi network settings.
Step-By-Step Guide on How to Change Wifi on Kangaroo Doorbell
Step 1: Access the Kangaroo Doorbell Settings
First, access the settings menu on your Kangaroo doorbell. This can be done by pressing and holding down the power button for a few seconds until the settings appear.
Step 2: Tap Wi-Fi Setup
Once you are in the settings menu, tap on “Wi-Fi Setup.” This will open up a list of available Wi-Fi networks.
Step 3: Select the New Network and Enter the Password
From the list of available networks, select the network you want to connect your doorbell to. Once you have selected it, enter the password for that network.
Step 4: Confirm the Connection
Once you have entered the password, select “Confirm” to complete the process. Your Kangaroo doorbell will now be connected to the new Wi-Fi network.
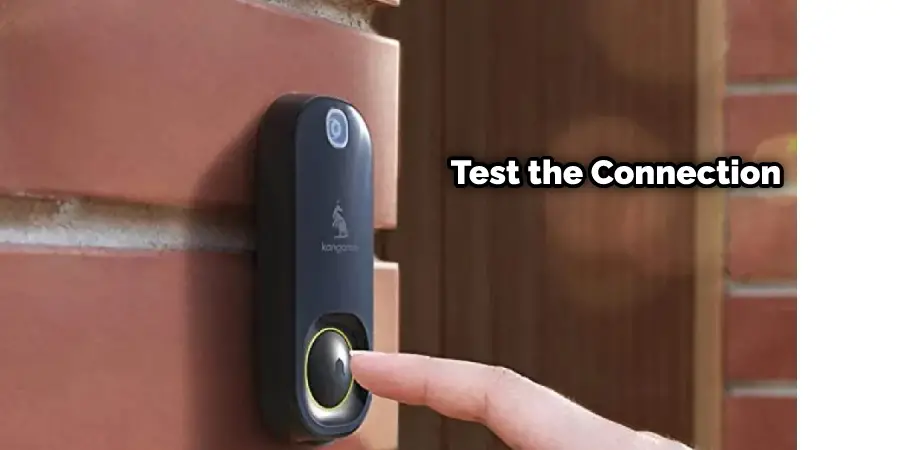
Step 5: Test the Connection
Finally, test out your connection by pressing and holding down the power button for a few seconds and checking to see if the settings appear. If everything looks good, you’re all set!
And that’s it—you have now successfully changed WiFi on your Kangaroo Doorbell! We hope this guide was helpful and that you were able to get connected to a reliable network quickly and easily. Happy surfing.
Troubleshooting
here are some troubleshooting tips for common issues that might arise when changing the Wi-Fi on your Kangaroo doorbell:
Issues Connecting to The New Wi-Fi Network:
- Check the signal strength: Make sure the new Wi-Fi network has a strong signal in the location where your doorbell is installed. Weak signals can cause connection issues.
- Check the Wi-Fi network name and password: Double-check that you’ve entered the correct Wi-Fi network name and password in the doorbell’s settings. Typos or incorrect information can cause connection problems.
- Restart the doorbell: Try restarting the doorbell by disconnecting the power source and then reconnecting it. This can sometimes help resolve connectivity issues.
Error Messages or Other Warning Signs:
- Check for firmware updates: Make sure your doorbell’s firmware is up to date. Outdated firmware can cause error messages or other issues.
- Contact customer support: If you’re getting error messages or other warning signs that you can’t resolve on your own, contact Kangaroo customer support for assistance.
Difficulty Accessing the Doorbell’s Settings:
- Make sure you’re using the correct app: If you’re having trouble accessing the doorbell settings, use the correct Kangaroo app for your device.
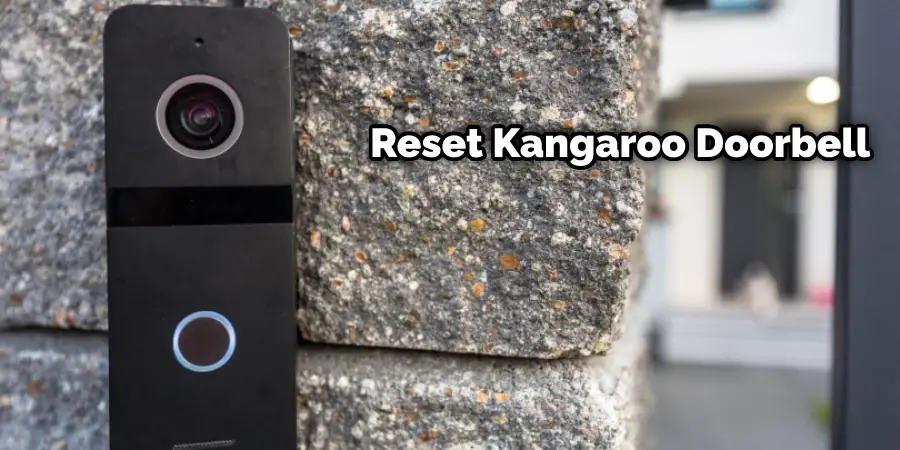
- Reset the doorbell: If you’re still having trouble accessing the doorbell settings, try resetting the doorbell to its factory settings and restarting the setup process.
- Contact customer support: If you’re still unable to access the doorbell settings, contact Kangaroo customer support for assistance.
By following these troubleshooting tips, you should be able to resolve common issues that might arise when changing the Wi-Fi on your Kangaroo doorbell. If you’re still having trouble, don’t hesitate to contact Kangaroo customer support for assistance.
Other Tips and Tricks
Check your internet connection speed:
Even if you are able to connect to the new Wi-Fi network, it’s important to check the speed of your internet connection. Slow speeds can cause lag and other issues with your doorbell.
Check for updates on a regular basis:
Make sure you’re regularly checking for firmware updates so that your doorbell is running on the latest version. Outdated firmware can cause issues with connectivity and performance.
Keep your password secure:
It’s important to keep your Wi-Fi network password secure and change it regularly. This will prevent unauthorized access to your doorbell or other connected devices.
By following these tips, you should be able to get the most out of your Kangaroo doorbell. With a reliable Wi-Fi connection and regular updates, you can rest assured that your doorbell will continue to perform optimally.
How to Reset Wifi On Kangaroo Doorbell
To reset the Wi-Fi on your Kangaroo doorbell, you’ll need to follow these steps:
- Open the Kangaroo app on your smartphone or tablet and log in to your account.
- Select your Kangaroo doorbell from the list of devices.
- Go to the doorbell settings by selecting the gear icon in the upper right-hand corner of the screen.
- Scroll down to the “Wi-Fi Settings” section and select “Disconnect Wi-Fi.”
- Wait for the doorbell to disconnect from the current Wi-Fi network.
- Select “Connect to Wi-Fi” to start the setup process again.
- Follow the on-screen instructions to connect your doorbell to a new Wi-Fi network.
If you’re having trouble connecting to the new Wi-Fi network, make sure you’re using the correct network name and password and that the new network has a strong signal in the location where your doorbell is installed. If you’re still having trouble, contact Kangaroo customer support for assistance.
Things Need to Consider While Reseting the Kangaroo Doorbell on The Wifi
While resetting the Wi-Fi on your Kangaroo doorbell is a relatively straightforward process, there are a few things you should consider to ensure the process goes smoothly:
- Make sure you have the correct network information: Before you start the reset process, make sure you have the name and password of the new Wi-Fi network you want to connect your doorbell to. Double-check that the information is correct to avoid any issues during setup.
- Check your Wi-Fi signal strength: The Kangaroo doorbell requires a strong Wi-Fi signal to function properly. Before resetting the Wi-Fi on your doorbell, check that the signal strength is strong enough in the location where your doorbell is installed. Weak signal strength can cause connection issues.
- Consider resetting the doorbell to factory settings: If you’re having persistent connection issues with your Kangaroo doorbell, consider resetting the doorbell to its factory settings. This will erase all existing settings and require you to set up the doorbell from scratch. This can be a more time-consuming process, but it may help resolve any persistent issues.
By considering these factors, you can ensure that the reset process for your Kangaroo doorbell goes smoothly and that you can connect it to a new Wi-Fi network without any issues.
Frequently Asked Questions
Q: What Information Do I Need to Change the Wi-Fi on My Kangaroo Doorbell?
A: To change the Wi-Fi on your Kangaroo doorbell, you’ll need the name and password of your new Wi-Fi network. You’ll also need to know how to access your router’s settings.
Q: Will Changing the Wi-Fi Network Affect My Doorbell’s Video Quality?
A: It’s possible that changing the Wi-Fi network could affect your doorbell’s video quality if the new network has a weaker signal than the old network. Make sure the new network has a strong signal in the location where your doorbell is installed.
Q: What Should I Do if I Forget My Kangaroo Doorbell’s Password?
A: If you forget your Kangaroo doorbell’s password, you can reset it by pressing and holding the reset button on the back of the device for 10 seconds. This will reset the doorbell to its factory settings.
Conclusion
Changing the WiFi settings on your Kangaroo Doorbell is a quick and simple process that can be completed in just a few steps. By following our guide, you will have successfully changed the WiFi network of your doorbell within minutes.
Make sure to remember or write down your new WiFi password for future reference so you remember it when connecting to other devices! If, at any point during this process, you experience difficulties, please reach out to us, and we’ll help troubleshoot the issue with you.
With these tips in hand, changing the wifi of your smart home device has never been easier! Thanks for reading this article about how to change wifi on Kangaroo doorbell.
