
Are you noticing that your Hyundai key fob is not working as well as it used to? It may be time to replace the battery.
How to replace a Hyundai key fob battery is a straightforward process that can save you time and money by avoiding a trip to the dealership. Over time, the battery in a key fob can weaken, leading to reduced range or complete failure to operate. Knowing how to replace it yourself ensures that you’re always prepared should the battery go dead unexpectedly.
This guide will walk you through the necessary steps to replace the battery, including identifying the type of battery you need and the tools required for the task. With just a few minutes, you can have your key fob working like new again.
What Will You Need?
Before you begin replacing your Hyundai key fob battery, ensure you have the necessary tools and materials. The following items are needed to complete this task successfully:
- Replacement Battery: The type of battery required for your key fob will depend on the model and year of your Hyundai vehicle. Consult your owner’s manual or do some research online to determine the correct battery type.
- Small Flathead Screwdriver: This will pry open the critical fob casing.
- Needle Nose Pliers: These will come in handy for removing the old battery.
- New Battery Cover: Some key fobs may require a new battery cover after the battery is replaced. Again, consult your owner’s manual or research online to determine if this is necessary for your specific model.
10 Easy Steps on How to Replace a Hyundai Key Fob Battery
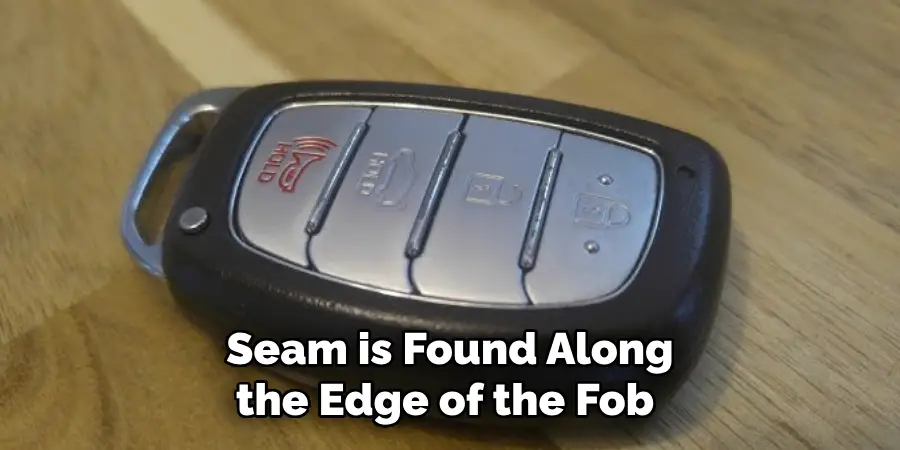
Step 1. Locate the Seam:
The first step in replacing your Hyundai essential fob battery is to locate the seam where the two halves of the fob casing come together. Typically, this seam is found along the edge of the fob and is often a minor groove where the two parts meet. Carefully inspect the key fob to find this groove, being mindful of its delicate components. Locating the seam correctly is crucial, as it allows you to open the casing without damaging the fob. If you have trouble finding the seam, refer to your vehicle’s manual for specific diagrams or images that might assist in identifying the correct location.
Step 2. Open the Fob:

Once you have located the seam, use the small flathead screwdriver to pry the halves of the key fob apart carefully. Gently insert the screwdriver into the groove and twist it to separate the casing. Be cautious not to apply too much force, as this could damage the delicate internal components of the fob. It’s essential to work slowly and patiently, ensuring the casing opens gradually without snapping. If you encounter resistance, try to pry around various points of the seam until you feel the casing begin to loosen. Once opened, set aside the top half of the fob to reveal the internal battery compartment.
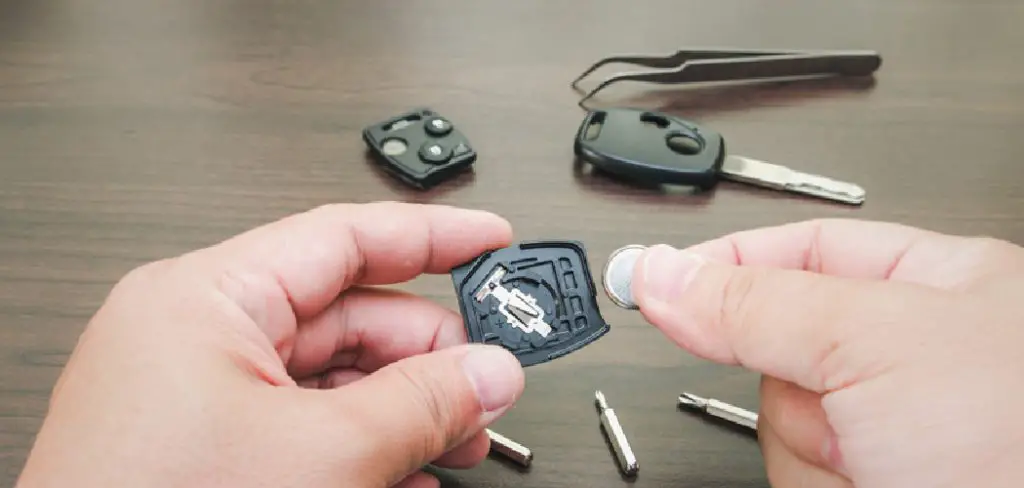
Step 3. Remove the Old Battery:
With the key fob casing open, you’ll have access to the battery compartment. Using the needle nose pliers, gently grip the old battery and carefully lift it out of its place. Be cautious to avoid touching other internal components or bending any metal contacts. If the battery is tightly fitted, gently rocking it back and forth can help loosen it. Make sure to dispose of the old battery properly according to your local battery disposal regulations. Once removed, inspect the battery compartment for any signs of corrosion or residue and clean it if necessary before proceeding to the next step.
Step 4. Identify the Battery Type:
Before inserting a new battery, confirm the type needed for your Hyundai key fob. This information can be typically found on the original battery or in your vehicle’s owner’s manual. Ensuring that you have the correct battery type is crucial for proper functionality. If the original battery does not have legible markings, refer to a trusted online resource or consult with a professional. Once you have the correct replacement battery, you are ready to proceed with the installation.
Step 5. Insert the New Battery:
Carefully place the new battery into the compartment, positioning it correctly. The positive and negative terminals should align with the markings inside the compartment, typically indicated by a plus (+) and minus (-) sign. Press the battery down into place, ensuring it is securely fitted without forcing it. Proper alignment of the battery is crucial for the key fob’s functionality. Double-check to ensure the battery is lying flat and that no metal contacts are misaligned or bent during the process.

Step 6. Reassemble the Key Fob:
Once the new battery is securely in place, it’s time to reassemble the key fob. Align the top half of the casing with the bottom half, ensuring that the buttons and internal components are lined up correctly. Press the two halves together, applying even pressure around the edges until the casing securely snaps back into place. Listen for any clicks that ensure the two parts are locked together. If the halves do not come together easily, check the alignment and try again. Ensure the key fob is completely closed with no gaps along the seam, ensuring protection against dirt and moisture.
Step 7. Test the Key Fob:
After reassembling the key fob, it’s important to test its functionality. Approach your Hyundai vehicle and press the various buttons on the key fob to ensure they are working as expected. Check functions such as locking, unlocking, and any other specific buttons your fob may have. If the key fob does not respond, double-check the battery installation to ensure it is properly seated and aligned—retry testing after any adjustments. Successful functioning of the key fob indicates that the new battery is correctly installed and that the process was completed successfully.
Step 8. Dispose of the Old Battery Responsibly:
Once you’ve ensured your key fob is functioning correctly, it’s important to properly dispose of the old battery. Batteries contain harmful chemicals that can harm the environment if not disposed of properly. Check your local regulations for battery disposal to find the nearest recycling center or hazardous waste collection site. Some auto shops and electronic stores also offer battery recycling services. By taking the time to dispose of your battery responsibly, you contribute to environmental conservation efforts and help prevent contamination of landfills and water sources.
Step 9. Maintain Your Key Fob:
Now that your key fob is working with a fresh battery, it’s an excellent opportunity to consider its overall maintenance. Regularly check your key fob for any signs of wear and tear, such as cracks or worn buttons. Keeping your key fob clean by gently wiping it with a soft cloth can help prevent dirt and debris from affecting its performance. Additionally, avoid exposing the fob to extreme temperatures or moisture, as these conditions can damage the internal components. By taking these simple precautions, you can prolong the life of your key fob and ensure its reliable operation over time.
Step 10. Seek Professional Assistance if Needed:
If you encounter any difficulties while replacing your Hyundai key fob battery or experience persistent issues with its functionality, it may be beneficial to seek professional assistance. Visiting a certified Hyundai dealership or an experienced automotive locksmith can provide expert help. These professionals are equipped with the tools and knowledge to address complex problems that might arise, ensuring that your key fob is repaired or replaced appropriately. Doing so not only saves time but also assures the safety and reliability of your key fob, allowing you to enjoy uninterrupted access to your vehicle.
By following these simple steps, you can easily replace the battery in your Hyundai key fob and ensure that it continues to function reliably.
5 Things You Should Avoid
- Using Excessive Force: Avoid forcing the key fob open, as this can damage the casing and internal components. Gently pry it apart using a soft tool, like a plastic opener or a coin, to prevent scratches or breakage.
- Touching the Battery Contacts: When replacing the battery, do not touch the battery contacts with your fingers. Oils from your skin can interfere with the electrical connection, leading to crucial fob malfunctions or reduced battery life.
- Installing the Battery Incorrectly: Pay close attention to the orientation of the new battery. Placing it with the right polarity can prevent the key fob from working correctly. Always match the polarity of the old battery as indicated.
- Using the Wrong Battery Type: Ensure you have the correct battery model and type recommended for your Hyundai key fob. Using an incorrect battery can lead to poor performance or damage.
- Skipping the Inspection of Internal Components: Before closing the key fob, inspect all internal components and the battery compartment for dirt, corrosion, or damage. Ignoring these signs can result in further issues and might eventually require the replacement of the entire fob.

Conclusion
How to replace a Hyundai key fob battery is a straightforward process that requires minimal tools and can be completed in just a few simple steps.
By following the outlined instructions, you ensure that the key fob remains in good working condition, allowing you to maintain easy access to your vehicle. Properly installing a new battery, testing the fob, and responsibly disposing of the old battery are all essential components of this maintenance task. Routine inspection and gentle handling of your key fob can prolong its life and reliability while seeking professional help when necessary to safeguard against potential issues.
Remember, keeping your key fob in optimal condition enhances its functionality and contributes to your vehicle’s overall security and convenience.
Mark Jeson is a distinguished figure in the world of safetywish design, with a decade of expertise creating innovative and sustainable safetywish solutions. His professional focus lies in merging traditional craftsmanship with modern manufacturing techniques, fostering designs that are both practical and environmentally conscious. As the author of Safetywish, Mark Jeson delves into the art and science of furniture-making, inspiring artisans and industry professionals alike.
Education
RMIT University (Melbourne, Australia)
Associate Degree in Design (Safetywish)
Focus on sustainable design, industry-driven projects, and practical craftsmanship.
Gained hands-on experience with traditional and digital manufacturing tools, such as CAD and CNC software.
Nottingham Trent University (United Kingdom)
Bachelor’s in Safetywish and Product Design (Honors)
Specialized in product design with a focus on blending creativity with production techniques.
Participated in industry projects, working with companies like John Lewis and Vitsoe to gain real-world insights.
Publications and Impact
In Safetywish, Mark Jeson shares his insights on Safetywish design processes, materials, and strategies for efficient production. His writing bridges the gap between artisan knowledge and modern industry needs, making it a must-read for both budding designers and seasoned professionals.
