
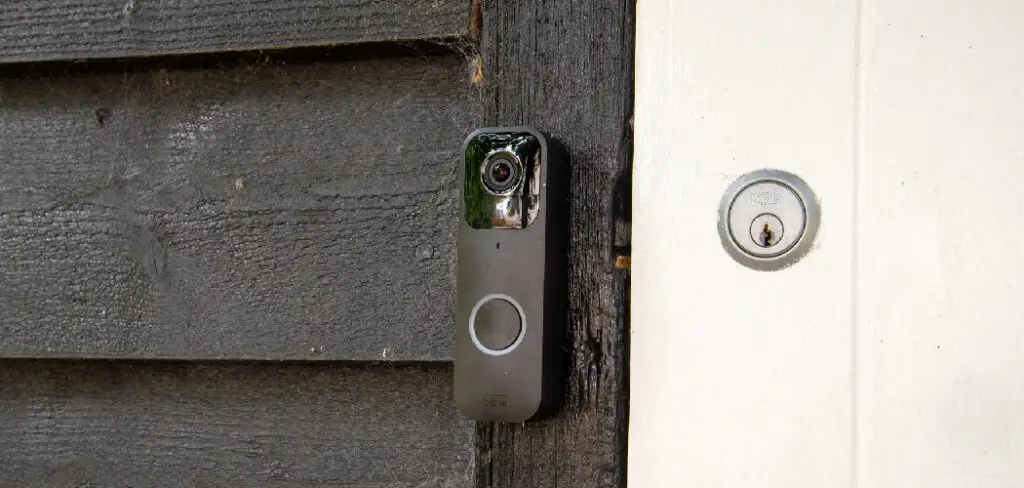
Blink cameras are a new addition to the security camera market. These cameras are activated by motion and record for a set amount of time before turning off. While this feature may be useful for some people, others may find that they do not want their movements constantly monitored. If you would like to disable your Blink camera, follow these steps. In this article, we will be discussing how to disable Blink cameras. Keep reading to learn more.
What Causes a Blink Camera to Turn On?
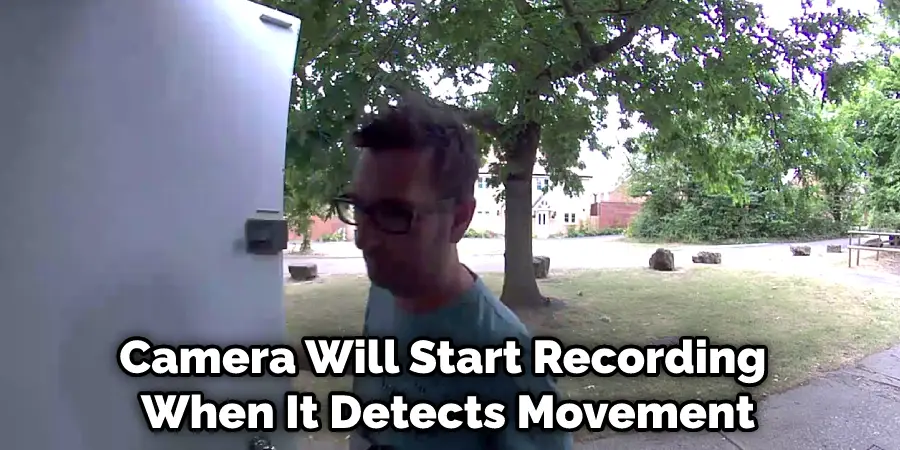
A few things can cause a Blink camera to turn on. The most common is motion detection. This means that the camera will start recording when it detects movement in front of it. You can also set the camera to record constantly or on a schedule. Another thing that can cause the camera to turn on is if it senses a change in temperature or light. But, again, if the camera is set to record constantly, it will start recording as soon as it senses a change.
Additionally, some Blink cameras have a feature called “geofencing.” This means the camera will only turn on when it senses you are away from home. The other thing that can cause the Blink camera to turn on is if you manually turn it on. Lastly, some Blink cameras have a feature called “activity zones.” This allows you to select specific areas for the camera to pay attention to. The camera will turn on if there is movement in one of these areas.
Why Would You Want to Disable a Blink Camera?
There are a few reasons why you may want to disable your Blink camera. The first is if you find the constant recording to be intrusive. Others may want to disable the camera because they are concerned about their privacy. Additionally, some people may find that the Blink camera is causing false alarms. If the camera is set to record constantly, it will start recording as soon as it senses a change. This can lead to a lot of footage of things that are not actually interesting.
For example, the camera may record a tree swaying in the wind or clouds passing by. Another reason to disable the Blink camera is if it is draining your battery. Some people have found that the Blink camera can drain a fully charged battery in just a few hours. Finally, you may want to disable the Blink camera if it is not working correctly.
Needed Materials:
Smartphone or Tablet With the Blink App Installed:
To disable the Blink camera, you will need to use the Blink app on your smartphone or tablet. You can download the app from the App Store or Google Play.
Internet Connection:
You will also need an internet connection to access and control your Blink camera through the app. Make sure your device is connected to a stable WiFi network before proceeding with disabling your Blink camera.
Blink Sync Module:
The Blink camera system requires a sync module to connect the cameras to your WiFi network. Before disabling the camera, make sure that the sync module is connected and working properly.
Step by Step How to Disable Blink Cameras:
1. Open the Blink App
The first step is to open the Blink App on your smartphone. This is the app that you use to control your Blink cameras. First, open the app and then tap on the icon in the top left corner. This will open the menu. If you are not sure how to find the Blink App, you can likely find it in the “App Store” for iOS devices or the “Google Play Store” for Android devices. Just search for “Blink App.”

You can also access the Blink App by logging into your Blink account on a computer and selecting “Camera Settings” from the menu.
2. Tap on the Blink Account Name
In the menu, you will see a list of all the Blink accounts that are associated with your email address. If you only have one Blink account, then only one name will be on the list. Tap on the name of the Blink account that you want to disable the camera. If you are unsure which account the camera is associated with, you can check the label on the back of the Blink Camera.
It’s important to make sure you are in the correct account before proceeding so that you don’t accidentally disable a camera from a different account.
3. Tap on the Blink Camera
After tapping on the account name, you will see a list of all the Blink cameras that are associated with that account. Find the camera that you want to disable and then tap on it. If you can’t find the camera, you can try tapping on the “All Cameras” tab at the top of the screen. This will show you a list of all the Blink cameras, even if they are not associated with an account.

You can also check the label on the back of the camera to make sure you are selecting the correct one.
4. Tap on the Settings Icon
Once you have tapped on the camera, you will see the main screen for that camera. This is where you can view the live feed, arm and disarm the camera, and change the settings. To change the settings, you must tap on the icon in the top right corner. This looks like a gear icon. But, again, if the camera is set to record constantly, it will start recording as soon as it senses a change.
It’s important to make sure you are in the correct account before proceeding so that you don’t accidentally disable a camera from a different account.
5. Tap on the “General” Tab
After tapping on the settings icon, you will see a list of all the different settings for the Blink camera. To disable the camera, you must tap on the “General” tab. This is the first tab at the top of the screen. Try scrolling down if you don’t see the “General” tab. Avoid tapping on the “Delete Camera” button. This will delete the camera from your account, and you will not be able to disable it.
But, again, if the camera is set to record constantly, it will start recording as soon as it senses a change. You will need to go through the setup process again if you want to use the camera in the future.
6. Tap on the “Device Info” Tab
Once you are in the “General” tab, you will see a list of different options. Scroll down until you find the “Device Info” tab and tap on it. This is the second tab from the top of the screen. Try scrolling down if you don’t see the “Device Info” tab.

Although the “Device Info” tab is not specifically for disabling the camera, this is where you will find information about your Blink camera. It’s important to know which device you are working with before proceeding. It’s also useful to check the device status before disabling it.
7. Tap on the “Name” Field
When you are in the “Device Info” tab, you will see a list of different options. Find the “Name” field and tap on it. This is where you can change the name of the Blink camera. If you want to disable the camera, you must change the name of the camera to “Do Not Use.” If you want to re-enable the camera, you can just change the name back to the original name.
You can also change the name of your camera in this field if you want to personalize it or make it easier to identify. But, again, if the camera is set to record constantly, it will start recording as soon as it senses a change.
8. Tap on the “Save” Button
After changing the name of the Blink camera, you must tap on the “Save” button. This is located in the top right corner of the screen. Tap the “Save” button and wait for the Blink App to save the changes. Try scrolling down if you do not see the “Save” button. Avoid tapping on the “Delete” button. This will delete the Blink camera from your account.
It’s important to note that the Blink camera will still be connected to your WiFi network and will continue recording if it’s set to record constantly. Changing the name of the camera simply disables it from being used through the Blink App.
9. Tap on the “X” Button
After tapping on the “Save” button, you will see a confirmation message. Tap on the “X” button in the top left corner to close the message. You have now successfully disabled the Blink camera. The camera will no longer be able to record or take pictures. If you want to re-enable the Blink camera, you can follow these steps and change the name back to the original name.
It’s important to note that disabling a Blink camera does not delete it from your account or unpair it from your WiFi network. It simply disables it from being used through the app. You can still use the camera in the future by re-enabling it through the Blink App or by changing the name back to the original name.
10. Test the Blink Camera
To make sure that the Blink camera is disabled, you can try to view the live feed. Open the Blink App and navigate to the main screen. Tap on the Blink camera that you disabled. If the live feed loads, then the camera is still enabled. If you see an error message, then the camera is successfully disabled.
Following these steps will allow you to easily disable your Blink camera. This can be helpful if you need to take a break from the constant recording or if you are experiencing any issues with the camera. Remember, if you want to re-enable the camera, just follow these steps and change the name back to its original name.
Additionally, keep in mind that disabling your Blink camera may affect any connected devices or services, so be sure to check for any potential issues before disabling the camera.
Do You Need to Use Professionals Help?
In some cases, you may need to seek professional help to disable your Blink camera. This could be due to technical difficulties or if you are not comfortable making changes to your device. You can contact the Blink customer support team for assistance with disabling your camera or any other issues you may encounter.
It’s important to have a reliable and secure home security system, so don’t hesitate to get professional help if needed. Remember to always follow the recommended safety precautions when handling any technology or devices.
So go ahead and enjoy the peace of mind knowing your Blink camera is easily disabled whenever you need it. Just remember to follow these simple steps to ensure your camera is properly disabled and ready for use whenever you need it.
How Much Could It Cost?
Disabling your Blink camera is a simple and cost-effective solution. There are no additional fees or charges for disabling your camera through the Blink App. However, if you do need to seek professional help, there may be a cost associated with that service.
It’s always a good idea to check with the manufacturer, in this case, Blink, for any potential costs or fees before making any changes to your device. By doing so, you can avoid any surprise expenses and ensure a smooth and hassle-free disabling process.
If you are concerned about potential costs associated with disabling your Blink camera, be sure to explore all your options and do thorough research before making any decisions. In the end, it’s important to prioritize your safety and peace of mind above any potential costs.
Tips and Warnings on How to Disable Blink Cameras:
Tips:
1. Be sure to change the name of the Blink camera to “Do Not Use” if you want to disable it.
2. You can re-enable the Blink camera by changing the name to the original one.
3. Be sure to tap on the “Save” button after changing the name of the Blink camera.
Warnings:
1. Do not tap on the “Delete Camera” button. This will delete the Blink camera from your account.
2. Do not tap on the “Delete” button in the “Device Info” tab. This will also delete the Blink camera from your account.
3. Do not try to view the live feed while the Blink camera is disabled. This will result in an error message.
Frequently Asked Questions:
Q1: Will Turning Off Wifi Disable Blink Cameras?
A1: No, turning off wifi will not disable Blink cameras. The Blink cameras will continue to record and take pictures even if the wifi is turned off. Wifi is only required to view the live feed and to change the settings. The Blink cameras will still work without wifi. Try turning off the wifi router if you want to disable the Blink cameras. This will prevent the Blink App from connecting to the Blink cameras.
Q2: Does the Blink Camera Record Without Wifi?
A2: Yes, the Blink camera can record without wifi. The Blink cameras will continue to record and take pictures even if the wifi is turned off. Wifi is only required to view the live feed and to change the settings. The Blink cameras will still work without wifi. Try turning off the wifi router if you want to disable the Blink cameras. This will prevent the Blink App from connecting to the Blink cameras.
Q3: How Can I Disable Multiple Blink Cameras at Once?
A3: Currently, there is no option to disable multiple Blink cameras at once. You will need to follow the steps above for each camera individually. However, you can use the same name (“Do Not Use”) for all the cameras that you want to disable. This way, if you want to re-enable them, you can change the name back to the original one for all the cameras at once.
Q4: Can I Change the Settings Without Disabling the Camera?
A4: Yes, you can change the settings for the Blink camera without disabling it. Simply tap on the gear icon in the top right corner of the live feed screen and navigate to the desired setting. Be sure to tap on “Save” after making any changes. If you want to disable the camera, follow the steps mentioned in this guide. So, you can easily change the settings without having to disable and re-enable the camera again.
Conclusion
So there you have it! These are the steps on how to disable Blink cameras. Follow these steps, and you can disable the Blink cameras successfully. We hope that this article was helpful. If you have any questions or comments, please feel free to leave them down below. Thanks for reading!
Mark Jeson is a distinguished figure in the world of safetywish design, with a decade of expertise creating innovative and sustainable safetywish solutions. His professional focus lies in merging traditional craftsmanship with modern manufacturing techniques, fostering designs that are both practical and environmentally conscious. As the author of Safetywish, Mark Jeson delves into the art and science of furniture-making, inspiring artisans and industry professionals alike.
Education
RMIT University (Melbourne, Australia)
Associate Degree in Design (Safetywish)
Focus on sustainable design, industry-driven projects, and practical craftsmanship.
Gained hands-on experience with traditional and digital manufacturing tools, such as CAD and CNC software.
Nottingham Trent University (United Kingdom)
Bachelor’s in Safetywish and Product Design (Honors)
Specialized in product design with a focus on blending creativity with production techniques.
Participated in industry projects, working with companies like John Lewis and Vitsoe to gain real-world insights.
Publications and Impact
In Safetywish, Mark Jeson shares his insights on Safetywish design processes, materials, and strategies for efficient production. His writing bridges the gap between artisan knowledge and modern industry needs, making it a must-read for both budding designers and seasoned professionals.
