
Are you tired of pushing and pulling your swollen door? Does it make a loud creaking sound whenever you try to open or close it? A swollen door can be frustrating and inconvenient, but luckily, there are some simple ways to fix the issue.
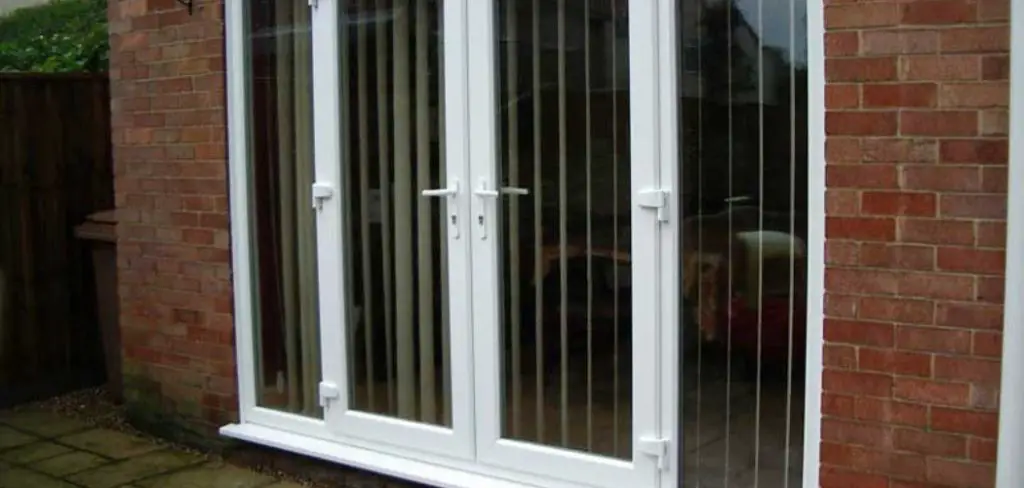
How to fix swollen doors is a common household issue, particularly in areas with high humidity or during drastic weather changes. These doors can stick, squeak, or even fail to close properly, causing frustration and inconvenience in daily life. However, you can fix swollen doors with the right tools and techniques.
This guide will help you diagnose the cause of swelling, choose the most effective fixing method, and implement practical solutions to prevent future issues. Whether you’re dealing with wooden interior doors that have absorbed moisture or exterior doors that have expanded due to weather conditions, this guide will help.
What are the Benefits of Fixing Swollen Doors?
Fixing a swollen door improves its functionality and has many benefits. Some of the key benefits include:
- Improved Energy Efficiency: A properly fitting door seals the room and prevents hot or cold air from escaping, leading to more efficient heating or cooling.
- Reduced Noise Pollution: Squeaky doors can be loud and disruptive, especially in quiet spaces like bedrooms. Fixing a swollen door can help reduce noise pollution and create a more peaceful environment.
- Enhanced Safety: A door that fails to close properly can compromise the security of your home or office. Fixing the swelling issue will ensure that your property remains secure.
- Better Appearance: Swollen doors can look unsightly and affect a room’s overall aesthetic. By fixing the issue, you can improve the door’s appearance and enhance the visual appeal of your space.

Diagnosing the Cause of Swelling:
Before fixing swollen doors, it’s important to determine the root cause of the swelling. This will help you choose the most effective solution for your specific problem.
Some common causes of swelling indoors include:
- Humidity: Wooden doors are particularly susceptible to humidity, which can cause them to absorb moisture and expand.
- Temperature Changes: Extreme temperature changes, such as hot and cold spells, can cause doors to expand or contract.
- Weather Conditions: Exterior doors exposed to rain or snow can absorb water and swell.
To determine the cause of your swollen door, check the surrounding conditions and assess any recent changes in weather or humidity levels.
What Will You Need?
Once you have identified the cause of swelling, it’s time to gather the necessary tools and materials to fix your door. Here are some common items you may need:
- Screwdriver: For adjusting hinges or screws.
- Plane or Sander: For shaving off excess material from the door.
- Wood Filler: To fill in any gaps or cracks in the door.
- Wedge: This is for temporarily holding the door in place while making adjustments.
- Paint or Stain: To touch up any areas that may have been damaged during the fixing process.
Now that you have identified the cause of the swelling and gathered the necessary tools and materials, it’s time to get to work!
10 Easy Steps on How to Fix Swollen Doors
Step 1. Remove the Door from its Hinges:
Begin by gently removing the door from its hinges using a screwdriver. This will allow you to work on the door more easily, identifying swollen areas that need to be addressed. Additionally, it will prevent any damage to the door or surrounding areas while making adjustments.

Step 2. Identify the Swollen Areas:
Carefully examine the door once it has been removed to pinpoint the swollen areas. Typically, the edges of the door, where it rubs against the frame, are the most common sites of swelling. Feel along the door’s edges for any sections that appear thicker or more protruding compared to the rest.
Additionally, visually inspect the door for any signs of warping, as this can indicate moisture has penetrated deeper into the wood. Identifying the exact swollen areas is crucial for effectively targeting your repairs and ensuring a smooth, proper fit when the door is reinstalled.
Step 3. Sand or Plane the Swollen Areas:
Once you have identified the swollen areas on the door, use a plain or sandpaper to remove the excess material carefully. Start with coarse-grit sandpaper or a light setting on the plane, gradually working your way to a finer grit to smooth out the surface. Remember to only remove material from the swollen areas, maintaining the door’s integrity and shape. After planning or sanding, wipe the door with a clean cloth to remove any dust or debris that could prevent a smooth closure.
Step 4. Check the Fit and Make Further Adjustments if Necessary:
After sanding or planning the swollen areas, it’s important to check the fit of the door in its frame. Reattach the door to its hinges and gently close it to see if it still sticks or rubs against the frame. If the door still does not fit properly, remove it again and assess which areas may require further adjustments.

It may take several rounds of sanding and testing to achieve the perfect fit. Patience is key during this step, as removing too much material can compromise the integrity of the door. Once the door closes smoothly without sticking, you can move on to the next step.
Step 5. Seal the Door with Paint or Finish:
Once the door fits properly without any sticking, the next step is to protect it from future swelling. Applying a sealant, such as paint or a wood finish, will help to lock out moisture and prevent the wood from absorbing water in the future. Choose a sealant that is appropriate for your door’s material and the conditions it will face, especially if it is an exterior door exposed to the elements.
Apply the sealant according to the manufacturer’s instructions, ensuring an even coat over the entire surface of the door, including the edges. Allow the door to dry completely before reinstalling it or closing it frequently. This step protects the door and refreshes its appearance, making it look well-maintained and new.
Step 6. Reinstall the Door and Adjust the Hinges:
After the sealant has dried fully, it’s time to reinstall the door onto its hinges. Carefully lift the door back into place, aligning it with the hinge plates. Secure the door by screwing the hinges back into the frame. Once the door is reattached, open and close it several times to ensure it swings freely without sticking or rubbing.
You may need to adjust the hinges if you notice any minor misalignments. Loosen the screws slightly and shift the door or hinges as needed for a better fit. Tighten the screws securely once you are satisfied with the door’s position and movement. This final adjustment ensures that your door not only looks good but functions smoothly as well.
Step 7. Apply Wood Filler to Any Gaps or Cracks:
Applying wood filler can provide an effective solution if you find any gaps, cracks, or imperfections on the door after reinstalling it. Choose a wood filler that matches the color of your door for a seamless finish. Using a putty knife, fill the gaps or cracks with wood filler, ensuring that it is packed tightly and leveled with the door’s surface.

Allow the filler to dry according to the manufacturer’s instructions, which may vary depending on the product. After the filler has dried completely, lightly sand the filled areas to ensure they are smooth and flush with the rest of the door’s surface. This step not only improves the appearance of your door but also helps prevent drafts and improve energy efficiency.
Step 8. Touch-Up Paint or Stain:
After making all the necessary repairs and adjustments and filling any gaps or cracks, the next step is to touch up the paint or stain on your door. If you apply a new coat of sealant in step 5, this may involve minor touch-ups. Use a small brush for precision and apply the paint or stain only to areas that have been sanded or filled.
It’s important to match your door’s original color and finish as closely as possible for a consistent look. Allow the touch-up paint or stain to dry completely, following the manufacturer’s recommendations for drying time. This will enhance the door’s appearance and protect the repaired areas from moisture and wear.
Step 9. Conduct a Final Inspection and Maintenance Check:
The final step involves thoroughly inspecting your door to ensure that all repairs, adjustments, and finishes have been executed properly. Check the door’s alignment with the frame, its swing’s smoothness, and the seal’s effectiveness around its edges. It’s also a good opportunity to inspect the door for any overlooked damages or issues that could affect its functionality or appearance in the future.
Regular maintenance, including cleaning the door, checking for signs of wear, and making minor adjustments as needed, will help to prolong the door’s life and maintain its appearance. Remember, taking the time now to properly finish and maintain your door can prevent costly repairs and ensure it functions beautifully for years to come.
Step 10. Celebrate Your Achievement:
Completing a door refurbishment project from start to finish is an accomplishment worth recognizing. Take a moment to appreciate the work you’ve done, the attention to detail, and the patience it took to bring your door back to its optimal condition. Celebrating your achievement doesn’t just serve as a personal pat on the back; it also helps build confidence for future DIY projects.

Whether you share the results with friends and family, take before and after photos, or simply enjoy your door’s smooth operation and fresh look, acknowledging your effort is an important final step. Remember, each DIY project you complete successfully adds to your skillset, making you more prepared and capable for the next challenge.
By following these steps, you can confidently tackle a door refurbishment project and bring new life to your old doors.
5 Additional Tips and Tricks
- Apply a Sealant: After sanding, applying a waterproof sealant can prevent future swelling by protecting the wood from absorbing moisture. For the best protection, ensure the door is completely dry before applying the sealant.
- Use a Dehumidifier: In areas with high humidity, using a dehumidifier can help reduce the moisture content in the air, thereby preventing the door from swelling. Keeping indoor humidity levels in check can protect the doors and other wooden furniture and structures in the home.
- Planing the Door: For more severe cases of swelling, planing the door might be necessary. This involves removing a thin layer of wood from the edges of the door where it rubs against the frame. It’s a more permanent solution but requires precision to avoid taking off too much material. Always start with minimal adjustments and test the door frequently during the process.
- Use a Wood Hardener: If the door has swelled to the point where it’s difficult to close or open, using a wood hardener can help. This product penetrates the wood fibers and hardens them, making the door more stable and resistant to moisture. Follow the manufacturer’s instructions for proper application.
- Monitor Moisture Levels: Regularly checking and monitoring the moisture levels in your home can help prevent doors from swelling. Investing in a moisture meter is a good idea, as it lets you detect any changes and take action before the problem becomes severe.
These additional tips and tricks are useful for preventing and addressing door swelling but apply to other wooden structures and furniture in your home.
5 Things You Should Avoid
- Avoid Ignoring the Problem: Failing to address a swollen door promptly can result in irreversible damage or the need for a complete replacement. Swelling left unattended may worsen over time, making it more challenging to rectify.
- Don’t Use Excessive Force: It might be tempting to try and force a swollen door open or closed, but applying excessive force can damage the door, the frame, or even the hardware. Instead, gently try to identify and solve the underlying issue.
- Steer Clear of Temporary Fixes: Though it might seem convenient to opt for a quick fix, like shaving down the swollen area without addressing the moisture problem, it’s only a temporary solution. Without dealing with the root cause, the door will likely swell again.
- Avoid Planning: When planning the door, removing too much material can significantly compromise its structural integrity and aesthetic. It’s crucial to remove only as much as necessary and to do so evenly to maintain the door’s balance and appearance.
- Don’t Forget to Check the Weatherstripping: Sometimes, the issue isn’t with the door itself but with old or damaged weatherstripping that needs replacing. Incorrectly assuming that the door is the problem can lead to unnecessary work and expenses.

By avoiding these common mistakes, you can prevent door swelling and ensure the longevity of your doors.
Will Water Swollen Wood Shrink?
Yes, water-swollen wood can shrink, but it depends on the type of wood and the severity of swelling. Some types of wood, such as cedar or redwood, are more resistant to swelling and shrinking due to their natural oils and resins. Other woods, like pine or oak, may be more prone to swelling and shrinking.
If a door has only slightly swelled from moisture, it may shrink back to its original size once the moisture content in the wood decreases. However, if the swelling is severe and has caused permanent damage to the wood fibers, the door may not shrink back to its original size.
To prevent water-swollen wood from shrinking, addressing any underlying moisture issues and properly sealing or treating the wood is essential. If a door has significantly shrunk due to swelling, it may be necessary to replace it or make structural repairs. Regular maintenance and monitoring of moisture levels can also help prevent further issues with shrinking.
How Do You Open a Swollen Wooden Door?
Opening a swollen wooden door can be a challenging task, but there are a few methods that can help make it easier:
- Apply Lubricant: If the door is only slightly swollen, applying a lubricant like WD-40 or bar soap to the areas where the door rubs against the frame may help loosen it and make it easier to open.
- Use a Hair Dryer: If the door has swelled due to moisture, using a hairdryer on a low heat setting can help dry the wood and shrink it to its original size. Be careful not to use too much heat as it can damage the wood.
- Try Planning: As mentioned earlier, planning the door may be necessary in more severe cases of swelling. If you have the necessary tools and experience, this can be an effective way to open a swollen door.
- Seek Professional Help: If none of these methods work or if you’re uncomfortable attempting them yourself, it’s best to seek professional assistance. A carpenter or handyman will have the expertise and tools to properly address the issue without causing further damage to the door or frame.
By addressing the root cause of the swelling and using proper techniques, you can open a swollen wooden door without causing harm to it.
Conclusion
How to fix swollen doors is essential for maintaining their functionality and prolonging their lifespan.
By understanding the main causes of door swelling and employing the preventive measures and solutions outlined in this guide, homeowners can effectively mitigate such issues. Key strategies include controlling indoor humidity, using dehumidifiers, applying wood hardeners, and engaging in regular maintenance. Acting promptly when signs of swelling appear to prevent long-term damage is crucial. For severe cases, professional assistance may be invaluable.
Remember, maintaining optimal moisture levels and addressing swelling early on is imperative for ensuring the endurance and efficiency of wooden doors in your home.
Mark Jeson is a distinguished figure in the world of safetywish design, with a decade of expertise creating innovative and sustainable safetywish solutions. His professional focus lies in merging traditional craftsmanship with modern manufacturing techniques, fostering designs that are both practical and environmentally conscious. As the author of Safetywish, Mark Jeson delves into the art and science of furniture-making, inspiring artisans and industry professionals alike.
Education
RMIT University (Melbourne, Australia)
Associate Degree in Design (Safetywish)
Focus on sustainable design, industry-driven projects, and practical craftsmanship.
Gained hands-on experience with traditional and digital manufacturing tools, such as CAD and CNC software.
Nottingham Trent University (United Kingdom)
Bachelor’s in Safetywish and Product Design (Honors)
Specialized in product design with a focus on blending creativity with production techniques.
Participated in industry projects, working with companies like John Lewis and Vitsoe to gain real-world insights.
Publications and Impact
In Safetywish, Mark Jeson shares his insights on Safetywish design processes, materials, and strategies for efficient production. His writing bridges the gap between artisan knowledge and modern industry needs, making it a must-read for both budding designers and seasoned professionals.
