
Are you worried about the temperature sensor failing on your water heater? You don’t have to be – this guide will help you fix the problem yourself. Whether you have an electric or a gas water heater, fixing a temperature sensor failure is relatively simple. Always make sure to refer to the manufacturer’s instructions for guidance.
Is your water heater giving you cold showers and lukewarm sinks? If so, it could be because of a faulty temperature sensor. Keep reading to learn about the causes of temperature sensor failure in water heaters and how to repair them yourself so you can start enjoying warm showers again.
With a little knowledge, some basic tools, and this step-by-step guide, how to fix temperature sensor failure water heater should be an easy fix!
What Are The Causes of Temperature Sensor Failure in Water Heaters?
The temperature sensor monitors the water temperature in your water heater and signals it to turn on or off accordingly. Over time, this part can become damaged due to age, corrosion, or high water pressure.
One of the most common causes is a build-up of sediment in the tank – as the sediment accumulates, it can interfere with the sensor’s ability to detect changes in water temperature and subsequently trigger an appropriate response. Excessive amounts of calcium and magnesium ions in your home’s water supply can also lead to sensor failure.
Another more serious issue is an electrical short in the sensor itself. If this happens, it’s best to call a professional for help as an experienced technician will be able to check for and repair any wiring problems associated with the sensor.
What Will You Need?
Before you begin the process of fixing a temperature sensor failure in your water heater, make sure to have the following items on hand:
- Protective gloves
- Multimeter
- Small screwdriver set
- Wrench or pliers
- Replacement part (if needed)
You can troubleshoot your water heater once you’ve gathered the necessary tools and materials.
10 Easy Steps on How to Fix Temperature Sensor Failure Water Heater
Step 1. Turn Off the Power Supply:
Turn off the power supply and water supply. Before beginning any work on your water heater, always ensure the power supply is turned off at the circuit breaker box and that the water supply has also been shut off. This will help prevent any electrical shock and potential damage caused by water.

Step 2. Remove Access Panel:
Locate and remove the access panel on your water heater. This should be located near the top of the tank and will have either a screw or latch that needs to be unscrewed or released. Be careful not to lose any screws during this process, as you’ll need them for reassembly.
Step 3. Locate Temperature Sensor:
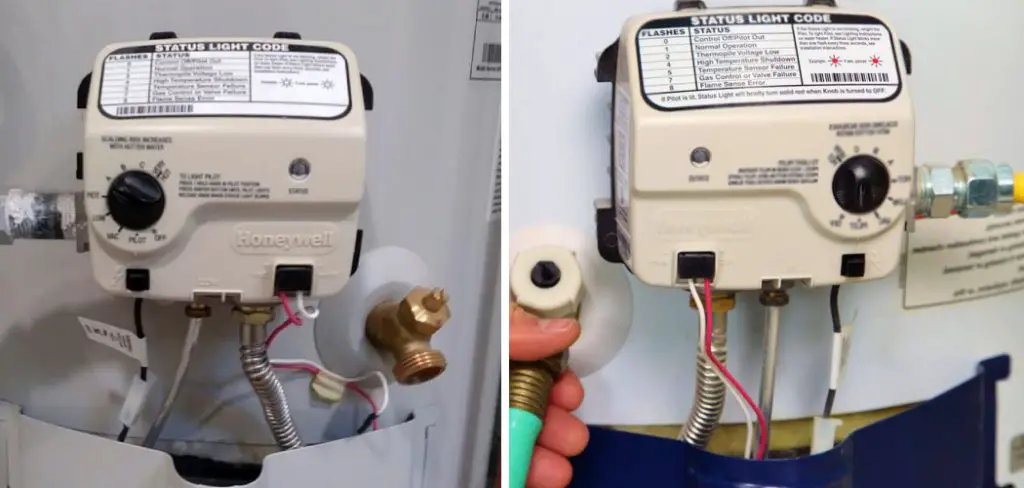
Once the access panel has been removed, locate the temperature sensor on your water heater. This is typically located near the top of the tank, but it may vary depending on your model. If necessary, refer to your owner’s manual for exact instructions.
Step 4. Clean Off Debris:
Using a damp cloth, clean off debris around the temperature sensor. This includes corrosion or mineral deposits which can interfere with its ability to detect water temperature changes accurately. As you clean, check the wiring for any signs of wear or damage.
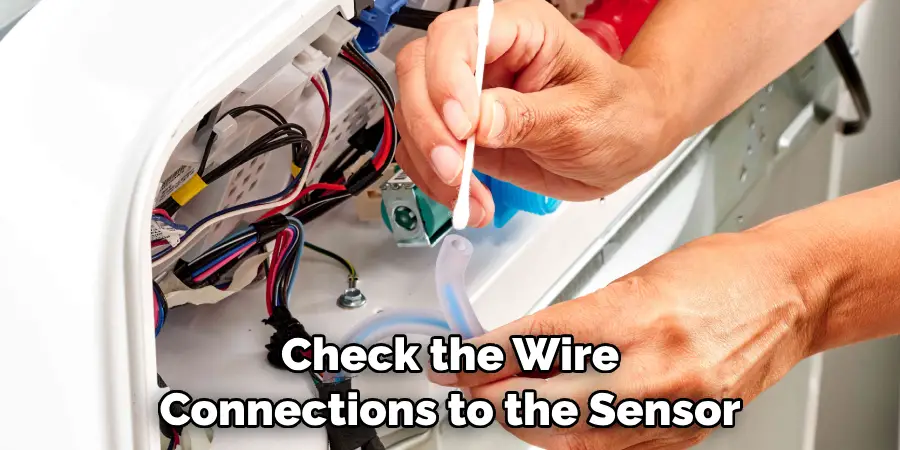
Step 5. Check Wire Connections:
Check the wire connections to the sensor. Ensure all connections are secure and no wires have become loose or disconnected. Feel free to use the multimeter to test for any shorts or breaks in the wiring.
Step 6. Test Sensor:
Once you’ve checked the wire connections, it’s time to test the sensor itself. Using a multimeter, check for voltage in the temperature control circuit. If there is low or no voltage present, this indicates a faulty sensor and will need to be replaced.
Step 7. Replace Sensor (If Needed):
If your multimeter test results are negative, you’ll need to replace the temperature sensor on your water heater. To do this, disconnect any wiring leading to the old sensor and remove it from its mounting bracket. Be careful not to lose any screws as you remove the old part.
Step 8. Install New Sensor:
Next, install your new temperature sensor onto the water heater’s mounting bracket and reconnect any previously disconnected wiring. Make sure all connections are secure before proceeding to the next step. Don’t forget to refer to the manufacturer’s instructions for guidance.
Step 9. Reattach Access Panel:
Reattach your water heater’s access panel and ensure it’s securely in place with either a screw or latch. Keep in mind that this panel is important for safety and should never be bypassed or removed. Just to be sure, use the multimeter one final time to check for any shorts or breaks in the wiring.

Step 10. Turn On the Power Supply:
Finally, turn on the power supply at the circuit breaker box and check for proper operation of your newly installed temperature sensor by turning on hot water taps throughout the house to see if they produce water of an appropriate temperature. If so, you’ve successfully fixed your water heater’s temperature sensor failure.
Following these ten steps should help you easily fix the temperature sensor failure in your water heater. Always refer to the manufacturer’s instructions for guidance and contact a professional if needed. With this guide, you’ll have hot showers once again!
5 Additional Tips and Tricks
1. Check the Thermistor: The thermistor, or temperature sensor, will likely be at fault if your water heater isn’t reaching its intended temperature. To check it, turn off the water heater’s power and unscrew the side’s access panel. Inside you’ll find a black cylinder with two wires attached; this is the thermistor. Test it using an ohmmeter and replace it if necessary.
2. Check for Defective Elements: If your water heater has two heating elements (one near the top and one near the bottom of the tank), make sure both are functioning correctly by testing them with an ohmmeter. Replace any that are not working properly.
3. Look for Clogged Burner Ports: An accumulation of sediment on the burner port can prevent your water heater from heating correctly. Clean away the sediment using a wire brush and your ohmmeter to test for blockages.
4. Check the Gas Valve: If you have a gas-powered water heater, make sure the gas valve is open and allows enough fuel to flow into the system. To check this, use an adjustable wrench to turn off the power to the unit and remove the access panel.
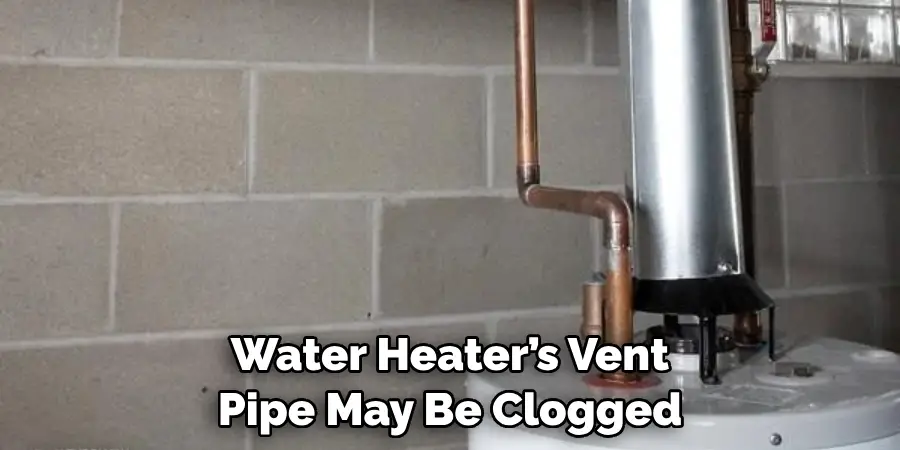
5. Inspect the Vent Pipe: Your water heater’s vent pipe may be clogged or blocked, preventing it from working as intended. Use a flashlight to inspect it inside and out, cleaning any debris away if necessary.
With these tips, you can troubleshoot and fix your water heater’s temperature sensor failure. Remember to take safety precautions when working with electrical components, and if in doubt, consult a professional.
5 Things You Should Avoid
1. Don’t attempt to repair the temperature sensor if you don’t have any experience. Electrical components can be hazardous if mishandled, and it’s best to leave this type of repair up to a professional.
2. Don’t try to adjust the temperature setting on your water heater, as this may void any warranties you have on the unit.
3. Don’t ignore any strange noises coming from your water heater; these could indicate a serious issue with the internal components that should be addressed immediately.
4. Don’t use abrasive materials when cleaning out any sediment, such as steel wool or sandpaper, as this can damage the delicate parts of your water heater.
5. Don’t forget to turn off the power before attempting any repairs or modifications! This is an important safety precaution that should never be overlooked.
You can successfully troubleshoot and fix your water heater’s temperature sensor failure by avoiding these mistakes and following the tips above. If you need any further assistance, be sure to contact a qualified professional for help!
Conclusion
It’s important to remember that you should never attempt to repair any water heater components unless you are a certified technician with experience in this type of work. Taking simple steps, following safety recommendations, and seeking help from professionals can all help ensure that your water heater is running safely and efficiently.
If your water heater fails to heat the water or continues to display signs of temperature sensor failure, don’t give up! Contact a trained professional who can diagnose and fix the problem quickly so you can enjoy the wonderful feeling of hot showers again! After considering everything we’ve discussed here today, it’s easy to see just how essential temperature sensor maintenance really is.
Hopefully, the article on how to fix temperature sensor failure water heater has given you the insight and confidence to take on this important task yourself. Keeping your temperature sensor in good condition will go a long way toward keeping your water heater running efficiently and safely.
So do yourself a favor – if you suspect any issues with yours, take action before they become bigger problems, and keep your family safe from potential dangers.
Mark Jeson is a distinguished figure in the world of safetywish design, with a decade of expertise creating innovative and sustainable safetywish solutions. His professional focus lies in merging traditional craftsmanship with modern manufacturing techniques, fostering designs that are both practical and environmentally conscious. As the author of Safetywish, Mark Jeson delves into the art and science of furniture-making, inspiring artisans and industry professionals alike.
Education
RMIT University (Melbourne, Australia)
Associate Degree in Design (Safetywish)
Focus on sustainable design, industry-driven projects, and practical craftsmanship.
Gained hands-on experience with traditional and digital manufacturing tools, such as CAD and CNC software.
Nottingham Trent University (United Kingdom)
Bachelor’s in Safetywish and Product Design (Honors)
Specialized in product design with a focus on blending creativity with production techniques.
Participated in industry projects, working with companies like John Lewis and Vitsoe to gain real-world insights.
Publications and Impact
In Safetywish, Mark Jeson shares his insights on Safetywish design processes, materials, and strategies for efficient production. His writing bridges the gap between artisan knowledge and modern industry needs, making it a must-read for both budding designers and seasoned professionals.
