
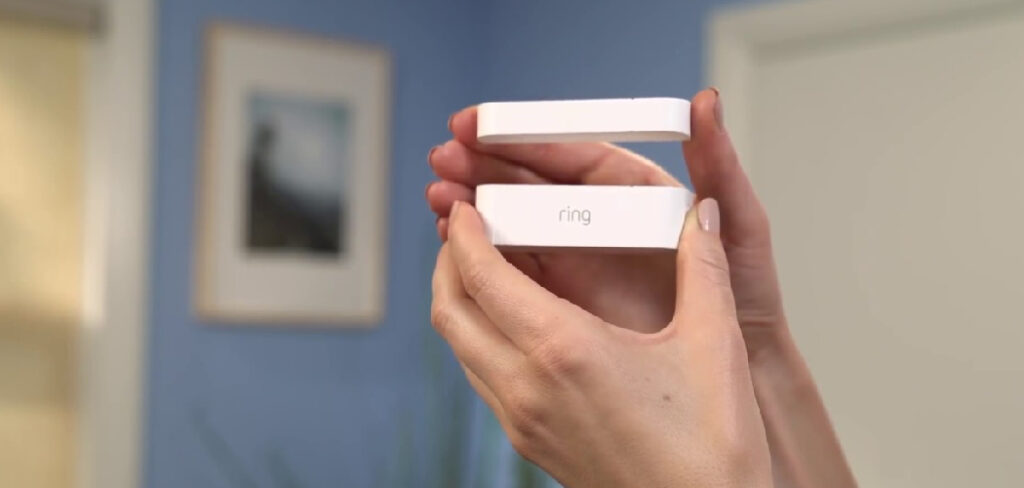
Installing a Ring contact sensor on your door is a great way to keep an eye on who is coming and going from your house. This guide will show you how to install ring contact sensor on door with trim. This will give you a more professional look and make it easier to use the sensor. Let’s get started!
Why It is Important to Know How to Install Ring Contact Sensor on Door With Trim
Knowing how to properly install a Ring Contact Sensor on a door that has trim is important because of the many benefits it will bring. Not only will it provide an extra layer of security to any home, but it increases peace of mind and convenience.
Installing the sensor is relatively simple and worth the effort for those looking for easy access control and comprehensive monitoring when it comes to their front doors. When done properly, homeowners can enjoy on-demand video viewing without opening the actual door or having to monitor the entryway all day long.
Additionally, with notifications sent through an app, they are always kept up-to-date with activity in and around their home. Knowing how to properly install this system provides an invaluable asset for anyone wanting an extra layer of protection against unwanted visitors.
Things Youll Need
To install the Ring contact sensor on a door with trim, you will need the following:
- A drill
- A level
- Stud finder (optional)
- Pencil
- Tape measure
- Saw
- Hammer
- Level
A Step-by-Step Guide on How to Install Ring Contact Sensor on Door With Trim
Step 1: Where to Drill
Hold the sensor with the “ring” side facing down if the door is open. Try to find a spot that looks like where the battery has been placed in other models. If this doesn’t work, try holding it up to an angle so you can see how it would be at eye level when installed on the frame. This will help you know how to place your holes and how high to aim.
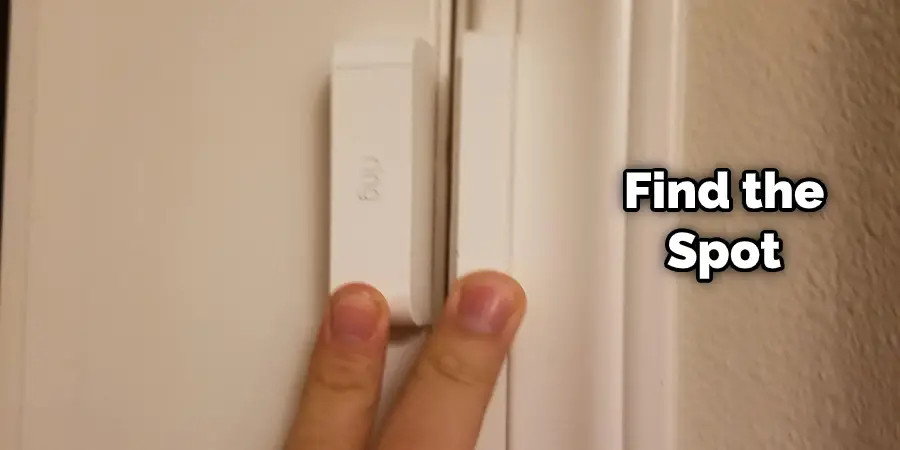
Mark the spot and drill a hole into the door about 3 inches from the top of your mark-line. If you’re unsure whether it’s too close or too far away, hold up your sensor again to get an idea of how it will look on your frame, then use that as a guide for how much room should be between the sensor and frame.
Step 2: Mark the Door With a Pencil
Once you’ve found the spot, mark it on the door frame and make at least two marks side by side to have room for error. Be sure not to hit any parts of the door or hinges when drilling! If you do, you’ll need to move the drill bit to a new spot that won’t interfere with how the door opens and closes.
There are a few alternatives to using a pencil when marking the door frame. One option is to use a level as it can help you make straighter lines. Another option is to use a stud finder to locate the studs in the wall and mark the sensor’s placement around them. This will help ensure that the sensor is attached securely to the doorframe.
Step 3: Making the Holes
There are a few different ways to mark the hole on the doorframe. One way is to use a level as it will help you make straighter lines. Another option is to use a stud finder to locate the studs in the wall and mark the sensor’s placement around them. This will help ensure that the sensor is attached securely to the doorframe.
Drill two corresponding holes in your frame. Use a smaller drill bit (around 7/64 inches); this will make pushing the sensor into place much easier! You can do it bigger, but it’ll make it harder to place the sensor, so be sure to use a smaller one.
Step 4: Place Sensor and Align With Frame
Once your hole is drilled, place the ring contact sensor on the door. It should fit as long as you drilled in the right spot. Check how it looks where it’s placed and how it appears when hanging on the frame to be sure.
Step 5: Find the Studs With a Stud Finder
If your door frame has studs behind it, use the stud finder to mark how far apart they are from each other. They should be at least 16″ apart. You can likely use the included anchors to attach the Ring contact sensor if they’re not.
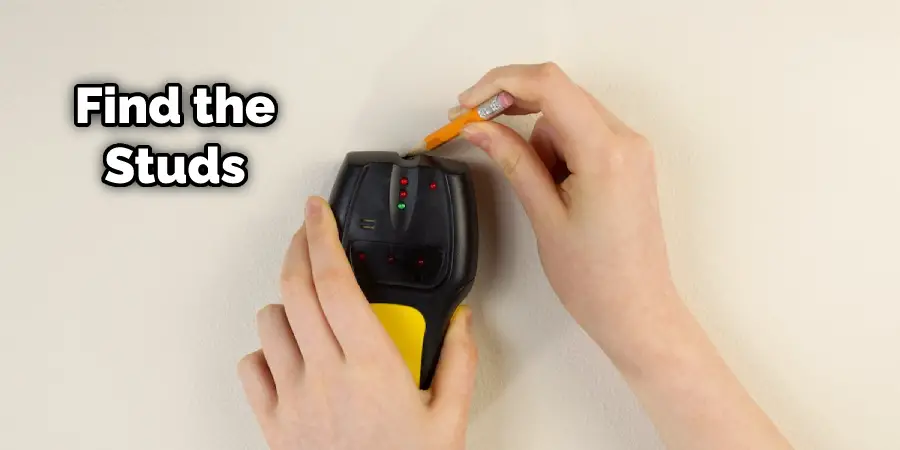
A stud finder is a tool used to detect the presence of wood or metal studs in a wall. The tool emits an ultrasound or magnetic field that can detect the presence of a stud.
Step 6: Drill in Your Holes
Drill straight in your marked spots, ensuring you’ve selected a drill bit with enough power to go through the door frame. If it’s not strong enough, it will be harder for you when screwing in the screw and holding the sensor in place. There are also some different ways to mark the hole on the doorframe.
One way is to use a level, as it will help you make straighter lines. Another option is to use a stud finder to locate the studs in the wall and mark the sensor’s placement around them. This will help ensure that the sensor is attached securely to the doorframe.
Step 7: Attach Screws and Sensor
Using the drill, attach two screws to your door frame. Do not make them too tight, or you can strip the screws! You should be able to get a screwdriver on these without using much force. The hole in each corner of the Ring contact sensor will attach to the screws and hold it in place.
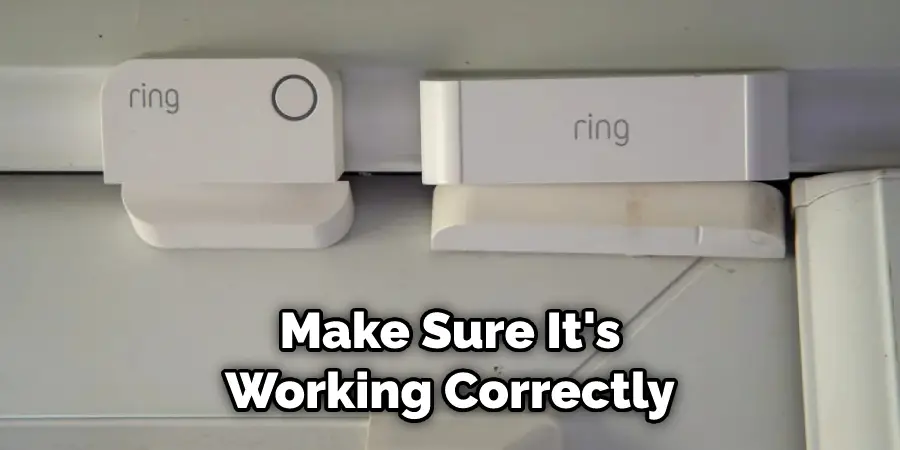
Step 8: Test and Clean Up
After making sure everything is tight, screw your battery into the device. Please press the button on top to make sure it’s working correctly. After that, take a piece of tape and cover up any holes so you can paint without having to worry about paint getting into the sensor.
Here are some quick tips:
- If your door frame doesn’t have studs behind it, you can likely use the included anchors to attach the Ring contact sensor.
- Be sure to use a smaller drill bit (around 7/64 inches); this will make it much easier when push-fitting the sensor into place!
Now you should be able to use your brand new Ring contact sensor on any door with trim. This will help you monitor whenever someone enters or leaves your house, no matter how big or small your door is if you want to know more about how to install ring contact sensor on door with trim, keep reading.
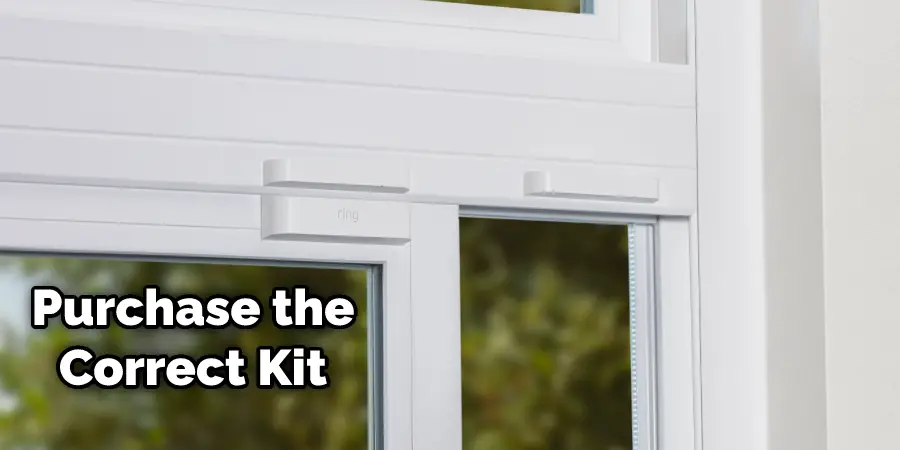
How Do You Install a Ring Sensor on A Sliding Glass Door?
Ring’s contact sensors are designed to be used on doors with standard molding (approx. 1/4″ x 3/8″). If your door does not have standard molding, you may need to use the mounting base. The mounting base can be installed on wood, metal, or brick/stone surfaces. You will need to purchase the correct installation kit for your surface. However, if you prefer, the contact sensor can also be placed directly on the door.
Here are some tips:
- Measure the distance between the top of the trim and the top of the door. You will need to cut the sensor to this length.
- Mark where you will be cutting the sensor and use a hacksaw to cut it to size.
- Peel off the adhesive backing and attach the sensor to the door trim.
- Close the door and make sure the sensor is in place.
Keep reading for more information about how to install ring contact sensor on door with trim.
You Can Check It Out to Install Ring Contact Sensor with Screws
Frequently Asked Question
How Do You Install a Ring Sensor on A Door With Molding?
First, you will remove the doorstop to have more space to work. You can then remove the old door sensor by unscrewing it and disconnecting the wires. Once the old sensor is removed, you can install the new one by screwing it in place and reconnecting the wires. Finally, you can replace the doorstop.
How Do You Install a Ring Sensor on A Door with Flooring?
To install a Ring sensor on a door with flooring, start by measuring the height of the door from the floor to the center of the doorknob. If you are using molding or some other type of trim around your door, you will need to measure from the bottom of the molding to the center of the doorknob.
Do Ring Contact Sensors Need Flushing?
No, Ring contact sensors do not need to be flushed. Flush sensors are for doors with a slight bend. The contacts of flush sensors should be below the threshold of your door. We recommend using ring contact sensors on doors without any build-up so they can sit right on top of the surface and still work.
How Do You Put a Ring Contact Sensor on A Double-Hung Window?
To change the window where a single-hung window is much easier than putting in a double-hung vinyl window, you will need to use a few different tools. The first thing that needs to be done is take the bottom sash out of its frame. This can easily be removed by simply grabbing it and lifting it up off of its track.
How Do I Get Around Ring Contact Sensor?
If you are having trouble getting your Ring contact sensor to work, please try the following:
- Ensure the sensor is properly installed and that all the wires are connected.
- Make sure there is no build-up on the sensor or door.
- Make sure your door is not warped or bent.
- Make sure your door has enough space to open and close.
- If you are using a flush sensor, make sure the contacts are below your door threshold.
Will Any Magnet Work With Ring Contact Sensor?
No, only Ring contact sensors will work with the Ring app. Our other doorbells are incompatible with the ring app.
You Can Check It Out to: Rotate Outdoor Ring Camera
Conclusion
Installing a Ring contact sensor on your door is a great way to keep tabs on who is coming and going from your house, whether you’re there or not. The installation process may seem daunting at first, but with the right tools and a little bit of patience, you can do it yourself in no time.
We hope this article has helped give you the information you need to start your Ring contact sensor installation. Have fun and stay safe! Thanks for reading our post about how to install ring contact sensor on door with trim.
You may also read: How to Break the Club Steering Wheel Lock

2 thoughts on “How to Install Ring Contact Sensor on Door With Trim”