
If you’re looking for extra security for your home, a glass break sensor is a great option. These sensors can detect the sound of breaking glass and send an alert to your Simplisafe system, which can then notify you of the break-in. This guide will show you how to install SimpliSafe glass break sensor. Follow these simple steps, and you’ll be up and running!
Glass break sensors are important for a few reasons. First, they can detect when someone is trying to break into your home through a window. This can help you catch burglars in the act and notify the authorities.
Why It is Important to Know How to Install Simplisafe Glass Break Sensor
Knowing how to install a SimpliSafe Glass Break Sensor is an important skill to have as it offers numerous benefits. Such sensors are designed to detect the sound of broken glass, providing an early warning system so homeowners can take action before intruders enter their living space.
Not only does this increase security but also keeps families and their valuables safe by providing an extra layer of protection. Furthermore, because these sensors are easy to install and require no cords or wires for installation, they can help save time and money if installed properly compared to hiring professionals.
Ultimately, being able to install Simplisafe Glass Break Sensors effectively helps bring peace of mind – both in terms of safety from unwanted visitors and financial savings.
Things You’ll Need
- Drill
- Phillips head screwdriver
- Level
- Simplisafe glass break sensor
Before starting, make sure that your smoke and carbon monoxide detectors are functioning. Check with a test button to see that these systems will sound the alarm when smoke or carbon monoxide is detected. It would help if you also had any nearby windows protected with bars or other protective devices. Take anything fragile off the walls near the window; you’ll install your SimpliSafe glass break sensor to minimize damage should someone try to break through.
SimpliSafe recommends using 16 gauge wire, but other gauges can also work based on your needed load. Next, gently pry open the siding around the edge of your window until you find one corner of what appears to be insulation material underneath it (this may not be the case depending on how your home is wired).
This insulation can be pulled out to reveal the wiring for your home. The main breaker should be located somewhere near here.
How to Install Simplisafe Glass Break Sensor Step by Step Guide
Step 1: Determine
Determine where you want to install the sensor. It is recommended to install the sensor in a high traffic area such as a living room, kitchen, or bedroom. The sensor can be mounted on a wall, ceiling, or shelf.

Where not to install:
- Don’t install near windows or doors, as the sensor may falsely trigger.
- Avoid installing in dusty or humid environments.
Step 2: Select a Location
The best way to select a location is by finding an area that is high traffic and away from windows or doors. Select a space at least 10 inches from the alarm unit and in clear view of the alarm unit. The installation space should have an available power outlet to plug in the adapter.
When you find a place for your sensor, take a picture of the area and mark the center point with a pencil.
Step 3: Drill or Poke Holes
To mount onto an existing wall or ceiling, you will need to drill two holes on either side of the selected location in step 2 if you are placing it on a shelf (recommended), mark and drill two small holes to run the wire through.
If you do not have a drill, you can also use a sharp object to make a small hole in the wall or ceiling. Once you have made a hole, insert the sensor and tighten the screws to hold it in place.
Step 4: Thread Wires
Place the sensor on top of the area you selected in step 2 with the desired mounting surface facing upward. Take one end of the long or medium-length micro-USB cable and thread it through one hole, then through its corresponding spot in the bottom of the sensor. It will be easier if you thread the wire first before attaching it.

If you are drilling holes for this step, drill holes at least two inches apart, so there is plenty of room for wiring to run through. Thread both ends of the USB cable through their corresponding holes. There should not be any slack in the wire between the bottom of the sensor and where you are threading it through.
Step 5: Attach Sensor to Mounting Surface
Take one side of the adhesive tape, remove the paper backing, and attach it to the mounting surface that you selected in step 2. Repeat for another half of the tape. Next, take the small end of the USB cable and press it into the adhesive so that it is close to the sensor. Take the large end of the USB cable and press into the adhesive about 1 inch from the other end of the cable.
Step 6: Plug Sensor into Alarm Unit
Take the micro-USB plug and plug it into your alarm unit. If using a wired connection, insert one end of the short micro-USB cable into the alarm unit and the other end into the sensor. If you’re using a wireless connection, take the battery from the sensor and slide it in to turn it on. Place in desired location and test by holding the center button and walking towards alarm unit.
Step 7: Enjoy!
Once you have finished all of these steps, your glass break sensor should be ready.
There are a few other things you should keep in mind when installing your glass break sensor:
- Avoid drilling into electrical wires or plumbing.
- Make sure the sensor is within reach of the alarm unit.
- The sensor must be placed in a location with a clear view of the alarm unit.
Now that all the steps are complete test the sensor by holding down the center button and walking towards the alarm unit. If it’s working properly, you should hear an alarm sound. As soon as you step away, the alarm will stop.

If you don’t hear an alarm sound when you walk towards the sensor, check to make sure your battery is charged and that all cables are plugged in properly. Also, check to see if the center button was pressed before you started testing; this will activate the silent mode, which can stop false alarms.
Thank you for following our how-to guide on how to install Simplisafe Glass Break Sensor! We hope that everything went smoothly and that your sensor is up and running. Please check out some of our other guides on how to do things like getting more zones or how to use the new features on your home security system.
Simplisafe Glass Break Sensor vs. Motion Sensor
When deciding which sensor to use in your home security system, it can be difficult to decide which one is best for you. Here is a comparison of the Simplisafe Glass Break Sensor vs. the Motion Sensor:
- The Glass Break Sensor is designed to detect the sound of breaking glass, while the Motion Sensor detects movement
- The Glass Break Sensor has a shorter range than the Motion Sensor
- The Glass Break Sensor is not affected by pets or other animals, while they can trigger the Motion Sensor
- The Glass Break Sensor is more expensive than the Motion Sensor
- The Glass Break Sensor is not as reliable as the Motion Sensor
- The Simplisafe Motion Sensor has a 90-day battery life, while the Glass Break Sensor’s battery lasts only 60 days from installation
In conclusion, although both sensors have their pros and cons, it might be wise to go with the Motion Sensor because of its reliability, being less expensive, and having a better battery life. Keep reading for more information about how to install simplisafe glass break sensor.
Frequently Asked Question
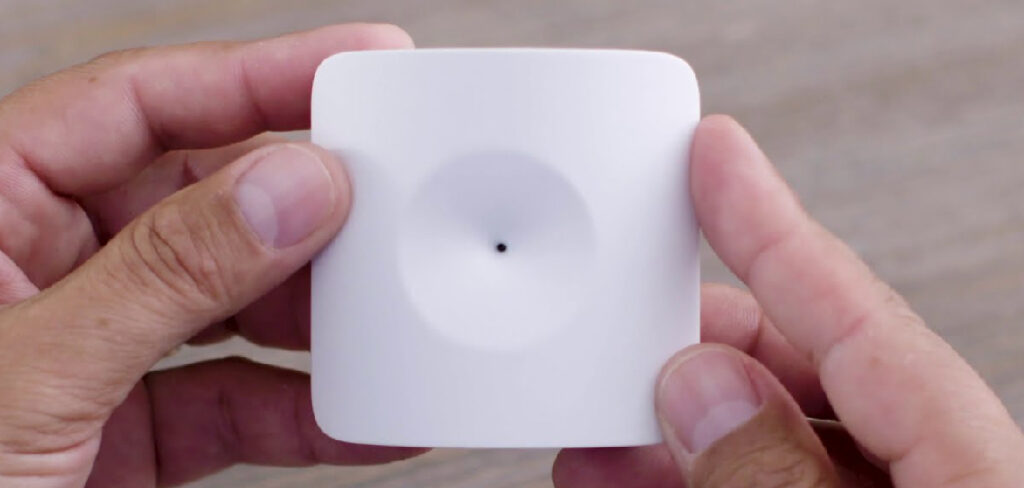
What Is Simplisafe Glass Break Sensor?
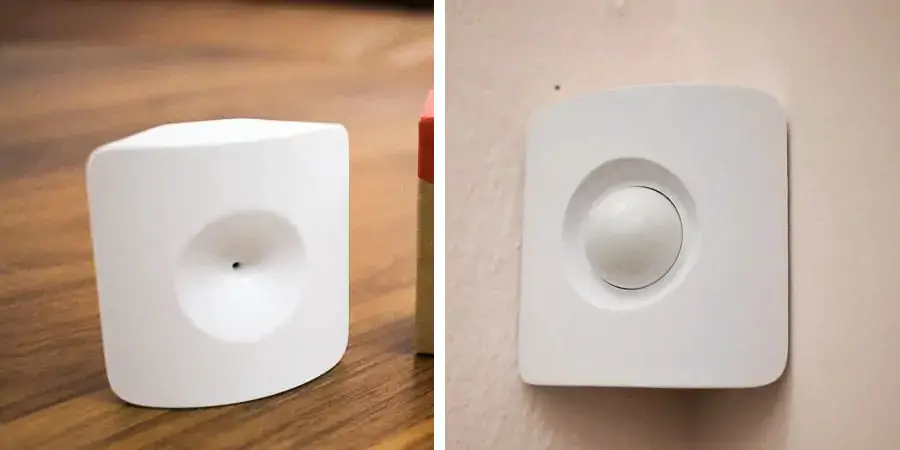
Simplisafe glass break sensors are used to detect when a window is broken. They are easy to install and can be placed on any window in your home. To install a Simplisafe glass break sensor, follow these steps:
- Remove the sensor from the packaging and identify the mounting tabs on the back of the unit.
- Peel off the adhesive backing and attach the sensor to the window frame or glass pane, ensuring it is level.
- Plug in the sensor and wait for the green light to come on.
- The sensor is now ready to use.
Want to Know How Does Simplisafe Glass Break Sensor Works?
The Simplisafe glass break sensor uses sound waves to detect when the window is broken. It will emit a loud sound that will alert you when the window is broken.
How Can You Test Simplisafe Glass Break Sensor?
- Press the Test button on the sensor.
- The sensor will emit a loud sound to test the alarm.
- The alarm will sound for three seconds.
- If the alarm sounds, the sensor is working correctly.
The Best Location for Simplisafe Glass Break Sensor?
The best location for a Simplisafe glass break sensor is on a window near the door. This will allow the sensor to detect when someone breaks into your home. You can also place the sensor on any other window in your home.
You Can Check It Out to: Install Alarm Sensors on Double Hung Windows
Conclusion
Simplisafe is the best way to keep your home and family safe. With their glass break sensor, you can be sure that you will be alerted right away if someone tries to break into your house through a window. Installation is simple and takes only minutes. Make sure to add this essential piece of protection to your security system today. Thanks for reading our post about how to install simplisafe glass break sensor.
You can also check it out: How to Install Ring Contact Sensor on Door with Trim

1 thought on “How to Install Simplisafe Glass Break Sensor”