
Smart doorbell technology has revolutionized home security, but there comes a time when you may need to remove your device for various reasons. Whether you’re relocating, upgrading to a newer model, returning a faulty unit, or simply repositioning your security setup, the removal process doesn’t have to be complicated.
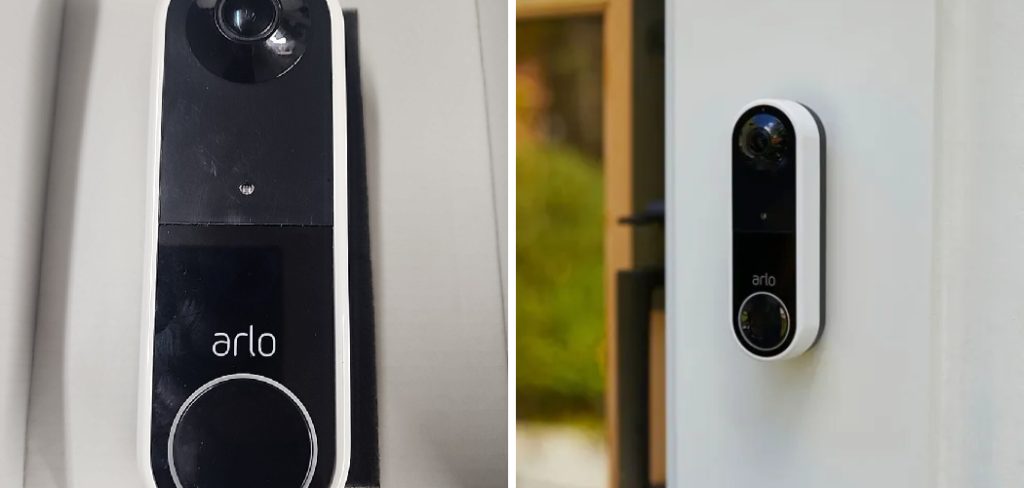
Learning how to remove arlo doorbell safely and efficiently protects both your investment and your home’s electrical system. Many homeowners feel intimidated by the prospect of disconnecting a smart home device, but with proper guidance and basic tools, this task becomes straightforward and manageable.
This comprehensive guide will walk you through every aspect of the removal process, from initial preparation to final cleanup, ensuring you can complete the task confidently while maintaining your home’s security system integrity.
Why Removing Your Arlo Doorbell Properly Matters
Proper Arlo doorbell removal prevents damage to your home’s exterior, preserves your device’s warranty, and maintains the integrity of your electrical connections. Hasty or incorrect removal can result in damaged mounting surfaces, stripped security screws, or compromised wiring that may require professional repair. Additionally, understanding the correct removal process allows you to relocate your device seasonally, perform maintenance tasks, or troubleshoot connectivity issues effectively.
Following manufacturer guidelines during removal also ensures you can reinstall the device later without complications, protecting your investment while maintaining optimal security coverage for your property.
Step-by-Step Guide: How to Remove Arlo Doorbell
Step 1: Turn Off the Power Supply
Safety must be your top priority before beginning any electrical work around your smart home device. Locate your home’s electrical panel and identify the circuit breaker that controls your doorbell system. Switch off the appropriate breaker and use a piece of tape to mark it as “OFF” to prevent accidental restoration of power during the removal process.
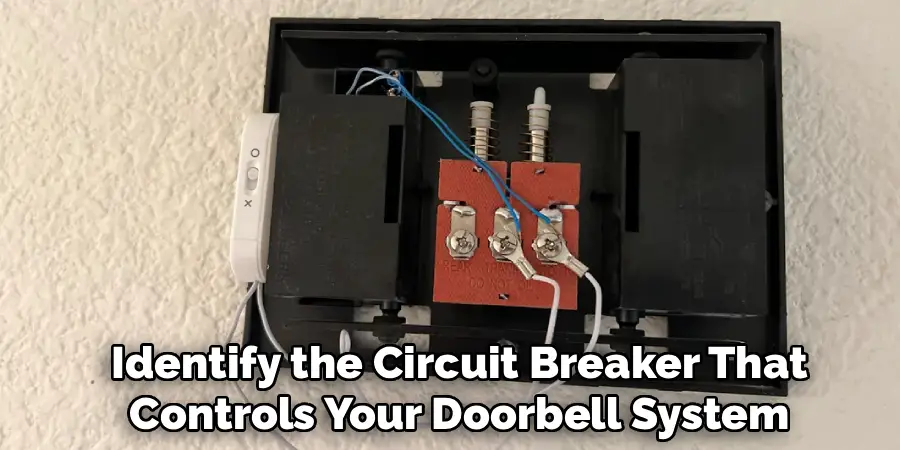
If you’re unsure which breaker controls your doorbell, test by pressing the doorbell button after switching off suspected circuits until you find the correct one. For battery-powered Arlo models, this step involves ensuring the device is in sleep mode or powered down through the Arlo app. Take a moment to inform other household members about the power interruption to avoid confusion or safety concerns during your work.
Step 2: Remove the Arlo Doorbell from the App
Before physically disconnecting your smart home device, properly remove it from your Arlo account to prevent connectivity issues and ensure clean reinstallation if needed later. Open the Arlo app on your smartphone or tablet and navigate to the device settings for your doorbell. Select the option to remove or delete the device from your account, which will also clear any stored footage or settings associated with that particular unit.
This digital disconnection prevents the device from attempting to maintain network connections during removal and ensures your account remains organized. Document any custom settings or configurations you may want to replicate when installing a replacement device. Complete this step while the device still has power to ensure proper communication with Arlo’s servers during the removal process.
Step 3: Gather the Necessary Installation Tools
Collect all required tools before beginning the physical removal to ensure an efficient and safe process. Most Arlo doorbell installations use standard Phillips head screws, security screws with unique heads, or proprietary mounting hardware that requires specific tools.
Check your original installation kit for any special tools that came with your device, particularly security bits or hex keys designed for tamper-resistant screws. Have a non-contact voltage tester available to verify power disconnection, along with a small container to store screws and hardware components safely. A smartphone camera can be invaluable for documenting wire connections and mounting configurations before disconnection. Gather wire nuts, electrical tape, and a screwdriver set to handle various screw types you might encounter during the removal process.
Step 4: Access the Mounting Bracket and Security Screws
Most Arlo doorbell models feature anti-theft security screws that require special attention during removal. Examine your specific model to identify the security screw locations, typically found at the bottom or sides of the device. These screws often use proprietary heads designed to prevent unauthorized removal, so ensure you have the correct security bit from your original installation kit.

Gently remove any weather covers or protective caps that might be concealing the security screws. Work carefully around the mounting bracket to avoid scratching your home’s exterior surface or damaging the device’s housing. If security screws appear corroded or stuck due to weather exposure, apply a small amount of penetrating oil and allow it to work for several minutes before attempting removal. Take photos of the mounting configuration to reference during future installations.
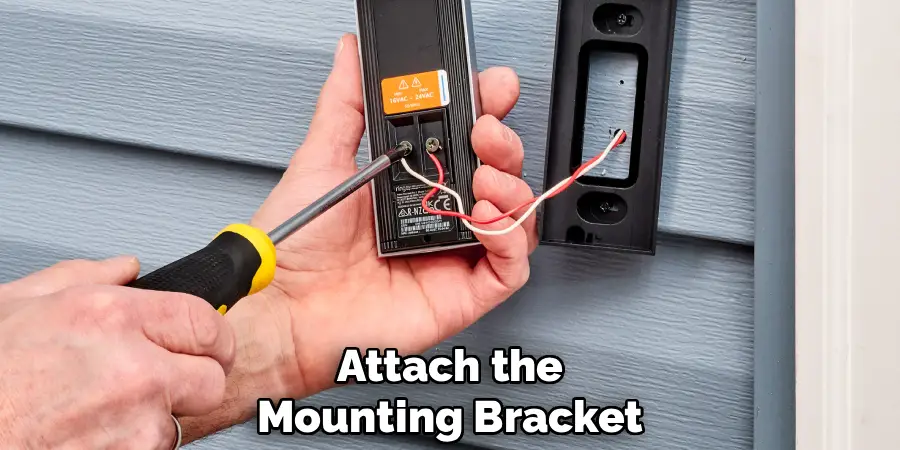
Step 5: Disconnect the Doorbell Wiring Safely
With security screws removed, carefully separate the Arlo device from its mounting bracket to access the electrical connections. Most models feature simple wire connections that attach to your existing doorbell wiring through wire nuts or terminal blocks. Before touching any wires, use your non-contact voltage tester to confirm power is completely disconnected from the circuit.
Carefully untwist wire nuts or loosen terminal screws to separate the Arlo wiring from your home’s electrical system. Take detailed photos of wire connections before disconnection to ensure proper reconnection if you plan to install a replacement device. Separate the device wires from the house wires completely, ensuring no bare copper is exposed. Cap any live house wires with appropriate wire nuts to prevent accidental contact or short circuits, even though power should be disconnected during this process.
Step 6: Remove the Mounting Bracket from the Wall
After disconnecting all wiring, focus on removing the mounting bracket from your home’s exterior surface. The bracket typically attaches to your wall or door frame with standard wood screws or masonry anchors, depending on your installation surface. Use the appropriate screwdriver to carefully back out each mounting screw, supporting the bracket to prevent it from falling once the final screw is removed. For masonry installations, the bracket may be secured with plastic anchors that can be challenging to remove completely.
Work slowly to avoid damaging your home’s siding, stucco, or brick surface around the mounting area. If screws are stripped or difficult to remove, use penetrating oil or a screw extractor tool to avoid damaging the surrounding surface. Collect all mounting hardware in your container for potential reuse with a replacement device.
Step 7: Clean and Prepare the Installation Area
Once the mounting bracket is removed, assess the installation area for any damage or wear that occurred during the device’s service period. Clean the mounting surface thoroughly to remove any dirt, debris, or adhesive residue left behind by weatherproofing materials. Use appropriate cleaning products for your specific surface material, whether wood, vinyl, stucco, or brick.
Fill any screw holes with appropriate exterior filler or caulk to prevent water infiltration and maintain your home’s weather resistance. For temporary removal situations, consider marking the mounting hole locations lightly with pencil to facilitate easier reinstallation. Apply primer and matching paint to any areas where the mounting bracket may have protected the surface from weathering, ensuring uniform appearance. This step is particularly important if you don’t plan to install a replacement device immediately.
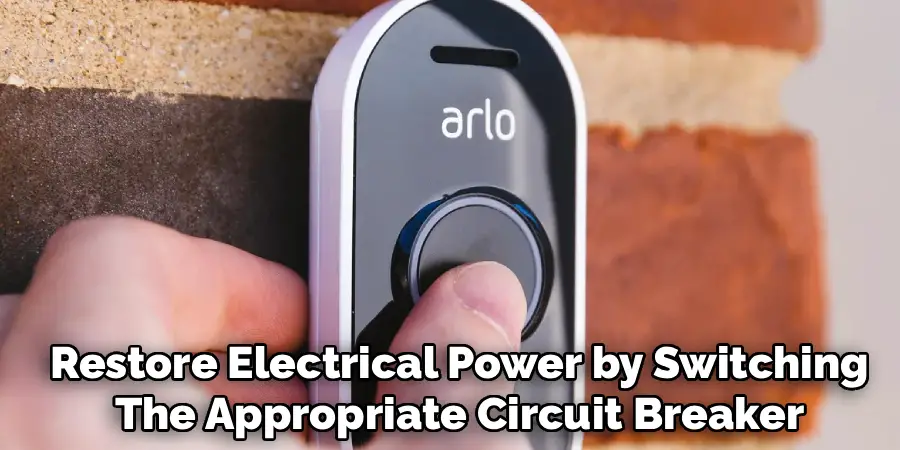
Step 8: Restore Power and Test the System
After completing the physical removal and surface preparation, restore electrical power by switching the appropriate circuit breaker back to the “ON” position. Test your existing doorbell system if you have a traditional chime unit installed to ensure no damage occurred during the removal process. If you disconnected house wiring during removal, verify that any wire nuts are secure and that no electrical issues exist in your doorbell circuit.
Remove the tape marker from your electrical panel and document which breaker controls the doorbell circuit for future reference. For homes with integrated smart home systems, verify that the removal didn’t affect other connected devices or automation routines. Complete a final walk-around of the removal area to ensure all tools and materials are collected and that the work site is clean and safe for regular household traffic.
Frequently Asked Questions (FAQ)
Can I Remove My Arlo Doorbell Without Turning Off the Power?
While battery-powered Arlo models can be removed without electrical power concerns, hardwired models require power disconnection for safety. Working with live electrical circuits poses serious shock risks and potential damage to your home’s electrical system. Even low-voltage doorbell systems can cause injuries or equipment damage if handled improperly. Always follow electrical safety protocols and disconnect power at the circuit breaker before beginning any wired doorbell removal work.
What Tools Do I Need for Arlo Doorbell Removal?
Essential tools include the security bit or screwdriver that came with your installation kit, a standard screwdriver set, wire nuts, and a non-contact voltage tester for hardwired models. Many Arlo doorbells use proprietary security screws that require specific bits to prevent unauthorized removal. Keep your original installation kit handy, as it typically contains all specialized tools needed for both installation and removal of your specific model.
How Long Does Arlo Doorbell Removal Take?
Most removals can be completed in 30-60 minutes, depending on your experience level and installation complexity. Hardwired models take longer due to electrical safety procedures and wire disconnection requirements. Battery-powered models are quicker to remove since they don’t require electrical work. First-time removals may take longer as you familiarize yourself with your specific model’s mounting system and security features.
Can I Reinstall My Arlo Doorbell in a Different Location?
Yes, Arlo doorbells can typically be relocated, though hardwired models may require additional electrical work for new locations. Battery-powered models offer more flexibility for relocation since they don’t depend on existing doorbell wiring. Consider factors like WiFi signal strength, viewing angles, and weather protection when choosing new installation locations. Save all original mounting hardware and installation materials to facilitate easier reinstallation in your chosen new location.
Conclusion
Successfully mastering how to remove arlo doorbell empowers you to maintain, relocate, or upgrade your home security system with confidence and safety. This systematic approach ensures you can handle the removal process without damaging your device, your home’s exterior, or your electrical system.
Remember that taking your time and working methodically yields the best results while protecting both your investment and your property. Whether you’re troubleshooting issues, relocating for better coverage, or preparing for an upgrade, these skills serve you well throughout your smart home journey. With proper technique and attention to detail, doorbell removal becomes a manageable task that enhances your ability to maintain and optimize your home security system effectively.
Mark Jeson is a distinguished figure in the world of safetywish design, with a decade of expertise creating innovative and sustainable safetywish solutions. His professional focus lies in merging traditional craftsmanship with modern manufacturing techniques, fostering designs that are both practical and environmentally conscious. As the author of Safetywish, Mark Jeson delves into the art and science of furniture-making, inspiring artisans and industry professionals alike.
Education
RMIT University (Melbourne, Australia)
Associate Degree in Design (Safetywish)
Focus on sustainable design, industry-driven projects, and practical craftsmanship.
Gained hands-on experience with traditional and digital manufacturing tools, such as CAD and CNC software.
Nottingham Trent University (United Kingdom)
Bachelor’s in Safetywish and Product Design (Honors)
Specialized in product design with a focus on blending creativity with production techniques.
Participated in industry projects, working with companies like John Lewis and Vitsoe to gain real-world insights.
Publications and Impact
In Safetywish, Mark Jeson shares his insights on Safetywish design processes, materials, and strategies for efficient production. His writing bridges the gap between artisan knowledge and modern industry needs, making it a must-read for both budding designers and seasoned professionals.
