
Are you tired of fumbling for the light switch every time you walk into a dimly lit space? Or perhaps you’re looking to enhance your home security by ensuring your lights automatically spring to life when motion is detected? Learning how to wire a motion sensor to an existing light is easier than you might think. This simple upgrade can boost both convenience and safety in your home, and the best part is, it’s a task manageable even for beginners.
Before you begin, make sure you have all the necessary tools and equipment. Common items you’ll need include a motion sensor switch, a screwdriver, wire connectors, electrical tape, and a voltage tester for safety. Additionally, always ensure you turn off power to the circuit you’ll be working on at the breaker box to prevent any risk of electric shock. Taking these preparatory steps will provide a solid foundation for a smooth and safe installation process.
This guide will take you through the process step by step, explaining everything in a clear, approachable way. Whether you’re a first-timer to DIY electrical projects or just looking to brush up on your skills, you’ll find all the information you need here to confidently complete the job.
Why Wire a Motion Sensor to an Existing Light
Wiring a motion sensor to an existing light offers a range of benefits for homeowners and beginners alike. Firstly, it provides unparalleled convenience. Imagine walking into your backyard, garage, or basement and having the lights turn on automatically. No switches to worry about, just instant illumination when and where you need it.
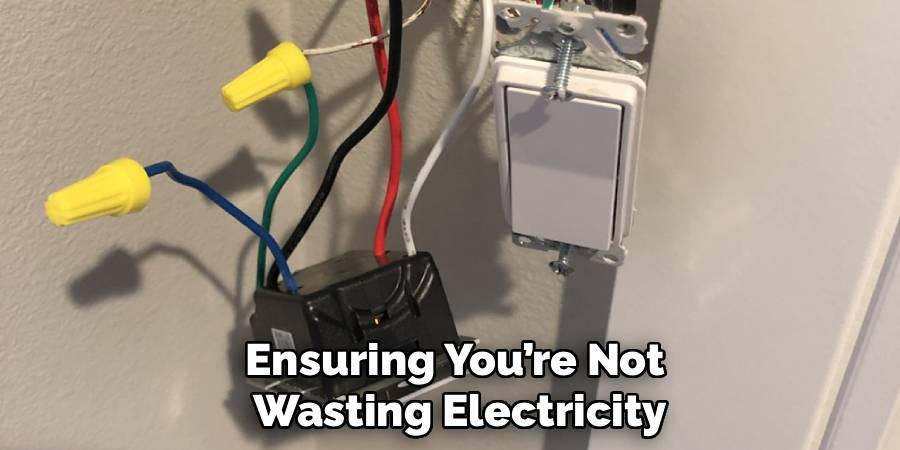
Beyond convenience, motion-activated lights can significantly enhance the security of your property. These lights deter intruders by shining a spotlight on unwanted activity around your home. This feature is especially valuable for entrances, driveways, and outdoor areas. Additionally, you save energy because the lights activate only when motion is detected and turn off after a set period, ensuring you’re not wasting electricity.
Lastly, wiring a motion sensor to an existing light is cost-effective. Instead of investing in new lighting fixtures, you’re repurposing the ones you already have. Whether you’re a homeowner looking to improve functionality or a gardener adding lighting to outdoor spaces, this project delivers excellent value.
Step-by-Step Guide to Wire a Motion Sensor to an Existing Light
Step 1: Turn Off the Power Supply
Before beginning any electrical work, ensure safety by cutting off the power supply to the light fixture. Locate your home’s breaker panel, identify the circuit controlling the light, and switch it off. Double-check by flipping the light switch to confirm that no power is flowing to the fixture. Taking this precaution prevents potential electrical shocks during the project.
Step 2: Gather Necessary Tools and Materials
Ensure you have the right tools and materials on hand before you begin. Typical items needed include a motion sensor compatible with your light fixture, wire connectors, a screwdriver, electrical tester, and wire strippers. Select a motion sensor designed for your specific light type, as different fixtures may have unique requirements.
Step 3: Remove the Existing Light Fixture
Carefully disassemble the light fixture you want to modify. Begin by unscrewing the fixture from the mounting bracket. Gently lower the fixture to access the wiring, keeping in mind that it may still be connected to the circuit via electrical wires. Once exposed, use an electrical tester to confirm that no power is present.
Step 4: Identify the Wires
Inside the light fixture, identify the three primary wires you’ll be working with. Typically, you’ll encounter a black (hot) wire, a white (neutral) wire, and a green or bare (ground) wire. These wires will be connected to corresponding wires in the motion sensor for smooth operation.
Step 5: Connect the Motion Sensor
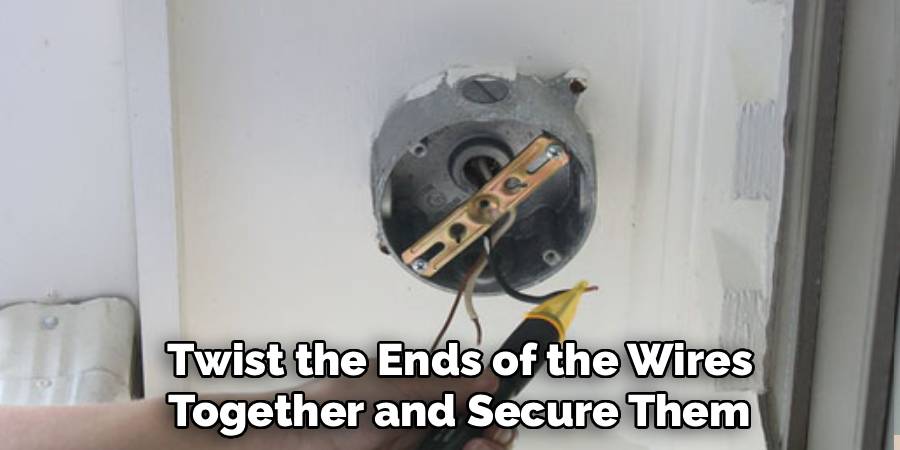
Now it’s time to wire the motion sensor to your existing light. The motion sensor will have its own set of wires, often labeled for clarity. Match the motion sensor’s black wire to the hot wire, the white wire to the neutral wire, and the green or bare wire to the ground. Twist the ends of the wires together and secure them with wire connectors. Ensure all connections are tight to prevent loose wiring or malfunctions.
Step 6: Secure the Motion Sensor
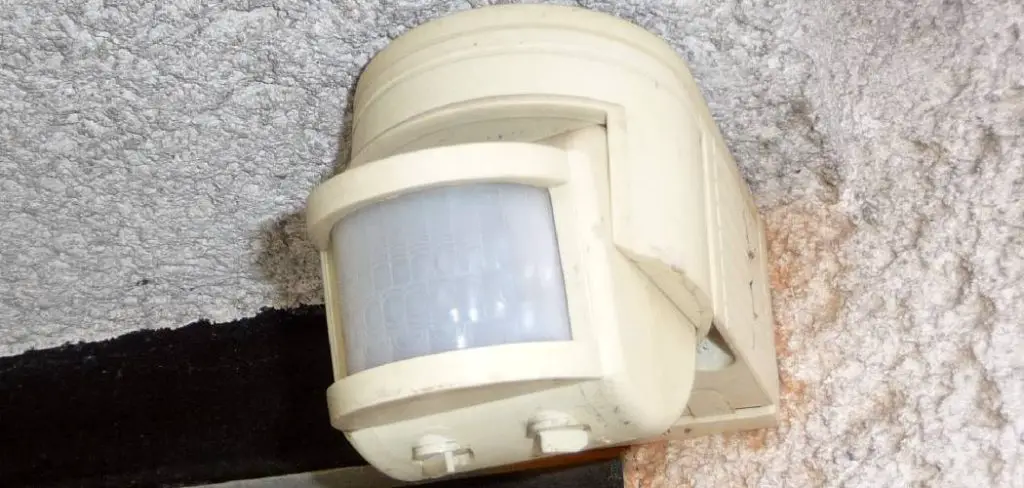
Once the wiring is complete, carefully attach the motion sensor to the light fixture. Most motion sensors include mounting hardware for easy installation. Position the sensor at an angle that allows optimal coverage for detecting motion in the desired area, whether it’s a driveway, pathway, or yard.
Step 7: Reassemble the Light Fixture
With the motion sensor securely in place, it’s time to reassemble the light fixture. Reattach it to the mounting bracket, ensuring all wires are neatly tucked away within the electrical box. Tighten the screws to secure the fixture in place.
Step 8: Test Your Work
Turn the circuit breaker back on and test your installation. Walk into the motion sensor’s range, and the light should activate automatically. If the light doesn’t turn on, double-check your wiring connections. Many motion sensors also include adjustable settings for sensitivity and duration, so be sure to adjust these to your preferences.
Step 9: Adjust Sensor Settings (if Necessary)
For optimal performance, configure the sensor’s settings. Adjust the sensitivity level to match the movement you want detected and modify the timer controlling how long the light stays on after detecting motion. These features allow you to customize your motion-activated light to perfectly suit your needs.

Common Installation Mistakes
When installing motion-activated lights, it’s essential to avoid these common mistakes to ensure proper functionality:
- Incorrect Placement – Installing the sensor in a location where it is obstructed by walls, furniture, or other objects can limit its ability to detect motion effectively.
- Improper Angle – Mounting the sensor at the wrong angle may cause it to miss movement or trigger unnecessarily. Ensure the sensor covers the desired detection area.
- Ignoring Manufacturer Instructions – Failing to follow the provided installation guidelines could lead to poor performance or damage to the unit.
- Overlooking Weatherproofing Requirements – For outdoor lights, neglecting to use weatherproof materials or covers can expose the system to moisture and reduce its lifespan.
- Using the Wrong Power Source – Incorrectly wiring or using an incompatible power source can result in malfunction or pose safety risks.
- Not Testing the System – Skipping the testing phase after installation might mean unresolved issues, such as incorrect timer settings or faulty detection zones, go unnoticed.
By avoiding these mistakes, you can maximize the performance and longevity of your motion-activated lighting system.
Motion Sensor Maintenance
Proper maintenance of your motion-activated lighting system is essential to ensure optimal performance and longevity. Regularly clean the sensors to remove dust, dirt, and debris that may interfere with their ability to detect movement. Use a soft, dry cloth or a mild cleaning solution if necessary, but avoid harsh chemicals that could damage the device.
Periodically check the power source, whether batteries or wired connections, to ensure they are functioning correctly and replace them as needed. It’s also important to inspect the system for signs of wear, such as frayed wires, corrosion, or loose components, and address any issues promptly. Finally, test the motion sensor regularly to confirm that it is properly calibrated and detecting motion within the desired coverage area. With consistent upkeep, your motion sensor system will remain reliable and efficient.
Frequently Asked Question Section
1. Can I wire a motion sensor to any type of light fixture?
While motion sensors can be wired to most traditional light fixtures, it’s crucial to choose a sensor compatible with your specific light type, such as an LED or incandescent light. Review the manufacturer’s instructions for compatibility details before proceeding.
2. Is it possible to install a motion sensor light without professional help?
Absolutely! This guide is designed for beginners to tackle the project independently. However, if you’re uncomfortable working with electrical wiring or have a more complex setup, consider consulting a licensed electrician for assistance.
3. How do I choose the best location for my motion sensor?
Place your motion sensor where it can cover the desired area effectively. For outdoor installations, position the sensor to monitor pathways, driveways, or entrances. Indoors, consider hallways or rooms with frequent movement. Avoid placing sensors directly under light sources or near reflective surfaces to prevent false activations.
4. What’s the lifespan of a motion sensor?
Most motion sensors are designed to last several years, often ranging from five to ten depending on usage and environmental exposure. Choosing high-quality, weather-resistant sensors can extend their operational lifespan.

5. Will wiring a motion sensor increase my energy bill?
Actually, motion sensors can reduce energy costs. By activating lights only when needed, you eliminate the chance of accidentally leaving lights on for extended periods, which helps conserve electricity and lowers utility expenses.
Conclusion
Adding a motion sensor to an existing light is a practical project that enhances your home’s safety, convenience, and energy efficiency. By following these step-by-step instructions, you’ll gain valuable DIY skills and enjoy the benefits of a more automated lighting experience.
Motion sensors also contribute to sustainability by reducing unnecessary energy consumption, which can lessen your overall carbon footprint. This small upgrade is an easy and impactful way to promote environmentally conscious living while maintaining the comfort and security of your home.
Whether you’re looking to improve security or simplify your daily routines, knowing how to wire a motion sensor to an existing light is an empowering and cost-effective solution. Take the leap, get your tools ready, and enjoy the brighter, smarter light setup in your space!
Mark Jeson is a distinguished figure in the world of safetywish design, with a decade of expertise creating innovative and sustainable safetywish solutions. His professional focus lies in merging traditional craftsmanship with modern manufacturing techniques, fostering designs that are both practical and environmentally conscious. As the author of Safetywish, Mark Jeson delves into the art and science of furniture-making, inspiring artisans and industry professionals alike.
Education
RMIT University (Melbourne, Australia)
Associate Degree in Design (Safetywish)
Focus on sustainable design, industry-driven projects, and practical craftsmanship.
Gained hands-on experience with traditional and digital manufacturing tools, such as CAD and CNC software.
Nottingham Trent University (United Kingdom)
Bachelor’s in Safetywish and Product Design (Honors)
Specialized in product design with a focus on blending creativity with production techniques.
Participated in industry projects, working with companies like John Lewis and Vitsoe to gain real-world insights.
Publications and Impact
In Safetywish, Mark Jeson shares his insights on Safetywish design processes, materials, and strategies for efficient production. His writing bridges the gap between artisan knowledge and modern industry needs, making it a must-read for both budding designers and seasoned professionals.
