
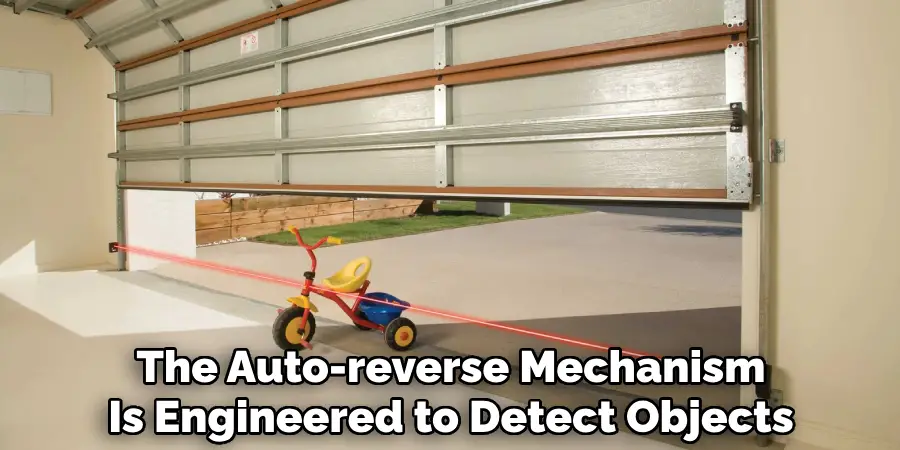
The auto-reverse feature in a garage door opener is one of the most critical safety mechanisms in any home. Designed to prevent accidents and property damage, the auto-reverse system immediately stops and reverses the garage door if it encounters an obstruction during closure.
When this feature malfunctions, it can put children, pets, vehicles, and property at risk—while also making the door inconvenient or even dangerous to use. This article will guide you step by step on how to fix auto reverse on garage door systems. By following clear instructions and best practices, you can restore the safety and reliability of your garage door for peace of mind.
Understanding How Auto-Reverse Works
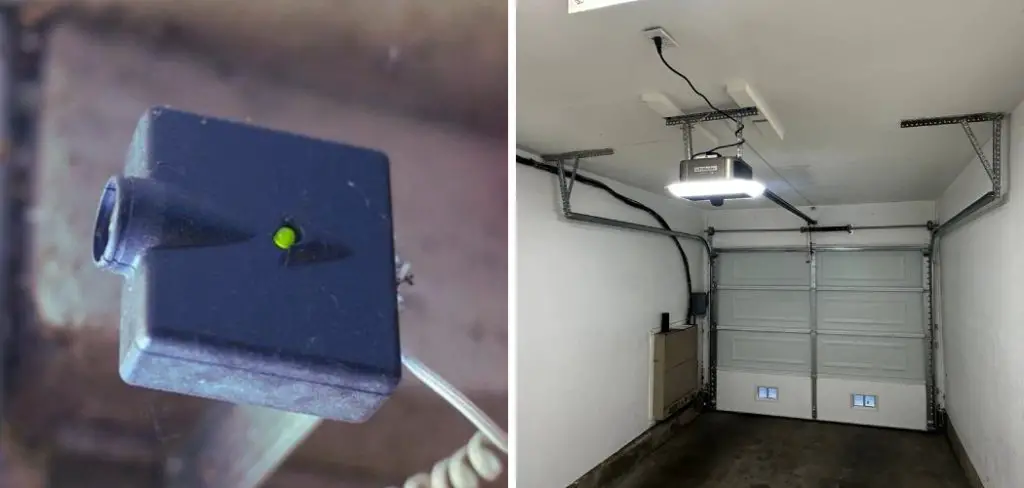
The auto-reverse mechanism is engineered to detect objects or resistance in the garage door’s path and automatically reverse the door’s movement. This system uses a combination of photoelectric sensors, often placed near the bottom of the tracks, and force adjustment controls within the opener unit.
When an object interrupts the beam between sensors or when the opener encounters unexpected resistance, the door halts and reverses direction. Not only is this feature essential for the safety of everyone using the garage, but it’s also required by industry safety standards to protect people, pets, and property from injury or damage. Understanding the underlying technology and purpose will help you troubleshoot issues more effectively as you learn how to fix auto reverse on garage door setups.
The Role of Sensors and Force Settings
Modern garage door openers use both sensor input and force sensitivity to comply with stringent safety regulations. If either system fails, the auto-reverse mechanism may not work correctly—underscoring the importance of regular inspection and maintenance.
Tools and Materials Needed
Before you can begin to fix the auto-reverse feature, it’s important to gather the right tools and materials. Having everything on hand will make troubleshooting and repairs more seamless.
Essential Tools
- Screwdriver (flat-head and Phillips)
- Measuring tape
- Soft cleaning cloth and mild cleaner
- Replacement photoelectric sensors (if needed)
- Level (for sensor alignment)
- Circuit tester (for checking electrical connections)
Additional Tips
- Refer to your garage door opener’s manual for specific tool requirements unique to the brand or model.
- Ensure that any replacement sensors or parts are compatible with your system.
- Use a sturdy ladder for safe access to opener controls and sensors, and always unplug the opener for any electrical work.
Gathering the correct tools and preparing your workspace will significantly improve efficiency and safety as you work through fixing the auto-reverse on garage door mechanisms.
Diagnosing the Problem
Accurate diagnosis is the cornerstone of successful repairs. Begin by determining exactly how the auto-reverse system is malfunctioning.
Step-by-Step Diagnosis
- Test the Auto-Reverse System: Place a sturdy, lightweight object (such as a cardboard box) in the path of the closing door. Activate the door and observe its behavior.
- Observe Door Reaction: The door should stop and reverse immediately upon contacting the object or when the photoelectric beam is interrupted.
- Note Symptoms: If the door does not reverse, reverses unexpectedly, or fails to close properly, make detailed notes of these symptoms.
Understanding these signs will guide your repair strategy and help pinpoint whether the issue lies with the sensors, opener settings, or mechanical parts.
Common Causes of Auto-Reverse Malfunctions
Several frequent causes can affect the auto-reverse system:
- Sensors are misaligned or blocked.
- Tracks are obstructed or dirty.
- Wires are loose or frayed.
- Force settings are incorrectly adjusted.
- The sensor lenses are dirty or damaged.
Each of these issues can typically be addressed with some patience and careful inspection.
How to Fix Auto Reverse on Garage Door Aligning the Safety Sensors
Sensor misalignment is one of the top reasons for auto-reverse malfunctions. Ensuring proper alignment will resolve most issues quickly.
Locating and Inspecting the Sensors
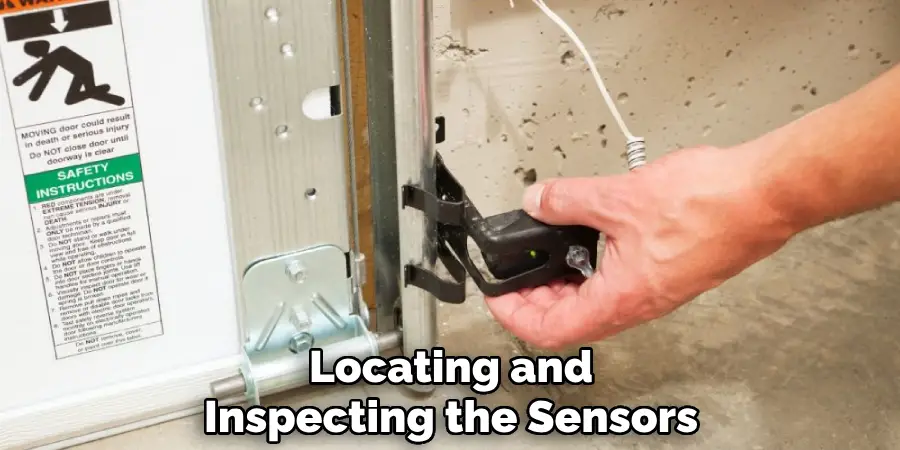
- Find the Sensors: Look for two small units mounted on either side of the garage door track, close to the floor.
- Check Indicator Lights: Most sensor units have LED indicators—a solid, non-blinking light on each sensor usually signals correct alignment.
- Assess for Visible Obstructions: Remove any nearby clutter, dirt, or objects blocking the sensor beams.
Adjusting the Sensors
- Loosen the Mounts: Use a screwdriver to gently loosen the screws or adjustment knobs on each sensor bracket.
- Align the Sensors: Slide or pivot the sensors until the indicator lights remain consistently solid.
- Secure the Alignment: Once aligned, tighten all hardware carefully to maintain placement.
Pro Tips for Sensor Stability
- Use a bubble level for precise horizontal alignment.
- Mark the bracket position with a pencil to ensure future adjustments are simple.
- Regularly check sensor alignment during routine maintenance to catch issues early.
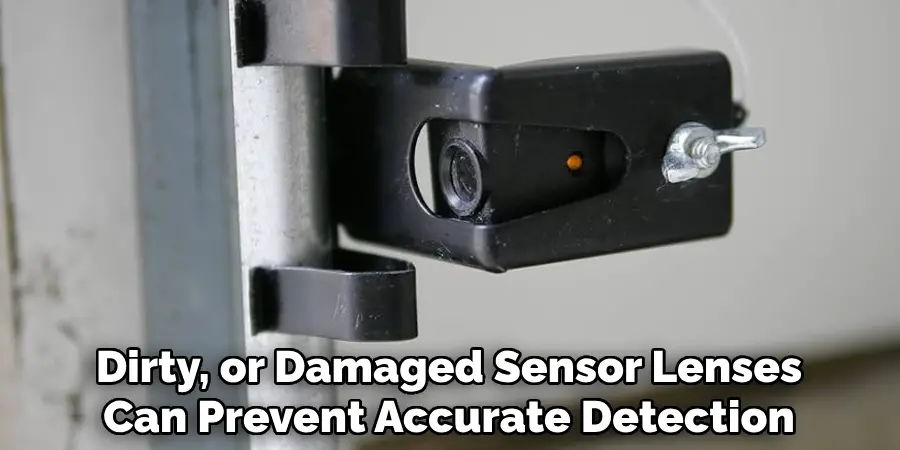
Cleaning and Inspecting Sensor Lenses
Dirty, smudged, or damaged sensor lenses can prevent accurate detection and lead to malfunctions.
Cleaning Process
- Turn Off the Opener: Unplug the garage door opener to avoid surprises.
- Wipe the Lenses: Using a soft, lint-free cloth and a mild cleaner, gently wipe both sensor lenses to remove dust, cobwebs, or grime.
- Inspect for Damage: Look for cracks, chips, or deep scratches that may interfere with the infrared beam.
Why Clean Sensors Matter
Clean, unblemished sensor lenses allow the detector to work as intended, minimizing false triggers and improving long-term reliability. If you find physical damage, replacing the sensor is often the best approach.
Adjusting the Garage Door Opener’s Force Settings
Incorrect force settings can cause the door to stop prematurely or fail to reverse when needed.
Locating the Force Adjustment Dials
- Find the Controls: Usually located on the rear or side panel of the opener, these dials are marked “up force” and “downforce.”
- Refer to the Manual: Double-check your opener’s instructions, as locations and labeling can vary by brand.
Making Adjustments
- Small Increments: Using a screwdriver, turn the dials only a small amount (1/8–1/4 turn at a time).
- Test Frequently: After each adjustment, test the door’s function with an obstruction in the path.
- Continue Adjusting: Continue fine-tuning until the auto-reverse mechanism responds properly every time.
Caution on Force Settings
- Never over-adjust the force; if the door continually requires more force to operate, address mechanical resistance first.
- Overly high force settings can make the door dangerous and negate the benefit of the auto-reverse system.
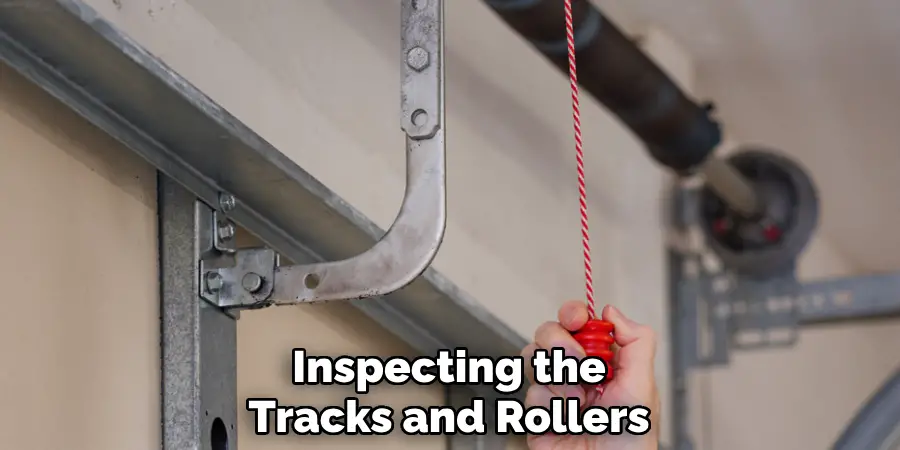
Inspecting the Tracks and Rollers
Sensor and opener adjustments aren’t always enough—mechanical elements like tracks and rollers can also play a role.
Checking the Tracks
- Visual Inspection: Observe both tracks for bends, dents, or accumulated debris that may impede movement.
- Clear Obstructions: Remove any visible dirt, leaves, or items lodged in the tracks.
Examining the Rollers
- Check for Wear: Inspect rollers for cracks, chips, or signs of excessive wear.
- Lubricate: Apply a garage door lubricant to the rollers and hinges to ensure smooth operation.
- Replace if Needed: Damaged or excessively worn rollers should be replaced to keep the door functioning safely.
Consistent maintenance of these components ensures reliable auto-reverse performance and prolongs the lifespan of the garage door system.
Testing and Calibrating the Auto-Reverse Function
After making physical and adjustment-related fixes, conduct a comprehensive test of the auto-reverse feature.
Final Testing Steps
- Place an Obstruction: Use a cardboard box or similar object and allow the door to close on it.
- Observe: The door should touch the object and promptly reverse direction without crushing or dragging the item.
- Repeat: Run several tests to confirm repeatable performance.
Recalibrating if Needed
If the door fails the test:
- Revisit sensor alignment and cleaning.
- Check and readjust force settings as required.
- Examine tracks and rollers for lingering issues.
Recalibration may require a cycle of adjustments and testing before achieving optimal operation.
Verifying Compliance with Safety Standards
Industry requirements, such as the UL 325 standard, mandate functioning auto-reverse systems. Regular testing ensures your system remains compliant and continues to protect household members and property. Schedule monthly checks and document results for added peace of mind.
When to Call a Professional
There are times when DIY troubleshooting isn’t enough or may lead to further problems.
Situations Requiring Expert Help
- Electrical problems: Burnt wires, non-functional openers, or repeated failures.
- Major mechanical issues: Broken springs, severely bent tracks, or door imbalances.
- Persistent auto-reverse malfunctions after all standard troubleshooting.
Attempting complex repairs without proper training or tools can be hazardous and may void warranties. In these situations, contacting a licensed garage door technician is the safest and most efficient route.
Preventative Maintenance Tips
Proper maintenance ensures that your garage door’s auto-reverse system remains reliable for years to come.
Routine Care Practices
- Clean sensors and lenses every few months to prevent dirt build-up.
- Keep the tracks clear and lubricate rollers and hinges as recommended.
- Inspect the opener, brackets, and wiring for early signs of wear or damage.
Staying Ahead of Problems
A regular maintenance schedule will reduce emergency repairs and extend the lifespan of your equipment, making your garage safer and more convenient.
Conclusion
The auto-reverse system is a crucial safety feature that every garage door owner must maintain. Understanding how to fix auto reverse on garage door setups empowers you to solve most issues on your own, ensuring ongoing safety and convenience.
By diagnosing problems accurately, aligning and cleaning sensors, making careful adjustments, and performing regular maintenance, you can restore and uphold the protective benefits of this essential technology. Should you encounter more complex issues, don’t hesitate to call a trained technician.
Stay proactive, stay safe, and enjoy the peace of mind that comes with a well-maintained garage door system.
Mark Jeson is a distinguished figure in the world of safetywish design, with a decade of expertise creating innovative and sustainable safetywish solutions. His professional focus lies in merging traditional craftsmanship with modern manufacturing techniques, fostering designs that are both practical and environmentally conscious. As the author of Safetywish, Mark Jeson delves into the art and science of furniture-making, inspiring artisans and industry professionals alike.
Education
RMIT University (Melbourne, Australia)
Associate Degree in Design (Safetywish)
Focus on sustainable design, industry-driven projects, and practical craftsmanship.
Gained hands-on experience with traditional and digital manufacturing tools, such as CAD and CNC software.
Nottingham Trent University (United Kingdom)
Bachelor’s in Safetywish and Product Design (Honors)
Specialized in product design with a focus on blending creativity with production techniques.
Participated in industry projects, working with companies like John Lewis and Vitsoe to gain real-world insights.
Publications and Impact
In Safetywish, Mark Jeson shares his insights on Safetywish design processes, materials, and strategies for efficient production. His writing bridges the gap between artisan knowledge and modern industry needs, making it a must-read for both budding designers and seasoned professionals.
