
Your Brinks home security system is a critical part of keeping your property and family safe. It helps monitor and secure your home, providing peace of mind day and night. Like any electronic device, the system relies on batteries to function properly. Over time, these batteries can deplete, causing alarms, notifications, or even lapses in the system’s ability to perform at its best.
Learning how to change battery in Brinks home security system is a straightforward task that most homeowners can handle without professional assistance. This guide offers step-by-step instructions for replacing batteries in different components of your system, ensuring uninterrupted protection and optimal performance. By handling this maintenance yourself, you’ll save time and avoid service fees while keeping your security system fully operational.
To begin, ensure you have the correct replacement batteries on hand. Consult your system’s manual or check the existing batteries to confirm the required type. Once you have the right batteries, disarm your system to avoid triggering unnecessary alerts during the process. Carefully open the battery compartment using the appropriate tools if needed, and remove the old batteries. Insert the new ones, ensuring the correct orientation as indicated in the compartment. Finally, close the compartment securely and test the system to confirm that everything is functioning properly.
Why Changing the Battery in Your Brinks Home Security System Matters
The batteries in your Brinks home security system power essential equipment such as control panels, motion sensors, door or window contacts, and backup systems. If these batteries run low or die, it could compromise your home’s safety and leave some functions inoperable. For example, a depleted battery in a motion detector might fail to register activity, while a drained control panel battery could interrupt communication with the monitoring service.
Timely battery replacement ensures that the system functions at full capacity, maintaining the safety measures you depend on. Additionally, avoiding battery depletion prevents unnecessary alerts or malfunctions that may disrupt your daily routines. Knowing how to change battery in Brinks home security system empowers you to stay proactive about system maintenance, ensuring that your home is secure around the clock.
Step-by-Step Guide on How to Change Battery in Brinks Home Security System
Before starting, familiarize yourself with the specific components of your Brinks system. Batteries may vary by model or device type, so refer to your user manual to verify compatibility. Follow these steps to replace batteries effectively.
Step 1: Identify the Component Requiring a Battery Replacement
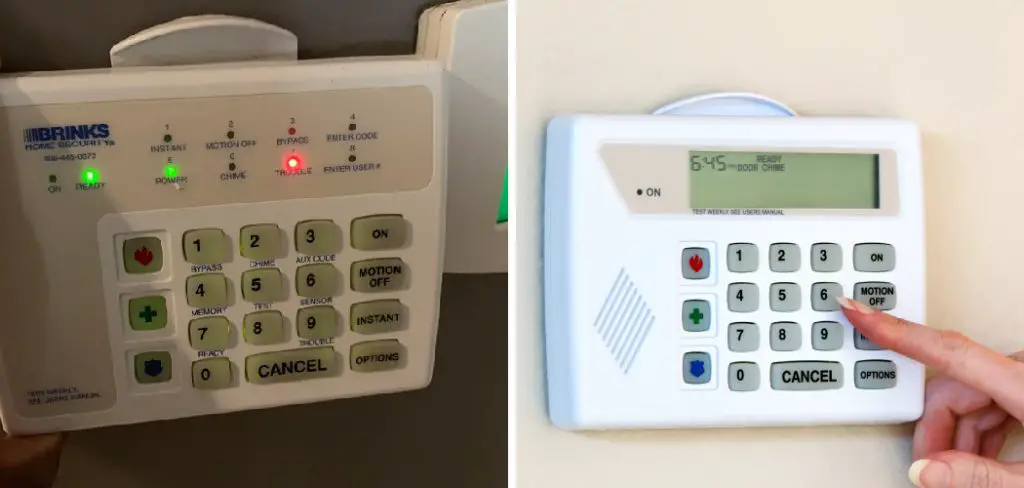
The first step in replacing the battery is identifying which component of your Brinks home security system needs attention. Check the system panel for low-battery notifications, alerts, or error messages.
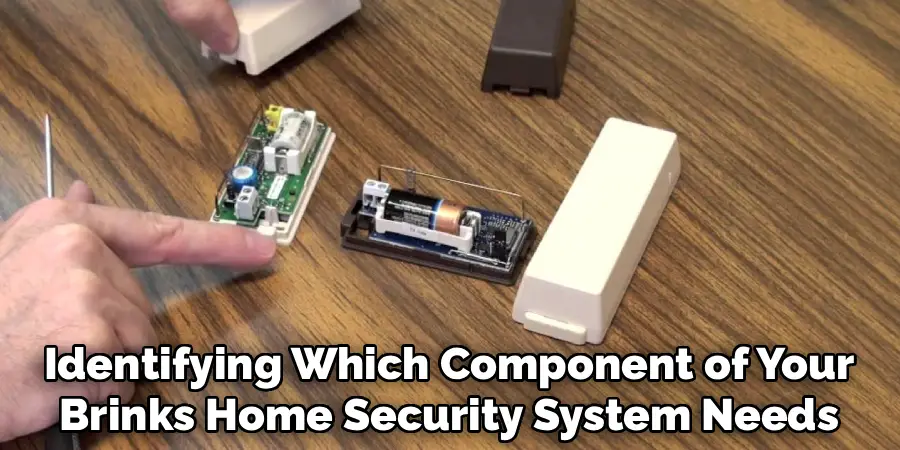
Typically, the display will specify the exact device requiring a replacement, such as a motion sensor, control panel, or window contact.
Step 2: Gather the Required Tools
Once you’ve pinpointed the component, gather the necessary tools for the task. Most Brinks systems only require basic tools, such as a screwdriver, to access the battery compartment. Additionally, ensure you have the correct type of replacement battery. Brinks devices often use AA or AAA batteries, lithium coin batteries, or rechargeable packs, depending on the specific equipment.
Step 3: Disarm the Security System
For safety, disarm your Brinks home security system before removing or replacing any components. Use the control panel to deactivate the system by entering your security code. This prevents accidental alarms during the process and ensures smooth handling of the devices.
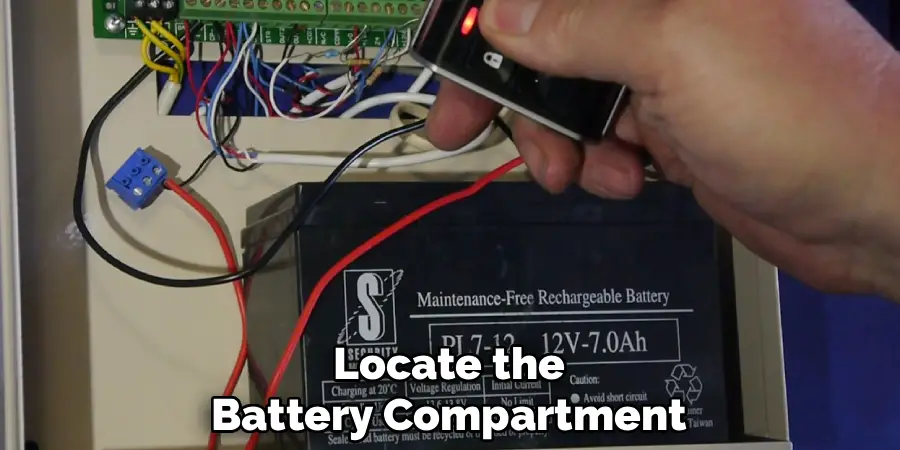
Step 4: Access the Battery Compartment
Locate the battery compartment on the component you’re servicing. For motion detectors or door sensors, this usually involves removing the device cover, which is often secured by screws or a snap-on mechanism. Use a screwdriver to loosen screws if necessary, but avoid over-rotating to prevent damage to the device casing.
Step 5: Remove the Old Battery
Carefully remove the depleted battery from its compartment. Pay attention to the positioning of the battery before taking it out, as this will guide you when inserting the new one.
Check for any signs of corrosion or damage inside the compartment. If corrosion is present, clean it gently using a dry cloth or a specialized cleaning solution to restore optimal functionality.
Step 6: Test the New Battery for Compatibility
Before fully installing the new battery, confirm it matches the specifications outlined in your Brinks user manual. Insert the battery into the compartment temporarily and check whether the device powers up or communicates correctly with the control panel. This step ensures proper fit and function before reassembling the component.
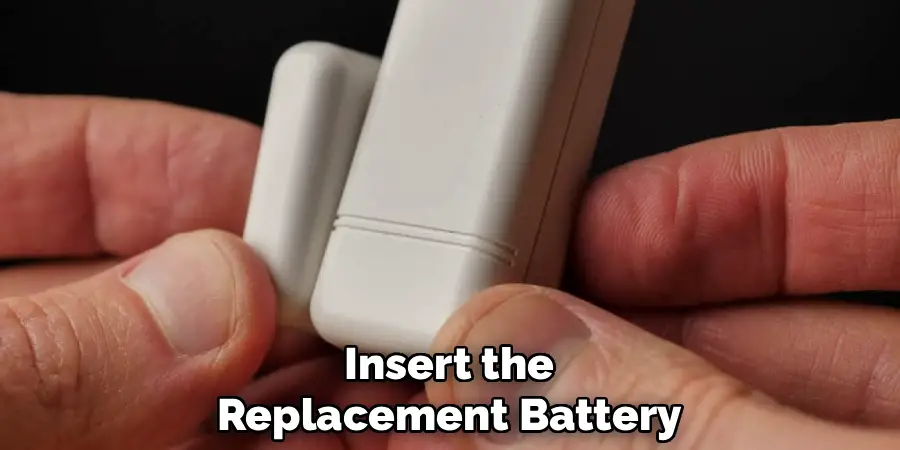
Step 7: Insert the New Battery
Insert the replacement battery into the designated compartment, ensuring correct polarity alignment. Most devices include markings indicating where the positive (+) and negative (-) ends of the battery should align. Push the battery gently into place until it fits snugly. Avoid forcing the battery, as this could damage the compartment.
Step 8: Secure the Battery Compartment
After inserting the new battery, reposition the device cover and secure it tightly using screws or snaps. Double-check that the cover is properly aligned and firmly attached to prevent exposure to external elements or accidental dislodgement. A well-sealed compartment helps maintain the longevity of the replacement battery.
Step 9: Reactivate the Security System
Once all components are reassembled, reactivate the Brinks home security system. Return to the control panel and enter your security code to enable monitoring. Wait for the system to run its diagnostics; it should confirm that the battery replacement was successful and that all devices are functioning normally.
Step 10: Check the System’s Performance
Finally, test the component you serviced to ensure it is working as intended. For instance, if you replaced a motion detector battery, walk through the monitored area to verify that it registers activity correctly. If issues persist, refer to the troubleshooting section of your Brinks user manual or contact customer support for assistance.
Dispose of Used Batteries
Once you have replaced the old batteries, it is important to dispose of them responsibly. Used batteries should never be thrown into regular trash as they contain chemicals that can be harmful to the environment. Instead, take the batteries to a certified battery recycling facility or a local recycling center that accepts household batteries.
Many hardware stores and electronics retailers also provide battery recycling services. Check your local guidelines for proper disposal methods, as regulations may vary by location. By recycling batteries, you contribute to environmental sustainability and help prevent hazardous waste contamination.
Signs of battery failure can often be identified through noticeable changes in performance or physical appearance. One common indication is a reduced capacity to hold a charge, resulting in shorter usage times despite regular charging. Overheating during use or charging is another warning sign, as it can point to internal damage or chemical degradation.
Physical defects, such as swelling, bulging, or leaking, should always be treated as serious issues, as they may signal that the battery is compromised and potentially hazardous. Additionally, unusual odors, corrosion around the terminals, or erratic device functionality can also indicate a failing battery. If any of these signs appear, it is essential to stop using the battery and replace or recycle it in accordance with safety guidelines.
Frequently Asked Questions Section
How often should I change the battery in my Brinks home security system?
Battery replacement frequency depends on the specific components and usage patterns of your Brinks system. Most system components, like door sensors or motion detectors, require new batteries every 1–3 years. Backup battery packs for control panels may have longer lifespans, typically 3–5 years. Monitoring battery performance and replacing them promptly helps avoid system disruptions.
What type of battery does my Brinks home security system use?
The type of battery varies based on the device. Door and window sensors often use lithium coin batteries, while motion detectors may require AA or AAA alkaline batteries. Control panels typically use rechargeable battery packs. Check your user manual or inspect the existing battery for size and type specifications before purchasing replacements.
What should I do if my Brinks system keeps showing a low-battery alert after replacing the battery?
If a low-battery warning persists after installing a new battery, ensure the replacement is correctly aligned with the device’s polarity markings. Additionally, inspect the battery compartment for damage, dirt, or corrosion that may hinder proper connection. Resetting the system through the control panel may also clear residual alerts. If the warning continues, contact Brinks customer support for further assistance.
Is it necessary to replace the backup battery in the control panel?
Yes, the backup battery in your Brinks control panel should be replaced periodically. This battery ensures the system operates during power outages. Failing to replace it could compromise your home’s security when electricity is unavailable. Refer to the manual for specific replacement intervals and guidelines.
Can I replace the batteries in my Brinks system myself, or should I hire a professional?
Replacing batteries in a Brinks home security system is a simple task that most homeowners can handle independently. By following detailed instructions, you can save money and avoid the need for professional assistance. However, if you encounter difficulties or prefer expert help, Brinks offers professional support services for maintenance and repairs.
Conclusion
Maintaining the functionality of your Brinks home security system is essential for keeping your home protected. By learning how to change battery in Brinks home security system, you can proactively address maintenance needs without relying on professional assistance.
Follow this guide to replace batteries efficiently and keep your system running smoothly. Regular battery checks and timely replacements ensure uninterrupted performance, giving you peace of mind that your home is secure. Take charge today—changing batteries is a simple step toward safeguarding your home and loved ones!
Before you begin, gather the necessary tools, such as a screwdriver and the correct replacement batteries specified for your Brinks home security system. Start by disarming the system to prevent any alarms from triggering during the process. Locate the component with the depleted battery, which could be a motion detector, keypad, or door sensor. Carefully open the device using the screwdriver, ensuring not to damage any wires or internal components. Remove the old battery, install the new one, and securely close the device. Finally, test the system to confirm that the replacement was successful and that everything is functioning as expected. Regular maintenance like this keeps your security system reliable and effective.
