
Installing a Genie garage door opener is a straightforward process that can enhance the convenience and security of your home. With the right tools and a step-by-step approach, you can successfully complete the installation without professional assistance.
This guide will walk you through the process of how to install genie garage door opener, ensuring your new garage door opener is installed safely and efficiently. Whether you’re replacing an old opener or setting up a new system, this tutorial will help make the task manageable. Let’s get started!
Benefits of Installing a Genie Garage Door Opener
Installing a Genie garage door opener offers numerous advantages, making it a practical and worthwhile investment for your home. Firstly, Genie openers are renowned for their reliability and durability, ensuring smooth and consistent operation for years to come.
They also feature advanced security mechanisms, such as rolling code technology, which prevents unauthorized access and enhances the safety of your property. Additionally, many Genie models provide quiet operation, an excellent benefit for homes with attached garages where noise could be a concern.
Convenience is another key advantage; with smart technology integration, Genie openers often allow for remote control or app connectivity, enabling you to operate your garage door from virtually anywhere. Lastly, energy efficiency and minimal maintenance requirements make these openers an eco-friendly and hassle-free choice for homeowners.
Tools and Materials You’ll Need
Before starting the installation process, it’s essential to gather all the necessary tools and materials to ensure a smooth workflow. Here’s a list of items you’ll need:
- Genie Garage Door Opener Kit (including all components provided by the manufacturer)
- Screwdriver Set (flathead and Phillips head)
- Power Drill and assorted drill bits
- Socket Wrench Set
- Stepladder
- Measuring Tape
- Pencil or Marker (for marking positions)
- Level (to ensure proper alignment)
- Clamps (to hold parts in place, if necessary)
- Safety Glasses (for eye protection during installation)
Having these tools and materials prepared in advance will save time and help you complete the installation efficiently and safely. Once you have everything ready, you can move on to the next steps.
10 Methods How to Install Genie Garage Door Opener
1. Choose the Correct Genie Opener for Your Door Type
Before you begin installation, it’s important to choose the right Genie garage door opener model based on your door’s size, weight, and construction. Genie offers a variety of models—such as chain drive, belt drive, and screw drive units—each with different lifting capacities.

For example, a standard single-car aluminum door may only need a 1/2 HP unit, while a double wood-paneled door might require a more powerful 3/4 HP model. Additionally, consider smart features like Wi-Fi compatibility and battery backup if you want advanced functionality. Selecting the right model will ensure long-term performance and reduce strain on the motor.
2. Gather All Required Tools and Safety Equipment
Preparation is key. Before starting, gather the necessary tools: a power drill, adjustable wrench, socket set, screwdriver, step ladder, level, tape measure, pliers, and safety glasses. Ensure you have a clear work area and that the power outlet for the opener is accessible.
Genie openers typically come with a detailed manual and all required brackets, hardware, and fasteners, but it’s a good idea to inventory the parts to ensure nothing is missing. Working safely and efficiently requires having everything ready before lifting a single tool.
3. Attach the Rail and Trolley Assembly
Begin the installation by assembling the rail or track, which guides the door’s movement. Genie openers often include a multi-piece rail that snaps or bolts together. Lay the sections flat on the ground and connect them as instructed.
Slide the trolley (the moving carriage) into the rail before attaching the final end pieces, as it must be in place before mounting. Then attach the rail to the motor head. This step forms the structural backbone of the opener system, so ensure all connections are tight and straight to prevent wobbling during operation.
4. Mount the Rail to the Garage Door Header
With the rail assembled, lift it and align the end (opposite the motor) to the header bracket above your garage door. This bracket should be centered over the door and installed into a wall stud or support beam using lag screws. If your Genie kit includes a header bracket, install it about 2 to 6 inches above the top edge of the door when closed.
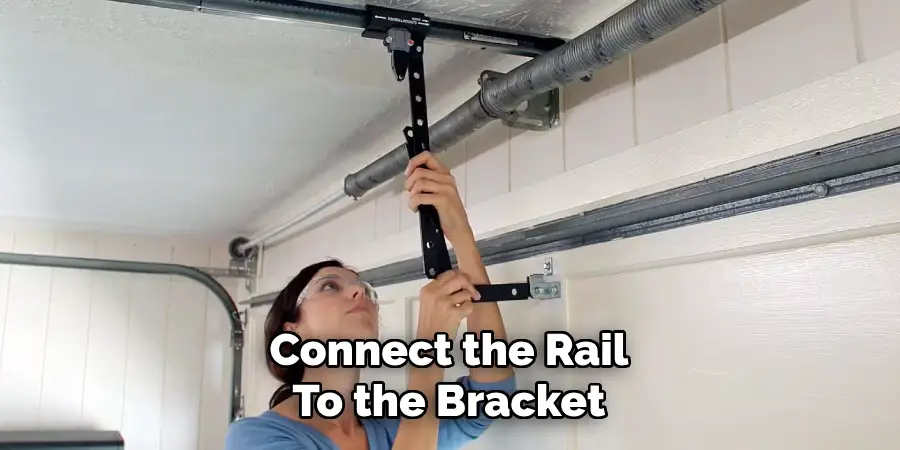
Then, connect the rail to the bracket using the provided clevis pin and fasteners. Use a level to ensure the rail is perfectly horizontal or slightly inclined toward the motor for smooth travel.
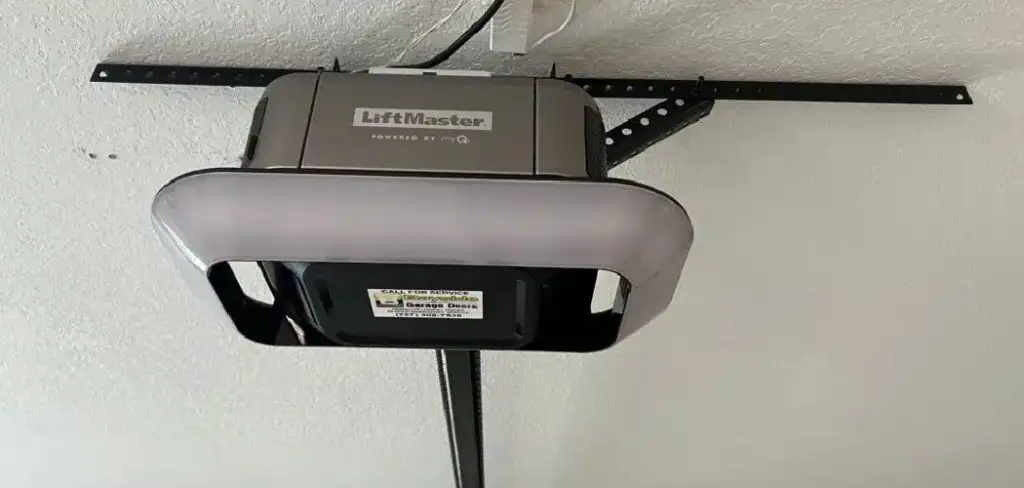
5. Secure the Powerhead to the Ceiling
The motor unit (also called the powerhead) needs to be mounted securely to your garage ceiling using hanging brackets or angle iron, which may be included or purchased separately. The opener should hang above the center of the garage door track, with adequate clearance to avoid obstruction.
Measure carefully and use ceiling joists or install anchor blocks if needed. Use a level to check alignment. Then attach the motor head to the brackets using bolts or carriage screws. A stable and aligned motor ensures the opener runs quietly and efficiently without placing strain on the rail or door.
6. Attach the Door Arm to the Garage Door
Next, connect the door arm to the garage door and the trolley. Genie openers use either a straight or curved door arm, which connects to the top section of your garage door using a bracket. With the door closed, attach the arm to the door bracket and to the trolley using clevis and cotter pins.
If the door arm consists of two parts (straight and curved), adjust them so they form a slight angle when the door is closed. This geometry provides optimal push-pull leverage during operation. Secure all bolts and ensure the arm moves freely without binding.
7. Install the Safety Sensors at the Bottom Rails
Genie garage door openers include infrared safety sensors that detect obstructions in the path of the door, preventing accidents or damage. These sensors must be mounted no more than 6 inches above the floor and directly facing each other on either side of the door.
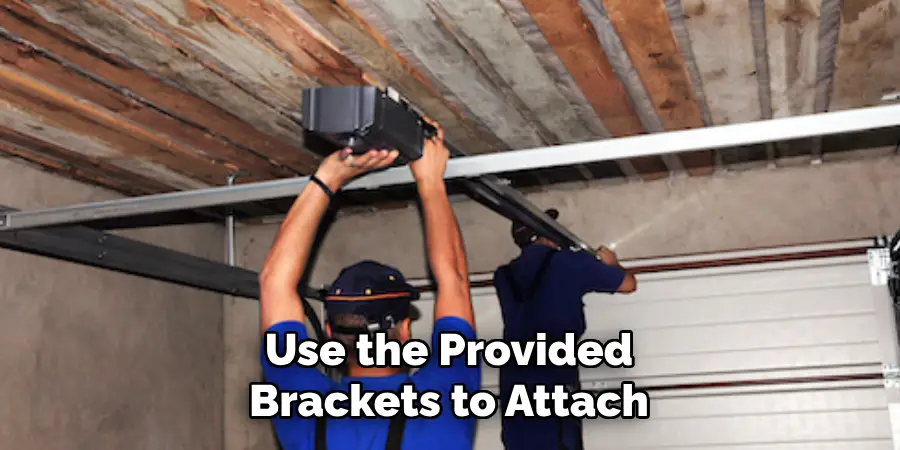
Use the provided brackets to attach them to the garage door tracks or walls. Run the sensor wires along the wall and secure them with clips or staples. Make sure both sensors have a solid LED light when aligned properly. Misaligned or dirty sensors can prevent the door from closing fully.
8. Connect the Wiring and Wall Control Panel
Genie openers include a wall-mounted control panel that allows you to open or close the door from inside the garage. Mount the wall console near the entrance door to the garage, at a convenient height. Run the included low-voltage wire from the panel to the opener’s terminal strip, matching the correct polarity.
Strip the wire ends and insert them into the terminals, tightening them securely. Follow the same process for the safety sensor wires. Neatly tuck or staple the wires to avoid snags. Double-check all connections before powering up the unit.
9. Plug In and Program the Opener
Now it’s time to bring your system to life. Plug the opener into a nearby grounded outlet and power it on. The Genie opener will typically perform a self-diagnostic check, during which the lights may blink. Then, use the “Program” or “Learn” button on the opener motor unit to sync the wall console, remote controls, and wireless keypad.
Follow the instructions in your manual for each device. Most remotes require you to press and hold a button within 30 seconds of activating the Learn mode. Confirm that each device properly opens and closes the door.
10. Adjust Travel Limits and Force Settings
To ensure your garage door opens and closes fully and safely, adjust the travel limits and force sensitivity using the dials or buttons on the opener’s motor unit. Travel limits determine how far the door moves in each direction. If the door doesn’t open all the way or fails to close completely, use the up or down adjustment buttons to recalibrate.

Force settings control how much power the opener uses to move the door. Adjust them if the door reverses unexpectedly or struggles to move. Test the door several times, making small adjustments until the motion is smooth and precise.
Conclusion
Installing a Genie garage door opener is a rewarding and manageable project for any homeowner with basic tools and patience. From preparing the mounting rail and powerhead to connecting sensors and adjusting the controls, each method plays a critical role in the system’s performance and longevity.
Taking time to measure carefully, align components precisely, and test the system thoroughly will ensure your opener runs quietly, safely, and reliably for years to come. Thanks for reading our blog post on how to install genie garage door openerhow to install genie garage door opener! We hope you found it helpful and informative.
Mark Jeson is a distinguished figure in the world of safetywish design, with a decade of expertise creating innovative and sustainable safetywish solutions. His professional focus lies in merging traditional craftsmanship with modern manufacturing techniques, fostering designs that are both practical and environmentally conscious. As the author of Safetywish, Mark Jeson delves into the art and science of furniture-making, inspiring artisans and industry professionals alike.
Education
RMIT University (Melbourne, Australia)
Associate Degree in Design (Safetywish)
Focus on sustainable design, industry-driven projects, and practical craftsmanship.
Gained hands-on experience with traditional and digital manufacturing tools, such as CAD and CNC software.
Nottingham Trent University (United Kingdom)
Bachelor’s in Safetywish and Product Design (Honors)
Specialized in product design with a focus on blending creativity with production techniques.
Participated in industry projects, working with companies like John Lewis and Vitsoe to gain real-world insights.
Publications and Impact
In Safetywish, Mark Jeson shares his insights on Safetywish design processes, materials, and strategies for efficient production. His writing bridges the gap between artisan knowledge and modern industry needs, making it a must-read for both budding designers and seasoned professionals.
