
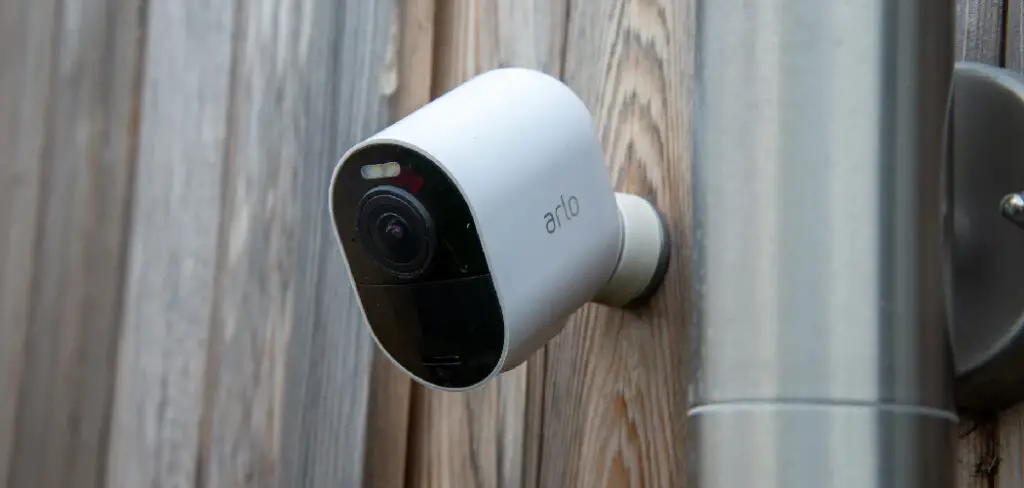
Arlo cameras are a great security option, but what if you want to mount them outside? If so, you’re in luck! This blog post will show you how to mount Arlo camera outside. So, whether you want to place it on a tree or fence, we have the perfect solution for you. Keep reading for more information.
There are many benefits to mounting an Arlo camera outside. For one, it can help you keep an eye on your property. This is especially useful if you have a large yard or live in a rural area. Additionally, mounting an Arlo camera outside can help deter crime. If criminals know that your home is being monitored, they are less likely to attempt a break-in. So, if you’re looking for added security, mounting an Arlo camera outside is a great option.
Why You Should Mount Arlo Camera Outside
Having the ability to monitor your home’s exterior is essential if you want to maximize your peace of mind. Mounting an Arlo camera outside will empower you to keep a watchful eye over your home and its surroundings so that you can gain immediate alerts no matter when or where trouble might be lurking.
Casting a wide net with up-to-date surveillance technology will also increase the security level of not just your property, but also of your friends and family. Arlo cameras give you that extra layer of protection against trespassers or burglars, enabling you to respond quickly and decisively to any situation that arises. Get an Arlo camera today and gain extra assurance that the safety of everyone on your property is in good hands.
Things Youll Need
To mount your Arlo camera outside, you will need the following items:
- An Arlo camera
- A mounting bracket
- Screws
- A drill
- A level
A Stepwise Guide on How to Mount Arlo Camera Outside
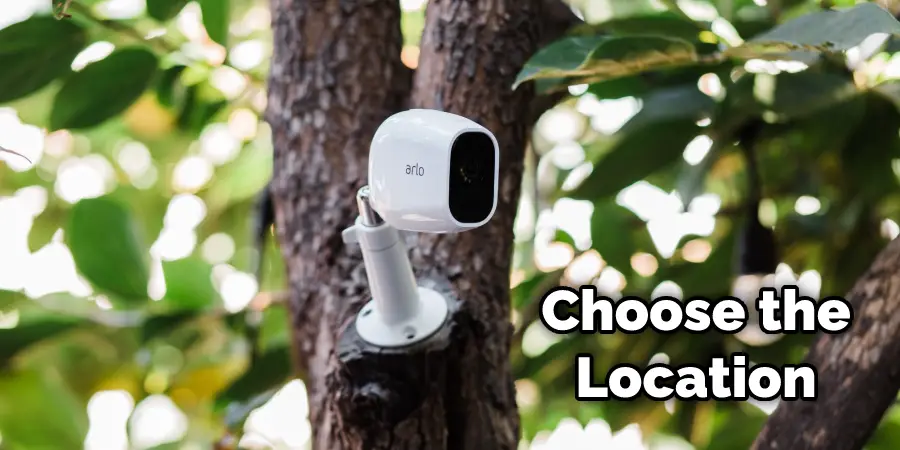
Step 1: Choose the Best Location
There are two ways you can mount your Arlo outside. The first method is choosing a location with perfect lighting and, if possible, somewhere away from the foot traffic. There should be enough space for setting up everything where there’s no interference with human or car movements, but still in a place where you can easily access it when needed.
The second option is mounting the Arlo camera outside on your balcony or patio, which might not be an ideal location to set up for most people due to lack of space and narrow shape.
Step 2: Mount Your Arlo on a Wall
Before mounting the Arlo camera outside, especially against a brick wall or a stone surface, you must check for any possible weather-resistant issues. For example, if your area is humid, your Arlo can get muddled up with rust and corroded within months of use.
Step 3: Mount Your Arlo on the Outdoors
Don’t forget that you will need waterproofing if you are thinking of attaching your outdoor security system to someplace with excess humidity. Waterproofing for Arlo is essential, especially considering how fragile these systems are.
Step 4: Mount Arlo Camera Outdoor on the Trees
The fourth way of mounting your Arlo is on a tree, but it may not be feasible for some people due to safety concerns. How you attach your Arlo to a tree depends on the type of trees you have in your garden.
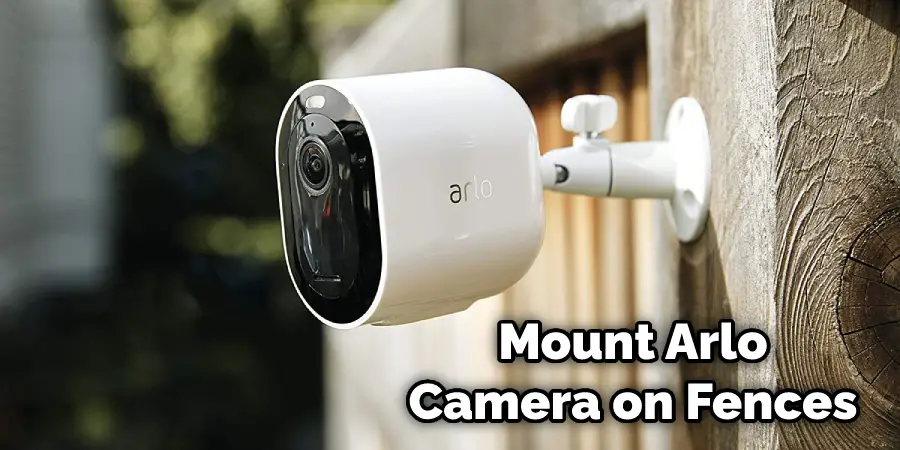
Step 5: Mount Arlo Camera Outdoor on Fences
Another way of mounting is by attaching it on a wooden fence, but like before, this might not work for everyone, thanks to safety concerns. How you will secure your Arlo on a fence depends on the type of fencing material and whether it is made of wood, metal, or plastic.
Step 6: Drill the 3/4 Inch Hole for The Camera
Now that you have all your tools and materials ready, it is time to drill a 3/4-inch hole. If you are not familiar with drilling holes into the concrete, then please be careful as this can damage tools or even break them if you apply too much pressure. Ensure that you are drilling down into the ground and not just sideways before you begin. Use a hammer or mallet to tap the bit through the surface, which should prevent it from slipping off.
Step 7: Assemble Arlo Security Camera Outdoor Housing
Now that you have a 3/4-inch hole for the camera, it is time to assemble the Arlo security camera outside the housing.
1. Fix the base using toggle bolts or screws and tighten using a wrench
The first step is to fix the Arlo Security Camera Base with three toggle bolts and tighten it using a wrench. If you cannot find toggle bolts, then simply use screws instead. Ensure that this is nice and secure before moving on to the next step.
2. Secure the bolt using a wrench and attach the base plate to it
Now that you have attached the toggle bolts use a screwdriver or wrench to secure them further into place. Once they are nice and tight, ensure that they go through to create a good foundation for your bolt.
3. Hold Arlo Camera Cable and Wire Tie together for a clean look
To make it nice and tidy, you should tie up the cables using a wire. Ensure that this is securely tied to reduce any risk of damage or accidents due to hanging cables from the exterior of your house. How you lay these out depends completely on your preference, but it is best to keep the other end of the cable inside your house.
4. Secure Arlo Camera Cable using Wire Ties
Once you have wire-tied the cable, make sure that you attach one end of this cable to the camera mount and ensure that they stay together by creating a strong bond with another wire tie. How you secure this is completely up to you, but make sure that the cable does not come loose over time.
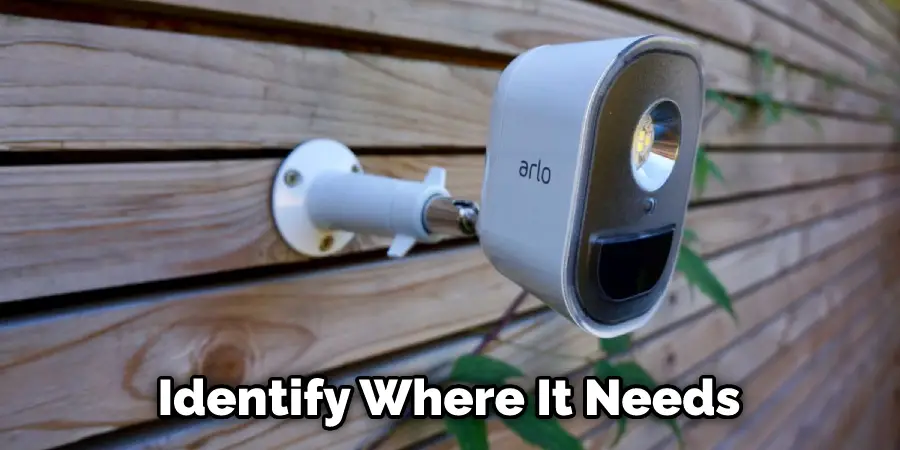
Step 8: Place Arlo Camera With Housing Where It Needs to Be
Before you place the Arlo camera with housing outside, please attach it to the Arlo Mount using a wrench or screwdriver, depending on what mount you have. Now that the camera is attached to the Arlo mount, you can place it on your desired surface and secure it by screwing a single screw into the wall then attaching the Arlo mount to it.
Step 9: How to Connect Arlo Wire-Free Power Cable
Now that you have placed the cable where you need it, it is time to secure it using a screwdriver or wrench, depending on what surface you are attaching to the Arlo power cable. Now simply connect the Arlo Wire-Free Power Cable from Arlo Camera to this bolt and make sure that it is firmly attached before closing off the housing. How you plug it in completely depends on your preference.
Now that you have set up your Arlo Security Cameras outside, it is time to install the Arlo app and start recording footage of your home. How you mount this depends entirely on what type of surface you are attaching it to, so take some time to experiment before completely committing to one location.
Here we will go over the details of each mounting option, what you will need and how to complete each one of how to mount Arlo camera outside.
Considerations When Installing an Arlo Pro Camera Outside
Installing an Arlo Pro camera outside is the best way to monitor your home. It will give you peace of mind knowing that you can keep an eye on your property day or night. The only problem is how to do it without worrying about damaging your investment. However, you can take a few steps when installing your Arlo Pro camera outside to ensure that you are getting the most out of it.
1. Theft Prevention
One of the main reasons you may want to install an Arlo Pro camera outside is to prevent theft. By having a camera watching your property, you can deter thieves from targeting your home. There are a few things you can do to make sure that your camera is as effective as possible in preventing theft:
- Make sure your camera is visible from the street.
- Place your camera in a high-traffic area.
- Point the camera in the direction of the most likely entry points.
2. Versatile Positioning
The Arlo Pro camera’s weather-resistant design is perfect for monitoring your home from all angles. You can mount the camera to a tree or use it as an outdoor surveillance system with the help of a 360° rotating base and magnetic mounts.
- Mount Directly on a tree: Horizontally, vertically, or even around 180° off the base
- Mount with a Wall Mount
- Base Included: Set up in minutes
3. Flexible Viewing Angle
The Arlo Pro camera offers a wide viewing angle, perfect for monitoring a large area. However, you may want to adjust the camera angle depending on your needs. You can do this by adjusting the camera’s position manually or by using the included base.
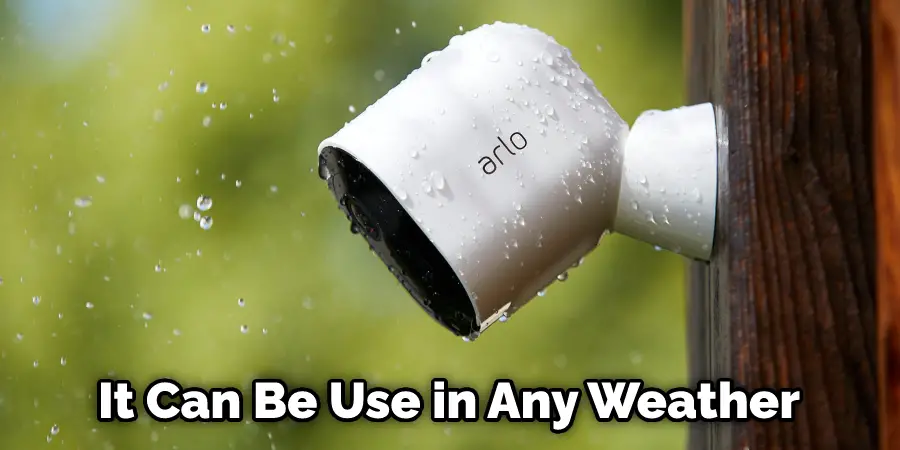
4. Weatherproof Design
The Arlo Pro camera is weatherproof and can be used in all types of weather. However, you may want to consider the temperature when choosing a location for your camera. The camera should not be exposed to direct sunlight or be in an area that is too cold or too hot.
5. Camera Protection
When installing your Arlo Pro camera outside, it’s important to protect it from the elements. The camera is weather-resistant, but you can take a few extra steps to make sure it’s fully protected from the rain, snow, and sun:
- Use the included mount to secure your camera in place.
- Make sure the camera is facing down if it’s raining.
- If you live in a cold climate, make sure to keep the camera covered when it’s not in use.
- Remove the camera completely if you are not using it for an extended period of time.
6. Bird’s Eye View for Surveillance
If you are looking for a way to get an even better view of your property, you may want to consider installing an Arlo Pro camera on a pole. You can use a standard pole or one of the Arlo Pro’s many mounts to get the perfect view. Keep reading for more information about how to mount Arlo camera outside.
Different Mounts You Can Use with the Arlo Pro Serie
1. Arlo Screw Mount
The Arlo screw mount is perfect for attaching your camera to a tree or other structure. It can be attached horizontally, vertically, or even around 180° off the base.
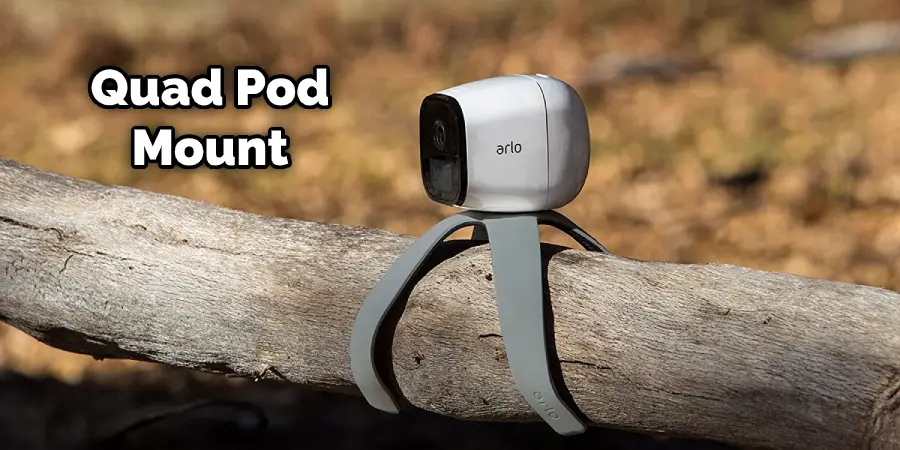
2. Arlo Quad Pod Mount
The Arlo Quad Pod Mount is perfect for attaching your camera to a tree or other structure. It can be attached horizontally, vertically, or even around 180° off the base.
3. Arlo Gooseneck Mount
The Arlo Gooseneck Mount is perfect for attaching your camera to a pole or other structure. The flexible neck of the mount allows you to adjust the camera’s angle to get the ideal view.
If you want to know more about how to mount Arlo camera outside, keep reading.
Best Ways To Mount an Arlo Camera Without Screws
1. Gutter Mounts
There are a few different ways to mount your Arlo camera without screws. One way is to use gutter mounts. Gutter mounts can be attached to the roof of your house and will hold the camera in place without causing any damage.
2. Wrap Mounts
Another way to mount your Arlo camera without screws is by using a wrap mount. The flexible arm of the mounts allows you to attach it around poles, fences, branches, etc.
3. Adhesive Mounts
Adhesive mounts are another way to attach your Arlo camera without using screws. The mounts can be attached to any surface and hold the camera in place without causing any damage.
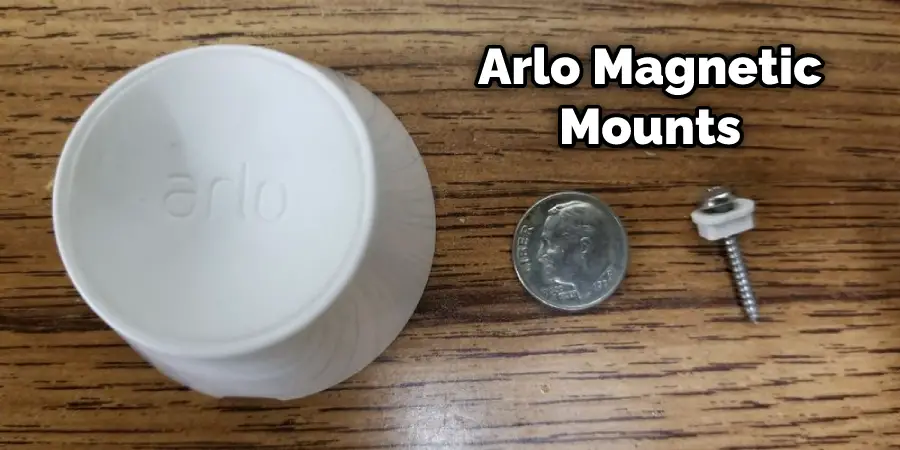
4. Magnetic Mounts
Another way to mount your Arlo camera without screws is by using a magnetic mount. The mount can be attached to any surface and hold the camera in place without causing any damage.
Keep reading for more information about how to mount Arlo camera outside.
You Can Check It Out to: Mount Arlo Pro 3 Camera Outside
Frequently Asked Question
Can Arlo Wall Mounts Be Used Outside?
Yes, Arlo wall mounts can be used outside, but it is important to consider the weather conditions. For example, the camera should not be exposed to direct sunlight or be in a too cold or too hot area.
How Do You Install Arlo Camera on Brick?
The Arlo Pro camera system can be installed on brick very easily. All you need is the Arlo Pro wall mount and a drill. The wall mount can be attached to the brick with the included screws or adhesive strips. The camera can then be attached to the wall mount with the included screw or the built-in magnet.
Are Arlo Magnetic Mounts Secure?
Yes, Arlo magnetic mounts are very secure. The magnets are powerful and will hold the camera in place securely.
You Can Check It Out to Remove Arlo Magnetic Mount
Conclusion
Mount your Arlo camera outside to stay connected and informed. Don’t wait until the last minute! Give yourself time to order, install and enjoy a more secure home or business with an outdoor mounted Arlo Camera. Thanks for reading our post about how to mount Arlo camera outside.
You can also check it out: How to Remove Baby Proofing Adhesive

3 thoughts on “How to Mount Arlo Camera Outside”