
Are you tired of having to manually open and close your garage door every time you come and go? If you have a Honda Pilot, you’re in luck!
Resetting the garage door opener in your Honda Pilot can be a straightforward process when you follow the correct steps. Whether you’re programming it for the first time or need to clear previous settings to sync with a new garage door system, understanding how to reset the opener ensures a seamless and secure connection.
Additionally, knowing how to troubleshoot common issues with your garage door opener can save you time and frustration.
This guide on how to reset honda pilot garage door opener will walk you through the process, making it simple to reprogram your garage door opener and get it working effectively again.
What Are the Benefits of Resetting Your Honda Pilot Garage Door Opener?
Resetting your Honda Pilot garage door opener can provide several benefits, including:
- Clearing Any Previous Settings: If you recently moved into a new home or purchased a new garage door system, resetting your opener will ensure that it is not synced with any previous settings. This helps to prevent potential security issues and ensures a seamless connection between your garage door opener and the new system.
- Troubleshooting Common Issues: Sometimes, the best solution for fixing an issue with your garage door opener is to reset it. This can help resolve problems such as incorrect programming, frequency interference, or malfunctioning sensors.
- Restoring Functionality: If your garage door opener is not responding or seems to be malfunctioning, there are a few steps you can take to restore its functionality. First, check the power source and make sure it is plugged in and receiving power. If the issue persists, try resetting the opener by unplugging it for a few minutes and then plugging it back in.
- Regular Maintenance: To keep your garage door opener running smoothly, it is important to perform regular maintenance. This includes checking and replacing worn-out parts such as batteries, sensors, and remotes. It is also recommended to lubricate moving parts like rollers and hinges to prevent them from becoming stuck or damaged.
What Will You Need?
To perform regular maintenance on your garage door opener, you will need the following tools and materials:
- Screwdriver
- Lubricant spray or oil
- Replacement batteries (if needed)
- Cleaning cloth
Once you have gathered all the necessary items, you can begin the maintenance process.
10 Easy Steps on How to Reset Honda Pilot Garage Door Opener
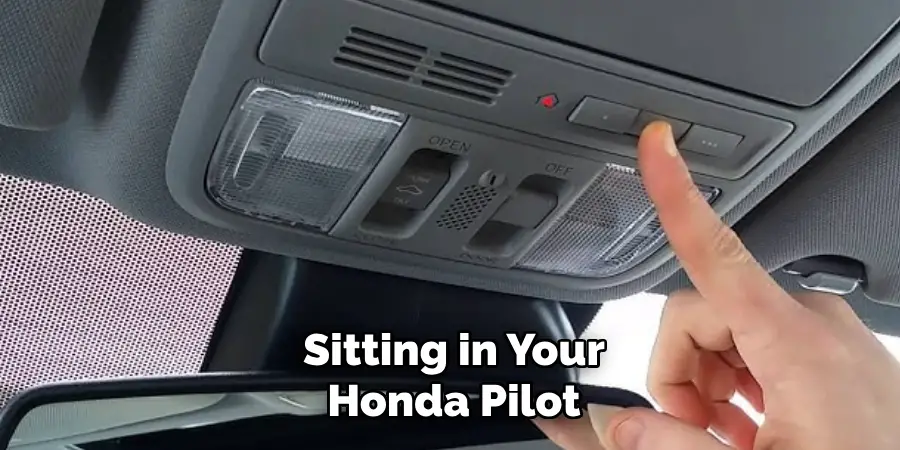
Step 1. Turn on the Vehicle
Start by sitting in your Honda Pilot and ensuring the vehicle is in park. Insert the key into the ignition and turn it to the “on” position, but do not start the engine. This activates the electrical components of the vehicle, including the garage door opener system. Make sure to keep the engine off during this step to conserve fuel and maintain safety while performing the reset process.
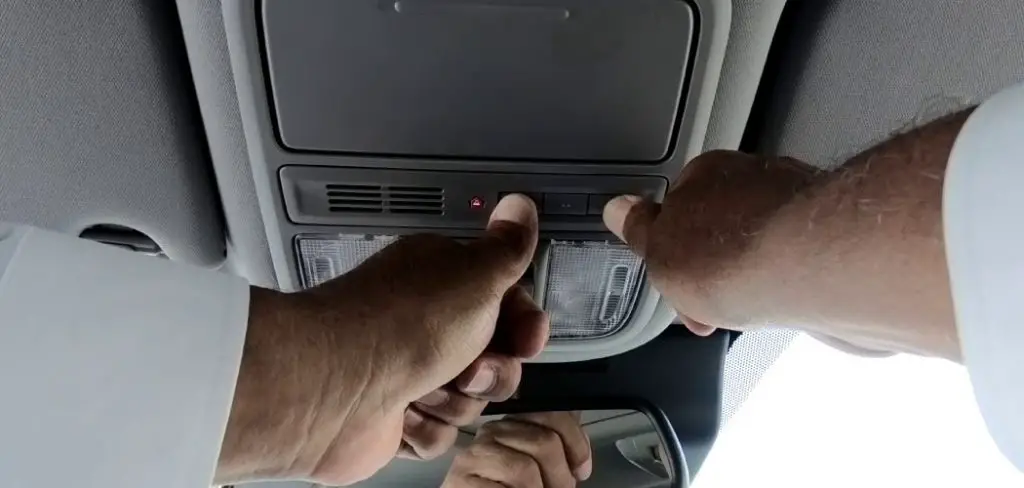
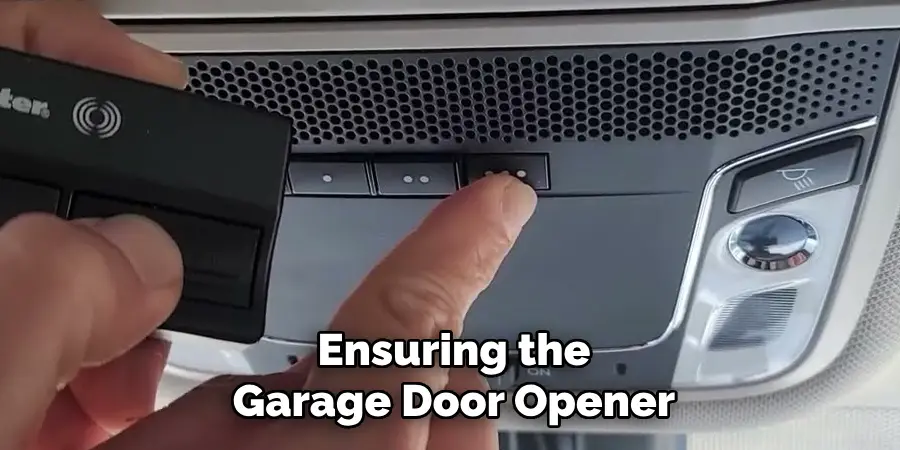
Step 2. Locate the Garage Door Opener Buttons
To reset the garage door opener in your Honda Pilot, start by identifying the buttons on the overhead console inside your vehicle. Typically, there are three buttons arranged in a row, which are part of the HomeLink system. These buttons are used to program and control your garage door. Ensure you are familiar with their placement and labeling, as you will need to use them during the reset process.
Step 3. Press and Hold the Two Outer Buttons
To reset the programming of your garage door opener, press and hold the two outer buttons on the HomeLink panel simultaneously. Hold both buttons until the indicator light begins to flash rapidly, which typically takes about 10-20 seconds. This action will erase any previous settings from the system. Once the light starts flashing, you can release the buttons. The system is now ready to be programmed with a new garage door opener.
Step 4. Prepare the Garage Door Opener Remote
To prepare the garage door opener remote, locate the remote control that currently operates your garage door. Ensure the remote has fresh batteries and is functioning correctly. Stand within a reasonable distance from the garage door opener motor unit, typically within 1 to 2 feet, to ensure proper transmission of the signal. Be ready to press and hold the button on the remote that you wish to program during the next step. Make sure there are no obstructions between the remote and the garage door opener motor.
Step 5. Enter Programming Mode
To enter programming mode, locate the “Learn” or “Program” button on your garage door opener motor unit. This button is usually situated near the antenna wire or light cover and may be labeled for easy identification.
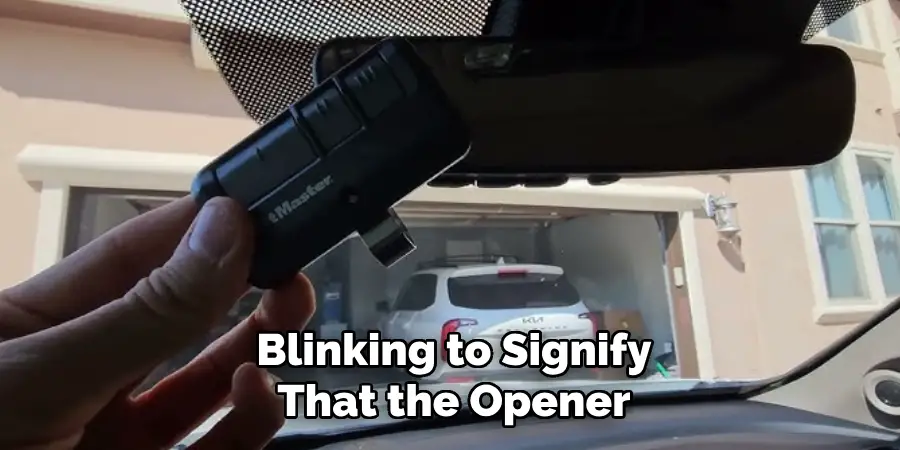
Press and release the “Learn” or “Program” button; in most models, an indicator light will turn on or begin blinking to signify that the opener is now in programming mode. You typically have a limited amount of time—usually 30 seconds—to complete the programming process after activating this mode, so be prepared to act quickly in the next step.
Step 6. Test the Connection
To test the connection, press the button on your remote control or keypad that you just programmed. Observe the garage door opener to see if it responds accordingly. If the door opens or closes as intended, the programming was successful.
If it does not respond, repeat the programming process from the beginning, ensuring that all steps are followed correctly and within the designated time frame. Be sure to check the battery in your remote control or keypad if issues persist, as a weak battery can interfere with the connection.
Step 7. Proceed with Garage Door Opener Controls
Once the garage door opener has been successfully programmed, you can begin using the controls to operate your garage door. Test the system by pressing the buttons on your remote or keypad to open, close, and stop the door as needed. Familiarize yourself with all available functions, such as locking the door or adjusting the speed settings, if your model includes these features.
Always ensure that the area around the garage door is clear of objects and people when operating the opener for safety purposes. Regularly inspect the system to verify that all components are functioning correctly to prevent potential issues or malfunctions.
Step 8. Return to the Vehicle
After ensuring the garage door opener is functioning properly and all safety checks are complete, return to your vehicle. Carefully take note of your surroundings as you exit the garage area, ensuring there are no obstacles or hazards in your path. Once inside your vehicle, confirm that the garage door has closed securely, providing peace of mind before departing.
Step 9. Check the System
Inspect the garage door opener system one final time to ensure everything is operating smoothly. Test the door’s movement by opening and closing it a few times to confirm there are no unusual noises or delays. Verify that all safety features, such as the automatic reversal mechanism and sensor alignment, are functioning as intended. If any issues are identified, address them promptly or consult a professional technician for assistance.
A thorough system check helps maintain the longevity and reliability of your garage door opener.
Step 10. Repeat for Additional Doors
If you have multiple garage doors, repeat the inspection and maintenance process for each one. Consistently applying the steps outlined ensures that all your garage doors are functioning efficiently and safely. Taking the time to properly maintain every door will help reduce repair costs in the long run and provide peace of mind knowing your entire system is in optimal condition.
By following these steps, you can easily reset and reprogram the garage door opener in your Honda Pilot, ensuring seamless operation.
5 Things You Should Avoid
- Skipping the Owner’s Manual: Avoid bypassing the instructions detailed in your Honda Pilot owner’s manual. The manual provides specific steps and safety guidelines that are essential for correctly resetting the garage door opener. Ignoring these details could result in improper programming or even damage to the system.
- Neglecting to Clear the Memory First: Before resetting, it’s critical to clear the memory of the garage door opener settings. Attempting to reset without doing this can interfere with the reprogramming process and lead to operational issues.
- Using the Wrong Frequency or Remote: Not all garage door openers are compatible with every vehicle system. Ensure that the garage door opener you are pairing uses a frequency that matches your Honda Pilot’s system to avoid any connection problems.
- Pressing Buttons Randomly: Avoid randomly pressing buttons on your garage door opener or in your vehicle. This can lead to unintentional programming, causing your system to malfunction or operate incorrectly.
- Disregarding Safety Precautions: Always prioritize safety during the reset process. Failing to heed precautions—such as ensuring other vehicles, people, or objects are clear of the garage door—could result in accidents or damage during operation testing.
Conclusion
How to reset honda pilot garage door opener is a straightforward process when approached with the correct steps and precautions.
By following the outlined guidelines, such as erasing old codes, carefully reprogramming the device, and avoiding common errors, you can ensure the system functions efficiently. Always prioritize safety and double-check the programming to prevent malfunctions.
With patience and attention to detail, your Honda Pilot’s garage door opener will be reset and ready for reliable use.
Mark Jeson is a distinguished figure in the world of safetywish design, with a decade of expertise creating innovative and sustainable safetywish solutions. His professional focus lies in merging traditional craftsmanship with modern manufacturing techniques, fostering designs that are both practical and environmentally conscious. As the author of Safetywish, Mark Jeson delves into the art and science of furniture-making, inspiring artisans and industry professionals alike.
Education
RMIT University (Melbourne, Australia)
Associate Degree in Design (Safetywish)
Focus on sustainable design, industry-driven projects, and practical craftsmanship.
Gained hands-on experience with traditional and digital manufacturing tools, such as CAD and CNC software.
Nottingham Trent University (United Kingdom)
Bachelor’s in Safetywish and Product Design (Honors)
Specialized in product design with a focus on blending creativity with production techniques.
Participated in industry projects, working with companies like John Lewis and Vitsoe to gain real-world insights.
Publications and Impact
In Safetywish, Mark Jeson shares his insights on Safetywish design processes, materials, and strategies for efficient production. His writing bridges the gap between artisan knowledge and modern industry needs, making it a must-read for both budding designers and seasoned professionals.
