
Modern homes and offices are embracing automation for greater convenience, energy efficiency, and enhanced control. Lutron Motion Sensors have become popular for adding intelligence to lighting systems, making spaces more comfortable while saving power.
However, getting the most out of these devices depends on knowing how to program lutron motion sensor to fit your specific needs. This guide breaks down everything you need to know—from understanding how these sensors work, to step-by-step programming instructions, troubleshooting, and advanced features. By the end, you’ll be equipped to fully customize your Lutron Motion Sensor for optimal performance.
Overview of Lutron Motion Sensors
What Are Lutron Motion Sensors?
Lutron Motion Sensors are electronic devices that detect movement using passive infrared (PIR) technology. They are used to automatically switch lights on and off, improving convenience and minimizing unnecessary energy usage. Positioned in areas like hallways, bathrooms, or storage rooms, these sensors respond to motion, making hands-free lighting effortless.
Key Features of the Sensor
Lutron’s motion sensors are highly configurable. They let you tailor sensitivity levels, set timers for how long lights remain on after motion stops, and, on certain models, enable daylight sensing—preventing lights from turning on when enough natural light is present. For users with smart homes, some Lutron Motion Sensors can be integrated into automation systems, supporting advanced actions and remote configuration.
Why Programming Matters
Programming is about more than just switching settings. By customizing how your motion sensor behaves, you gain more efficiency and individualized convenience. Busy spaces might need fast response and quick shutoff; quieter areas could use a lower sensitivity and longer timers. A properly programmed sensor cuts waste, adapts to your schedule, and ensures reliable operation. For anyone wondering how to program lutron motion sensor for their unique situation, mastering these settings is the key to unlocking every benefit Lutron tech offers.
Preparations Before Programming
Tools and Resources Needed
Before you begin, gather your Lutron Motion Sensor’s user manual and the required tools—often a small screwdriver. Download any relevant smartphone apps, charge your device if needed, and, for models with app or smart home integration, ensure you have a Wi-Fi connection or compatible smart home bridge.
Ensuring a Good Setup
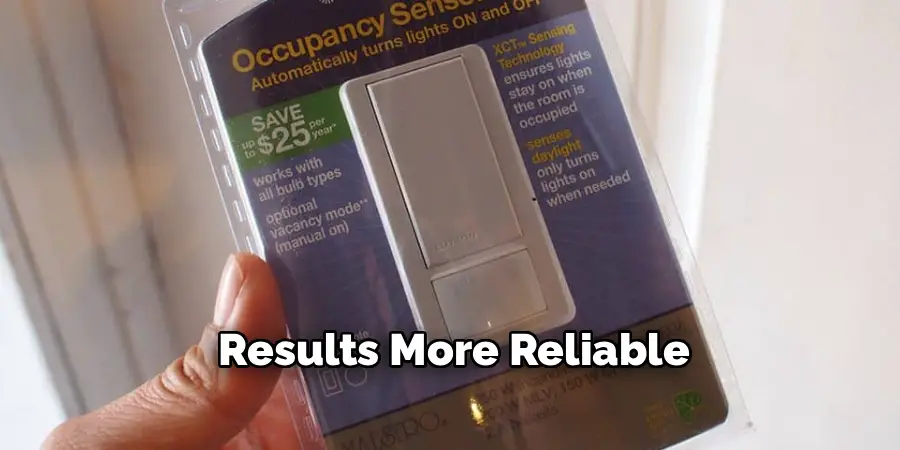
Start by confirming your sensor is installed securely and positioned according to the manufacturer’s instructions. Remove anything that may block the sensor’s view. Temporarily test the sensor by walking through its detection zone. Verify it is powered and recognized by any controlling app or hub. A careful setup now makes programming smoother and results more reliable.
How to Program Lutron Motion Sensor: Step-by-Step Guide
Accessing the Programming Mode
Most Lutron Motion Sensors can be programmed through onboard controls or a mobile app. For physical units, press and hold the setup button until the indicator light starts flashing, signaling programming mode. If using an app, open your app, select the sensor, and choose the configuration or settings menu. Always refer to your model’s manual for exact instructions.
Adjusting Motion Sensitivity and Range
Fine-tuning sensitivity is crucial for effectiveness. Manually, this is done via a dial or switch inside the sensor housing. High-sensitivity settings capture even small movements, ideal for areas requiring rapid response. Lower sensitivity helps avoid false triggers from pets or drafts. In app-controlled models, you may be able to specify zones or detection thresholds. Make incremental adjustments and test until the sensor behaves as you need.
Configuring Time Delay and Lighting Timer
Set the time delay so your lights stay on for just the right amount of time after movement is detected—commonly ranging from one minute to half an hour. Shorter times suit active, pass-through spaces; longer delays are better for places where people may linger. Choose your interval using the onboard dial, digital controls, or within your app’s settings.
Integrating the Sensor with Other Devices
For those with a Lutron bridge or smart home hub, integrating the sensor lets you create complex routines. Group your sensor with specific lights, or set up scenes; for instance, trigger overhead, task, and accent lights together when you walk in. Within your smart home app, follow prompts to add or assign sensors to these groups and customize their interactions.
Programming Custom Settings for Specific Needs
Creating Schedules
Some sensors and control apps allow scheduling, meaning you can deactivate motion control at certain times (like during daylight hours or while no one is home). In the app, set periods when you want the sensor active. This prevents unnecessary light activation and allows your system to adapt to your daily routines automatically.
Setting Up Zones
If your sensor and app support zoning, configure them for spaces with distinct activity areas. This advanced programming technique lets you define how the sensor responds in different parts of a larger room, so lighting matches real-world usage rather than treating the whole area as uniform.
Troubleshooting Programming Challenges
Resolving Connectivity Issues
When programming through an app or hub, connectivity problems may occur. Confirm your Wi-Fi and bridge are working, restart the app, and check for firmware updates. If the sensor doesn’t appear or settings don’t save, try resetting both the sensor and app connection as per manufacturer instructions.
Restoring Factory Settings
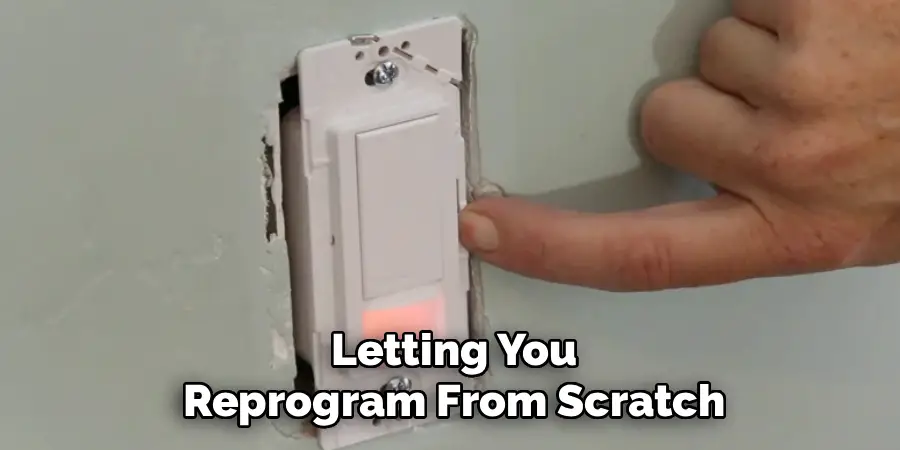
If the sensor becomes unresponsive or is being moved, a full reset may help. For most devices, hold the reset button (or follow an app-based reset flow) until the indicator blinks in a special pattern. This erases previous settings, letting you reprogram from scratch.
Advanced Features for Tech Enthusiasts
For those who are more tech-savvy and want to unlock the full potential of their smart sensor, there are advanced features that can be accessed through developer modes or third-party apps. These features may include:
- Customizable triggers for specific actions (e.g. turning on a light when motion is detected)
- Integration with other smart home devices and platforms
- Data logging and analysis for deeper insights into daily routines and usage patterns
However, it’s important to note that accessing these advanced features may require technical knowledge and could potentially void the warranty of the device. It’s always recommended to thoroughly research and understand the risks before attempting any modifications.
Safety Precautions During Programming
When working with programmable devices like smart home products, it’s important to keep safety in mind. Here are some precautions to take when programming your smart home device:
- Always read the manual and follow manufacturer instructions carefully.
- Unplug the device before starting any modifications or programming.
- Use caution when handling electrical components and make sure to protect yourself from electric shocks.
- Avoid using damaged or faulty equipment.
- Keep children and pets away from any open electrical outlets or wiring.
- Don’t overload circuits or exceed the recommended voltage for your device.
- If you’re unsure about how to program your device safely, consult a professional technician.
It’s also a good idea to regularly check and update your device’s software and firmware to ensure optimal performance and security. This can help prevent potential malfunctions or vulnerabilities that could compromise your device.
Frequently Asked Questions
How Do I Reset My Sensor to Factory Defaults?
To reset your sensor, locate the reset button on the device. Press and hold it down for approximately 10 seconds until the device indicator flashes. This will restore all factory default settings. Refer to your specific sensor model’s manual for detailed instructions.
Can I Program the Sensor Without Turning Off the Circuit Power?
It is highly recommended to always turn off circuit power before programming your sensor. This ensures your safety and protects the device from potential damage due to electrical hazards.
What Should I Do If the Sensor Is Not Responding?
If your sensor is unresponsive, check the power supply and ensure all connections are secure. If the issue persists, reset the sensor to factory settings or contact a qualified technician for assistance.
Is Professional Installation Necessary for All Sensors?
While some sensors are designed for DIY installation, others, particularly hardwired or complex systems, may require professional installation to ensure proper setup and safety. Always refer to the product manual to determine the level of expertise required.
How Often Should I Test My Sensor Functionality?
It is recommended to test your sensor regularly, ideally every few months, to confirm it is working correctly and detecting as intended. Regular testing helps maintain optimal performance and identify any issues early.

Conclusion
Understanding how to program lutron motion sensor gives you direct control over your lighting environment, combining technology, comfort, and energy savings. With the right setup and programming tactics, you’ll tailor how your spaces respond to activity—creating a seamless, hands-free, and efficient lighting experience. Whether you’re working with basic manual sensors or app-integrated smart devices, careful programming unlocks the full potential of your Lutron system. Take a few moments to review your needs, follow the detailed steps above, and enjoy all the benefits that adaptive, responsive lighting has to offer.

Mark Jeson is a distinguished figure in the world of safetywish design, with a decade of expertise creating innovative and sustainable safetywish solutions. His professional focus lies in merging traditional craftsmanship with modern manufacturing techniques, fostering designs that are both practical and environmentally conscious. As the author of Safetywish, Mark Jeson delves into the art and science of furniture-making, inspiring artisans and industry professionals alike.
Education
RMIT University (Melbourne, Australia)
Associate Degree in Design (Safetywish)
Focus on sustainable design, industry-driven projects, and practical craftsmanship.
Gained hands-on experience with traditional and digital manufacturing tools, such as CAD and CNC software.
Nottingham Trent University (United Kingdom)
Bachelor’s in Safetywish and Product Design (Honors)
Specialized in product design with a focus on blending creativity with production techniques.
Participated in industry projects, working with companies like John Lewis and Vitsoe to gain real-world insights.
Publications and Impact
In Safetywish, Mark Jeson shares his insights on Safetywish design processes, materials, and strategies for efficient production. His writing bridges the gap between artisan knowledge and modern industry needs, making it a must-read for both budding designers and seasoned professionals.
