
Securing chicken wire to wood is a straightforward yet essential task for various projects, such as building animal enclosures, garden fencing, or DIY home improvements. Properly attaching the chicken wire ensures durability, stability, and safety in your construction. This guide will walk you through the steps of how to secure chicken wire to wood.
Purpose of Using Chicken Wire
Chicken wire, also known as poultry netting, is a versatile and lightweight material commonly used for a variety of applications. Its primary purpose is to create barriers that contain or protect animals, such as chickens, rabbits, and other small livestock. Beyond animal enclosures, chicken wire is ideal for protecting gardens by keeping pests away from plants and crops. It’s also frequently used in DIY projects, including creating trellises, reinforcing insulation, or crafting decorative features. The hexagonal pattern of chicken wire offers both strength and flexibility, making it an excellent choice for projects that require durability without adding excessive weight.
Tools and Materials You’ll Need
To successfully work with chicken wire, having the right tools and materials is essential. Here is a list of items that will make your project easier and more efficient:
- Chicken Wire: Choose the appropriate gauge and mesh size for your specific project.
- Wire Cutters: To effortlessly cut through the wire without fraying or damaging it.
- Gloves: Protect your hands from sharp edges during handling and installation.
- Staple Gun or Staples: Essential for securely attaching the wire to wooden structures like frames or fences.
- Measuring Tape: Ensure accurate measurements for cutting and fitting the chicken wire.
- Pliers: Used for bending, twisting, or securing sections of wire as needed.
- Safety Goggles: Protect your eyes from stray wires or sharp edges during cutting or adjustment.
- Ties or Fasteners: To hold the wire securely in place, especially on metal structures or poles.
Having all the necessary tools and materials on hand before starting will save time and help ensure that the project proceeds smoothly.
10 Methods How to Secure Chicken Wire to Wood
Staple Gun Method (Manual or Pneumatic)
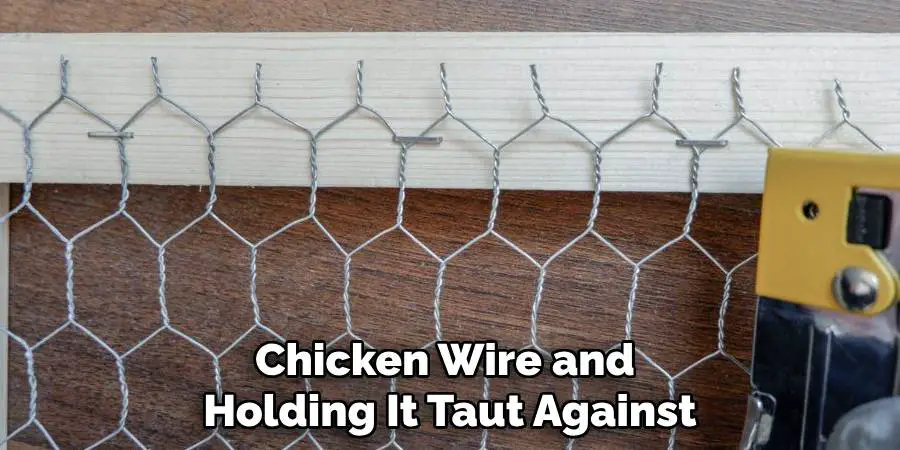
One of the most common and efficient ways to attach chicken wire to wood is by using a staple gun. Manual staple guns are excellent for small-scale jobs like garden boxes or temporary fencing, while pneumatic or electric staple guns offer power and speed for larger structures like chicken coops or garden fences. Begin by rolling out the chicken wire and holding it taut against the wood. Start at one end and staple every few inches, ensuring that the mesh remains flat and tensioned. Reinforce the edges with extra staples to prevent curling or sagging over time. If you’re using thin wood, ensure your staple length doesn’t poke through the back.
Using U-Nails or Fencing Staples
U-nails (also called fencing staples) are curved, heavy-duty nails designed specifically to secure wire fencing to wooden posts. To use them, place the chicken wire flush against the wood and hammer the U-nails over the wire strands into the wood. These nails are best for thicker wooden posts and frames, especially in outdoor fencing where long-term strength is needed. Space the U-nails about every 6 to 12 inches along the top and bottom of the wire. For corners or high-tension areas, use more nails. While this method takes more physical effort than a staple gun, it’s highly secure and weather-resistant.
Screws and Washers Method
For an extra-secure and easily removable fastening method, consider using screws and washers. Position the chicken wire where you want it, and use a power drill to screw wood screws through large washers and into the wood. The washer presses down on the wire, holding it firmly in place without cutting or damaging it. This method is ideal for projects where you may want to remove or adjust the wire later. It also provides a stronger grip than staples alone, making it excellent for high-stress areas or where animals may push against the wire.
Wood Stripping or Battening
To increase the durability and neatness of your chicken wire attachment, use wooden strips (also called battens or furring strips) to sandwich the wire between two pieces of wood. After stretching the wire across your frame, lay a strip of wood on top of it and screw or nail the strip into place. This not only hides the sharp wire edges but also firmly secures the mesh. It’s a visually appealing method often used in coop doors, garden gates, and trellis panels. This method reduces fraying and ensures long-term tension retention.
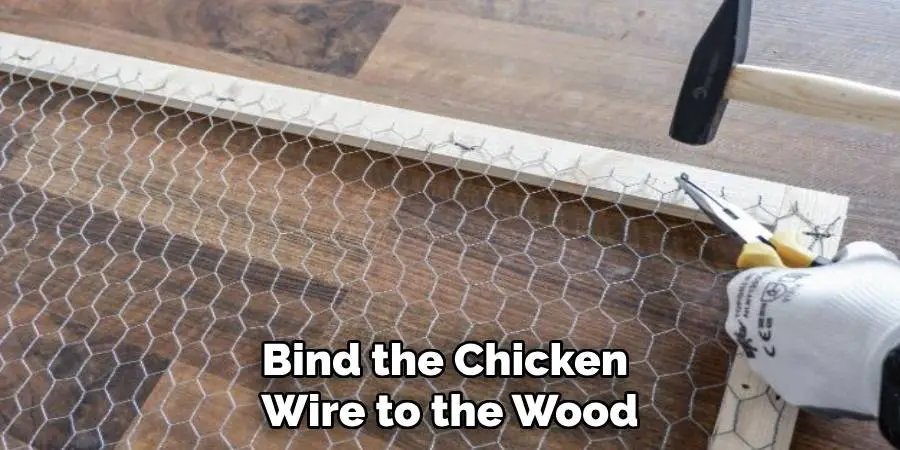
Pre-Drilled Holes with Wire Ties
If you’re using treated or hard wood that makes hammering or stapling difficult, you can pre-drill small holes and loop galvanized wire or zip ties through the holes to bind the chicken wire to the wood. This method is helpful for custom applications where flexibility is needed. It also allows for easy replacement or repair of sections later on. Use pliers to twist the wire ties snugly against the mesh and frame, and snip off excess ends for a clean finish.
Use a Wire Tensioning Tool or Fence Stretcher
Before fastening the chicken wire to the wood, it’s crucial to stretch it taut. Loose wire sags over time, reducing effectiveness and appearance. A fence stretcher or tensioning tool helps pull the mesh evenly across your structure. Once tensioned, secure the wire starting from the center and working outward using staples, U-nails, or screws and washers. This method minimizes wrinkles or uneven pull in the mesh and ensures the wire holds its shape for years. Tensioning tools are especially useful for long fence runs or large enclosures.
Roofing Nails for Temporary Fixes
In temporary or low-load applications, such as protecting seedlings or covering compost bins, roofing nails can serve as a quick attachment method. Their large, flat heads press against the mesh and hold it in place. Simply position the chicken wire, and drive the nails in using a hammer. This method isn’t as secure as staples or screws, but it works well for lightweight or non-permanent uses. It’s also easy to remove or relocate, which is useful for seasonal applications.
Use Construction Adhesive in Low-Stress Indoor Projects
In some indoor projects or decorative applications, such as art frames, small garden planters, or faux window screens, you can use construction adhesive or a strong bonding glue to attach chicken wire to wood. Apply a bead of adhesive along the wood frame and press the mesh into it. Let it cure according to the adhesive’s instructions. While this method won’t work for load-bearing or outdoor fencing, it’s an elegant solution for projects where aesthetics matter and physical stress on the wire is minimal.
Combination Method for Maximum Security
For maximum durability—especially in outdoor or livestock applications—combine multiple fastening methods. For instance, start with a staple gun to secure the chicken wire quickly, then reinforce it with U-nails or wood strips along the top and bottom. This layered approach prevents sagging and strengthens the fence against pushing or pulling forces. It also adds redundancy; if one fastener fails, others maintain security. Combination methods are ideal for areas exposed to weather or animal contact.

Secure the Bottom Edge to Prevent Lifting or Digging
Finally, securing the bottom of the chicken wire is just as important as the top. For fences or animal enclosures, unfastened bottom edges can be lifted or dug under by animals. Secure the bottom using stakes, burying the mesh underground, or folding it outward in an “apron” style and staking it down. U-nails or garden staples can be used to fix the mesh flat to the soil surface. This approach is critical for chicken coops, rabbit runs, or garden borders where small animals may attempt to escape or enter.
Maintenance and Upkeep
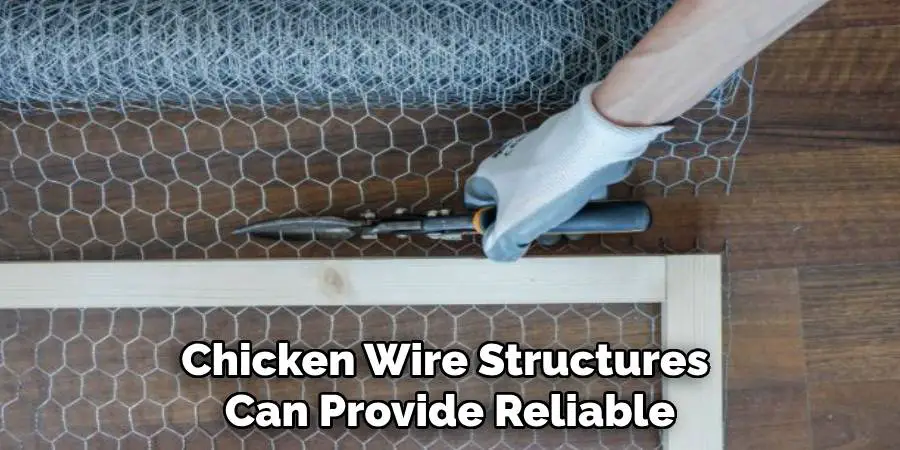
Proper maintenance of chicken wire installations ensures their effectiveness and prolongs their lifespan. Regularly inspect the entire structure for signs of wear, such as rust, broken wires, or loose fastenings. Repair any damage promptly to prevent further deterioration and maintain the strength of the barrier. Clean the wire periodically to remove dirt, debris, and vegetation, which can contribute to rusting or make the enclosure harder to monitor. If the wire is buried, check the ground regularly for signs of digging or shifting that may expose the edges. Reapply stakes or secure fastenings as necessary to keep the installation tight and in place. With consistent upkeep, chicken wire structures can provide reliable protection for years.
Conclusion
Properly securing chicken wire to wood is a task that balances practicality, durability, and sometimes aesthetics. Depending on the scale and purpose of your project, different methods can be employed individually or in combination for best results. Whether you’re building a fortress-like chicken run or a charming garden trellis, choosing the right technique ensures your structure stands strong against time, weather, and unwanted visitors. By understanding and implementing these ten methods, you not only protect your project but also gain the confidence and skill to tackle more complex fencing and framing tasks. Thanks for reading our blog post on how to secure chicken wire to wood! We hope you found it helpful and informative.
Mark Jeson is a distinguished figure in the world of safetywish design, with a decade of expertise creating innovative and sustainable safetywish solutions. His professional focus lies in merging traditional craftsmanship with modern manufacturing techniques, fostering designs that are both practical and environmentally conscious. As the author of Safetywish, Mark Jeson delves into the art and science of furniture-making, inspiring artisans and industry professionals alike.
Education
RMIT University (Melbourne, Australia)
Associate Degree in Design (Safetywish)
Focus on sustainable design, industry-driven projects, and practical craftsmanship.
Gained hands-on experience with traditional and digital manufacturing tools, such as CAD and CNC software.
Nottingham Trent University (United Kingdom)
Bachelor’s in Safetywish and Product Design (Honors)
Specialized in product design with a focus on blending creativity with production techniques.
Participated in industry projects, working with companies like John Lewis and Vitsoe to gain real-world insights.
Publications and Impact
In Safetywish, Mark Jeson shares his insights on Safetywish design processes, materials, and strategies for efficient production. His writing bridges the gap between artisan knowledge and modern industry needs, making it a must-read for both budding designers and seasoned professionals.
