
Introduction
Genie garage door openers are reliable workhorses that provide years of dependable service, but over time, they may require force adjustments to maintain optimal performance and safety. When your garage door struggles to open completely, reverses unexpectedly, or creates excessive noise during operation, improper force settings are often the culprit. These issues not only create daily inconveniences but can also pose serious safety risks to your family and property.

Learning how to adjust genie garage door opener force adjustment empowers you to restore your garage door’s smooth operation while ensuring it meets current safety standards. Modern Genie openers include sophisticated safety features that automatically reverse the door when it encounters resistance, protecting people and objects from potential harm. However, these safety mechanisms only work effectively when force settings are properly calibrated.
This comprehensive guide breaks down the adjustment process into simple, manageable steps that most homeowners can complete safely with basic tools. Proper force adjustment ensures your garage door opens and closes with just the right amount of power – enough to lift the door smoothly but not so much that it becomes dangerous or damages your opener’s motor over time.
Why Adjusting Your Genie Garage Door Opener Force Settings Matters
Proper force adjustment is crucial for both safety and longevity of your garage door system. Incorrect settings can cause the door to slam shut with dangerous force or fail to reverse when it encounters an obstruction, potentially causing serious injury or property damage. The Consumer Product Safety Commission requires all garage door openers manufactured after 1993 to include automatic reversal systems, but these only function correctly when force settings are properly calibrated.
Beyond safety concerns, improper force settings accelerate wear on your opener’s motor and drive components. Excessive force strains the motor unnecessarily, while insufficient force causes the opener to work harder than designed, leading to premature failure and costly repairs.
Step-by-Step Guide: How to Adjust Genie Garage Door Opener Force Adjustment
Step 1: Locate the Force Adjustment Controls on Your Genie Opener
Begin by identifying the force adjustment controls on your Genie garage door opener motor unit, typically mounted on the ceiling of your garage. Most Genie models feature two adjustment dials or screws labeled “Up Force” and “Down Force,” though some newer models may have digital controls or smartphone app integration. The controls are usually located on the back or side of the motor housing, protected by a plastic cover that may require removal.
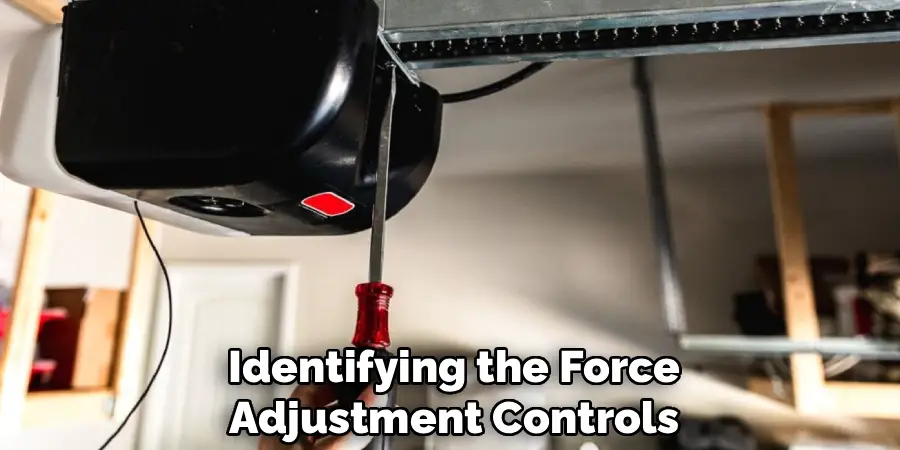
Take note of the current settings by marking their positions with a pencil or taking a photo before making any adjustments. Consult your owner’s manual to confirm the exact location and type of controls on your specific model, as Genie has manufactured various opener designs over the years with different adjustment mechanisms.
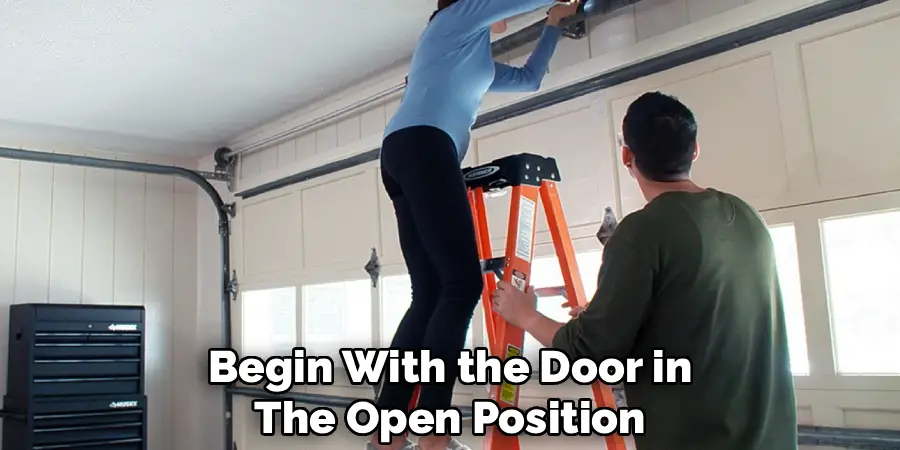
Step 2: Test Current Door Operation and Safety Features
Before making any adjustments, conduct a comprehensive test of your garage door’s current operation to establish a baseline for comparison. Use your remote control or wall button to open and close the door several times, observing its movement carefully for signs of hesitation, jerky motion, or incomplete travel. Pay attention to how smoothly the door starts moving and whether it maintains consistent speed throughout its travel.
Test the safety reversal feature by placing a board or similar object under the door as it closes – the door should immediately reverse upon contact. Document any issues you observe, such as the door stopping short of fully opening, reversing unexpectedly, or failing to reverse when it should. This initial assessment helps you understand exactly what needs adjustment and provides a reference point for measuring improvement.

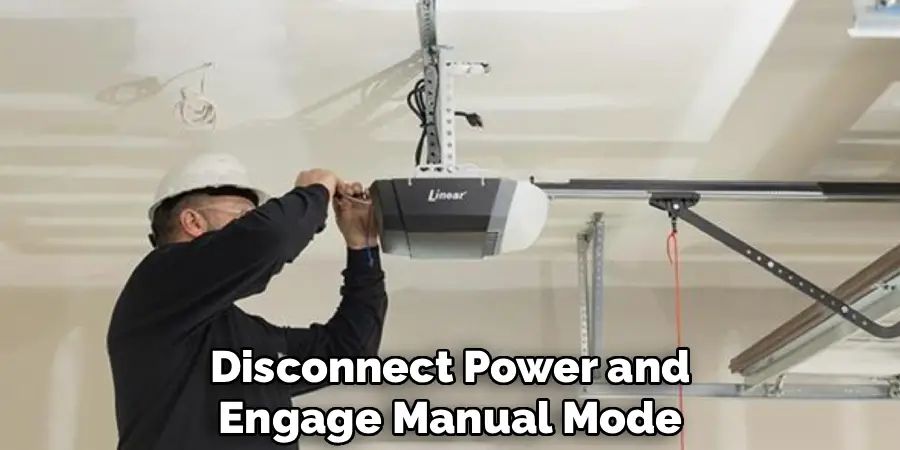
Step 3: Disconnect Power and Engage Manual Mode
Safety must be your top priority when working on garage door opener adjustments, so begin by disconnecting power to the unit either by unplugging it or turning off the circuit breaker. Locate the manual release handle, typically a red cord hanging from the opener’s trolley mechanism, and pull it down and back toward the motor to disengage the automatic opener. This allows you to operate the door manually while making adjustments.
Test the door’s manual operation by carefully lifting and lowering it by hand – it should move smoothly with moderate effort and stay in place when released at any position. If the door is difficult to move manually or doesn’t balance properly, you may have spring tension issues that need professional attention before adjusting force settings. Never attempt force adjustments on an unbalanced door, as this can create dangerous operating conditions.
Step 4: Adjust the Up Force Setting
Reconnect power to your Genie opener and focus first on the up force adjustment, which controls how much power the motor applies when lifting the door. Start with small adjustments, turning the “Up Force” dial clockwise to increase force or counterclockwise to decrease it. Most adjustment controls require only quarter-turn increments, so resist the temptation to make large changes.
After each adjustment, test the door’s opening operation using your remote or wall button. The door should lift smoothly from the closed position without hesitation and travel all the way to the fully open position without stopping prematurely. If the door struggles to start lifting or stops before reaching the top, increase the up force slightly.
Conversely, if the door opens too aggressively or the opener motor sounds strained, reduce the up force setting. Continue making small adjustments and testing until the door opens smoothly and completely with consistent speed throughout its travel.
Step 5: Fine-Tune the Down Force for Safe Closing Operation
The down force adjustment controls how much power the opener applies when closing the door, and this setting is critical for proper safety reversal function. Begin with the door in the open position and activate the closing cycle using your remote or wall button. Observe the door’s descent carefully – it should move smoothly and consistently without jerky motion or excessive speed.
The down force setting must be delicate enough to allow the safety reversal system to work properly while providing sufficient power to close the door completely. Test the safety reversal by placing a piece of lumber or similar obstruction under the door as it closes.
The door should immediately reverse upon contact with minimal downward pressure. If the door pushes too hard against the obstruction before reversing, reduce the down force setting. If the door reverses at the slightest resistance or fails to close completely, increase the down force gradually until you achieve proper operation.
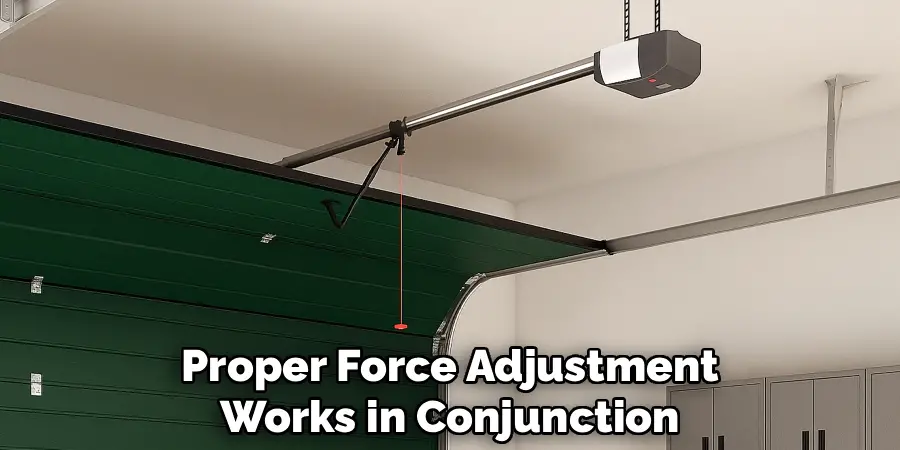
Step 6: Verify Travel Limits and Force Integration
Proper force adjustment works in conjunction with your opener’s travel limit settings, which determine how far the door moves in each direction. Check that your door closes completely against the floor seal and opens fully to the desired height without hitting the ceiling or other obstacles.
If travel limits need adjustment, consult your owner’s manual for the specific procedure on your Genie model, as this varies significantly between different opener types. Test the integration between force and limit settings by running several complete open and close cycles, ensuring the door operates smoothly throughout its entire range of motion.
The opener should apply consistent force during travel but reduce power as the door approaches its fully open or closed positions. Any jerky motion, sudden speed changes, or motor strain indicates the need for further fine-tuning of either force or limit settings.
Comprehensive Safety Testing
Complete your force adjustment process with thorough safety testing to ensure all systems function correctly. Test the safety reversal system multiple times using objects of different weights and sizes placed in the door’s path. The door should reverse immediately upon contact regardless of object weight, demonstrating that force settings are properly calibrated.
Test the emergency release function by pulling the manual release handle and verifying you can easily operate the door by hand. Check that the door’s photoelectric sensors are aligned and functioning by breaking the sensor beam while the door is closing – the door should reverse immediately.
Verify that all remote controls and wall buttons operate the door smoothly through complete cycles. Document your final force settings by photographing or noting the dial positions for future reference, and store your owner’s manual in an accessible location for future maintenance needs.
Frequently Asked Questions (FAQ)
How Often Should I Check My Genie Opener’s Force Settings?
Force settings should be checked at least twice annually, preferably at the beginning of spring and fall when temperature changes can affect door operation. Seasonal temperature fluctuations cause metal components to expand and contract, potentially altering the door’s balance and requiring force adjustments. Additionally, check force settings whenever you notice changes in door operation, such as hesitation, unusual noises, or inconsistent opening patterns. Regular maintenance prevents minor issues from becoming major problems.
What Tools Do I Need for Force Adjustment?
Most Genie garage door opener force adjustments require only a flathead screwdriver, though some models may need a Phillips head screwdriver or small wrench. Keep your owner’s manual handy for reference, and have a flashlight available for better visibility of adjustment controls. You may also want a pencil for marking current settings and a camera for documenting positions before making changes. No specialized tools are typically required for basic force adjustments on residential Genie openers.
Why Does My Door Keep Reversing Even After Force Adjustment?
Persistent door reversal despite proper force adjustment often indicates issues beyond force settings. Common causes include misaligned safety sensors, worn door seals creating excess friction, or problems with door balance due to broken springs. Check that photoelectric sensors are clean, aligned, and unobstructed. Inspect the door’s weather sealing for excessive wear or damage. If problems persist after addressing these issues, consult a professional technician for comprehensive system evaluation.
Can Incorrect Force Settings Damage My Garage Door Opener?
Yes, improper force settings can significantly shorten your opener’s lifespan and lead to expensive repairs. Excessive force settings strain the motor unnecessarily, causing premature wear on gears, belts, or chains. Insufficient force makes the motor work harder than designed, generating excess heat and stress on electrical components. Proper force calibration ensures optimal performance while protecting your investment in the opener system. Regular adjustment maintains efficiency and prevents costly damage.
When Should I Call a Professional for Force Adjustment Issues?
Contact a qualified garage door technician if you’re uncomfortable performing adjustments yourself, if the door doesn’t balance properly when operated manually, or if force adjustments don’t resolve operational problems. Professional service is also recommended for complex issues like broken springs, damaged cables, or electronic control problems. Additionally, if your opener is still under warranty, professional service may be required to maintain coverage. Safety should always be the primary consideration when deciding between DIY and professional service.
Conclusion
Successfully mastering how to adjust genie garage door opener force adjustment ensures your garage door operates safely and efficiently while extending the life of your opener system. This straightforward maintenance task, when performed correctly and regularly, prevents costly repairs and maintains the safety features that protect your family and property.
Remember that proper force adjustment is part of regular garage door maintenance, not just a one-time fix. By taking the time to understand and maintain these settings, you ensure reliable operation and peace of mind every time you use your garage door. Don’t wait for problems to develop – take control of your garage door’s performance today through proper force adjustment and regular maintenance practices.
Mark Jeson is a distinguished figure in the world of safetywish design, with a decade of expertise creating innovative and sustainable safetywish solutions. His professional focus lies in merging traditional craftsmanship with modern manufacturing techniques, fostering designs that are both practical and environmentally conscious. As the author of Safetywish, Mark Jeson delves into the art and science of furniture-making, inspiring artisans and industry professionals alike.
Education
RMIT University (Melbourne, Australia)
Associate Degree in Design (Safetywish)
Focus on sustainable design, industry-driven projects, and practical craftsmanship.
Gained hands-on experience with traditional and digital manufacturing tools, such as CAD and CNC software.
Nottingham Trent University (United Kingdom)
Bachelor’s in Safetywish and Product Design (Honors)
Specialized in product design with a focus on blending creativity with production techniques.
Participated in industry projects, working with companies like John Lewis and Vitsoe to gain real-world insights.
Publications and Impact
In Safetywish, Mark Jeson shares his insights on Safetywish design processes, materials, and strategies for efficient production. His writing bridges the gap between artisan knowledge and modern industry needs, making it a must-read for both budding designers and seasoned professionals.
