
Are you tired of your old, plain doorway, but don’t want to go through the hassle and expense of installing a new door? Or maybe you just want to add some character and style to your home without making any major renovations.
How to cover a doorway without door can be a practical and creative solution for various needs. Whether you’re looking to add privacy to a space, reduce noise, or simply enhance the aesthetic of a room, there are plenty of alternatives to consider.
From curtains and beaded strings to sliding panels or even DIY options, these solutions can suit a range of styles and budgets. Additionally, using the right materials and techniques can help maintain the functionality of the space while achieving your desired look.
This guide will explore different methods to successfully cover a doorway without using a conventional door.
What Are the Benefits of Using Alternatives to Doors?
There are several benefits to using alternatives to traditional doors in your home. Here are a few reasons why you should consider incorporating alternative door options into your interior design:
- Space-saving: Unlike conventional doors, many alternative options take up minimal space and can be easily tucked away or removed when not in use. This is especially helpful in small living spaces where every inch counts.
- Versatility: Alternative door solutions come in a wide range of styles, materials, and colors, making them highly versatile and customizable to match any interior design aesthetic.
- Cost-effective: In most cases, alternative door options tend to be more budget-friendly than traditional doors. Whether you opt for a DIY solution or hire a professional, you can save money on both the materials and installation costs.
- Eco-friendly: Many alternative door options are made from sustainable materials such as reclaimed wood, bamboo, or recycled metals. This makes them an environmentally friendly choice for those looking to reduce their carbon footprint.
- Soundproofing: Some alternative door options, such as sliding barn doors or solid wood doors, can provide better sound insulation compared to traditional hollow-core doors. This is especially beneficial for rooms that need privacy or where noise reduction is important.
What Will You Need?
To install a door, you will need the following materials:
- Door of your choice
- Hinges and screws
- Door handle and lock (if not included with the door)
- Drill and drill bits
- Screwdriver or power drill
- Level
- Measuring tape
You may also want to have some additional supplies on hand, such as wood shims, sandpaper, and paint or stain if you plan on customizing your door. It’s important to carefully measure your doorway before purchasing a door to ensure it will fit properly.

9 Easy Steps on How to Cover a Doorway Without Door
Step 1. Measure the Doorway
Start by using a measuring tape to carefully record the height and width of the doorway. Make sure to measure at multiple points along the edges, as walls and door frames are not always perfectly straight. Write down the largest measurements for both height and width to ensure the covering will fully fit the opening.
Additionally, check for any unique features, such as uneven flooring or molding, that may affect how the covering fits. Accurate measurements are crucial before proceeding, as they will guide you in selecting or preparing the materials needed for your doorway covering project.
Step 2. Choose Your Covering Material
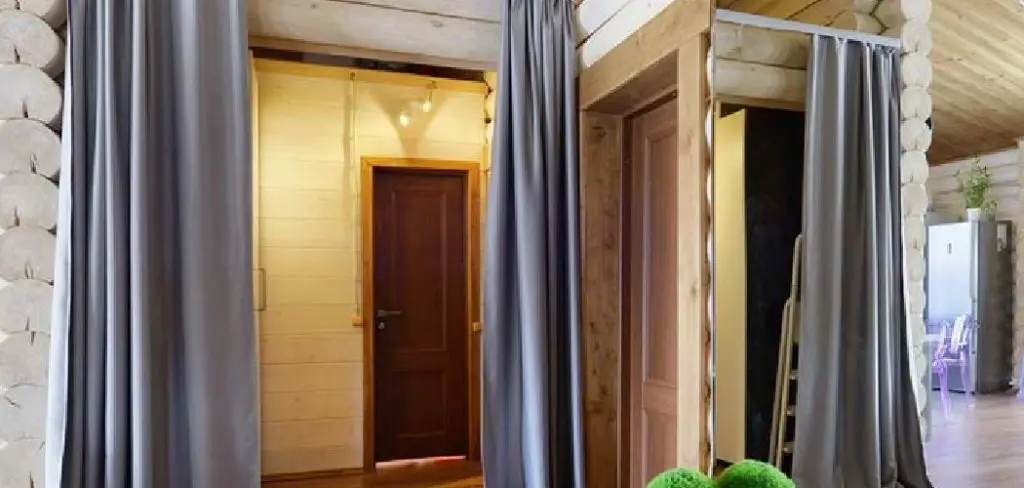
When choosing your covering material, it’s important to consider both functionality and aesthetics. Think about the purpose of the doorway covering—is it meant to provide privacy, block light, or simply enhance the visual appeal of the space? For instance, lightweight materials like fabric curtains or beaded strands can add a decorative element while allowing some light to filter through, making them ideal for casual or decorative spaces.
On the other hand, heavier materials such as wood panels, sliding doors, or thick curtains offer more privacy and can help with sound insulation, making them suitable for bedrooms or offices. Consider also the durability of your chosen material, as doorways are high-traffic areas, and the covering will need to withstand frequent use. Materials like bamboo, canvas, or plastic may be more resilient in these situations.
Step 3. Install a Curtain Rod or Tension Rod
To properly install a curtain rod or tension rod, start by measuring the width of your doorway to determine the appropriate length of the rod. Ensure that the rod extends slightly beyond the width of the opening to allow the covering to fully cover the doorway when closed.

If you’re using a tension rod, make sure to adjust and secure it tightly within the doorway frame to prevent it from slipping or collapsing. For a mounted curtain rod, carefully mark the placement for brackets on the wall or frame. Use a level to ensure the rod will be straight, then drill pilot holes and secure the brackets with screws.
Once the brackets or tension rod are in place, hang your chosen doorway covering and adjust it for the desired drape or fit.
Step 4. Hang the Fabric or Curtain
Once the fabric or curtain has been hung, take a moment to ensure it is evenly positioned and falls symmetrically on both sides of the doorway. If necessary, adjust the fabric to create smooth, consistent folds or pleats for an aesthetically pleasing appearance.
For curtains with tiebacks, decide whether to keep them fully drawn or styled open to frame the doorway, depending on your preference and the function of the space. Additionally, double-check that the curtain rod or tension rod is secure and stable, particularly if the covering will see frequent movement, and make any additional adjustments to prevent potential slipping or damage.
Step 5. Customize for Style
Now that the curtains are in place, take the opportunity to add finishing touches that reflect your personal style. Consider incorporating decorative curtain hooks, ornamental tiebacks, or rings with unique finishes to enhance the overall look. If the curtains feel plain, layering them with a valance or sheer panels can introduce an added dimension of texture and sophistication.
Additionally, ensure the fabric complements the room’s color scheme and décor, creating a cohesive and inviting atmosphere. Personalization is key to making the space truly your own.
Step 6. Adjust and Test Stability
Once your curtains are installed, it’s essential to adjust and test their stability to ensure both functionality and safety. Start by gently tugging on the curtain rods and brackets to verify they are securely anchored to the wall. If you notice any wobbling or instability, tighten the screws or use additional wall anchors as needed.

Open and close the curtains several times to check for smooth movement across the rod; ensure the fabric glides effortlessly without snagging. Pay close attention to the alignment of the curtains—both sides should hang evenly and reach the desired length.
Step 7. Add Finishing Touches
To complete your curtain installation, take a moment to ensure everything looks polished and cohesive. Straighten the fabric and adjust any pleats or folds to create an even and aesthetically pleasing appearance.
Consider adding decorative tiebacks or holdbacks to frame the windows and enhance the room’s style. If desired, layer sheer curtains or use valances for extra texture and depth. Finally, step back and admire your work, ensuring the curtains align beautifully with the room’s overall design and functionality.
Step 8. Consider Privacy and Light Control Options
When choosing curtains or window treatments, it’s essential to think about how they will impact the level of privacy and light control in the room. For spaces like bedrooms or bathrooms, consider blackout curtains or shades that effectively block outside light and provide maximum privacy.
Alternatively, lighter fabrics or sheer curtains work well in living areas, allowing natural light to filter in while maintaining a sense of openness. You can also layer curtains with blinds or shades for added versatility, enabling you to adjust light and privacy levels as needed throughout the day.
Step 9. Maintain and Clean Regularly
Before fully covering your doorway without a door, it’s important to consider privacy and light control options. If you’re using curtains or fabric as a covering, consider adding sheer panels or a privacy liner for added coverage when needed.
You can also use tiebacks or clips to adjust the amount of light coming through. Additionally, regularly dusting or vacuuming your coverings will help maintain their appearance and keep them clean.

By following these steps, you can successfully cover your doorway without a door and create a more private and customizable space in your home.
Conclusion
Covering a doorway without a door is a simple and versatile way to enhance the functionality and aesthetic of your space.
By utilizing options such as curtains, beads, screens, or other creative materials, you can achieve both privacy and style. The methods you choose will depend on your personal preferences, the overall design of your home, and the level of privacy or light control you require. With some thoughtful planning and proper maintenance, your doorway solution can be both practical and visually appealing.
Hopefully, the article on how to cover a doorway without door has given you some useful ideas and inspiration for your own space. Remember to experiment with different materials and designs, and don’t be afraid to think outside the box.
Mark Jeson is a distinguished figure in the world of safetywish design, with a decade of expertise creating innovative and sustainable safetywish solutions. His professional focus lies in merging traditional craftsmanship with modern manufacturing techniques, fostering designs that are both practical and environmentally conscious. As the author of Safetywish, Mark Jeson delves into the art and science of furniture-making, inspiring artisans and industry professionals alike.
Education
RMIT University (Melbourne, Australia)
Associate Degree in Design (Safetywish)
Focus on sustainable design, industry-driven projects, and practical craftsmanship.
Gained hands-on experience with traditional and digital manufacturing tools, such as CAD and CNC software.
Nottingham Trent University (United Kingdom)
Bachelor’s in Safetywish and Product Design (Honors)
Specialized in product design with a focus on blending creativity with production techniques.
Participated in industry projects, working with companies like John Lewis and Vitsoe to gain real-world insights.
Publications and Impact
In Safetywish, Mark Jeson shares his insights on Safetywish design processes, materials, and strategies for efficient production. His writing bridges the gap between artisan knowledge and modern industry needs, making it a must-read for both budding designers and seasoned professionals.
