
The engine coolant temperature sensor, often overlooked, plays a vital role in monitoring your car’s engine temperature and ensuring it operates efficiently. Installing this sensor can sound intimidating, especially for beginners. However, with a little guidance, replacing it yourself can save you a large repair bill, enhance your engine’s performance, and potentially prevent overheating issues.
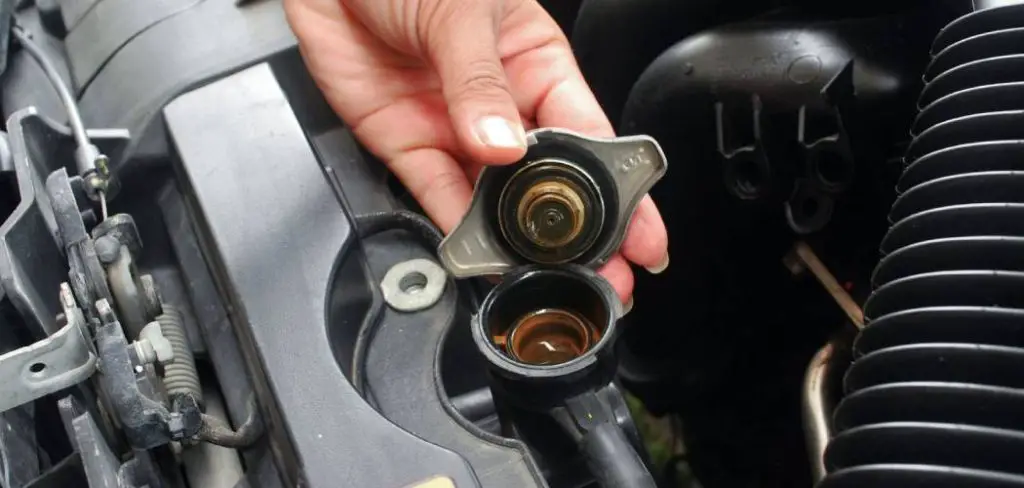
Before starting the installation, make sure you have all the necessary tools and safety equipment. Common tools required include a wrench, screwdriver, and a clean rag. It’s also crucial to have a new coolant temperature sensor that matches your vehicle’s make and model. Ensure the engine is completely cool before you begin to avoid burns or injuries, and disconnect the battery to prevent accidental electrical issues. Preparing your workspace with good lighting and enough space will make the process safer and more efficient.
This guide how to install engine coolant temperature sensor, is designed to demystify the process of installing an engine coolant temperature sensor. We’ll walk you through the tools you’ll need, the steps to follow, and common mistakes to avoid—all in beginner-friendly terms. Before jumping in, remember to always prioritize safety and check your vehicle manual for exact specifications.
Why Is Installing an Engine Coolant Temperature Sensor Important?
Your engine relies on the cooling system to maintain the right operating temperature. The engine coolant temperature sensor plays a pivotal role by sending temperature data to the car’s computer system.
A faulty sensor can disrupt engine performance by leading to incorrect air-fuel mixture readings or causing the engine to overheat. Over time, neglecting this component can lead to major engine failure and costly repairs.
Regularly inspecting and replacing a faulty engine coolant temperature sensor is a critical part of vehicle maintenance. Signs of a failing sensor include poor fuel efficiency, engine misfires, or the check engine light appearing on your dashboard. Addressing these issues promptly ensures your vehicle runs smoothly and prevents further damage. Additionally, maintaining an optimal engine temperature contributes to a longer lifespan for your engine and better overall performance.

By learning how to install an engine coolant temperature sensor yourself, you not only gain the satisfaction of a DIY project but also ensure your engine functions reliably for years to come. This task is manageable with the right tools and attitude, and it’s a great skill to add to any car enthusiast’s toolbox.
Necessary Tools and Materials
- New engine coolant temperature sensor
- Socket wrench set
- Pliers
- Screwdrivers (flathead and Phillips)
- Thread sealant (if required for your sensor)
- Rag or shop towels
- Coolant (for topping off or replacing if needed)
- Drain pan (to catch any spilled coolant)
- Safety gloves
- Safety goggles
Step-by-Step Guide on How to Install Engine Coolant Temperature Sensor
To successfully install an engine coolant temperature sensor, follow these steps carefully. With patience and a methodical approach, you can complete this task even if you’re a complete beginner.
Step 1: Prepare Your Tools and Workspace
Before starting, gather all necessary tools and equipment. These typically include a wrench set, a coolant basin, rags, and your new sensor. Ensure the engine is cool to avoid burns. Park your car on a flat surface and engage the parking brake. A well-organized workspace can make the process significantly smoother.

Step 2: Locate the Existing Coolant Temperature Sensor
Refer to your vehicle’s manual to find the exact location of the sensor. Usually, the sensor is installed near the thermostat housing or in the cylinder head. Identifying it correctly prevents accidental removal of the wrong component.
Step 3: Drain the Coolant
Position a basin beneath the radiator and carefully unscrew the radiator drain plug. Allow the coolant to drain completely. Draining the coolant ensures that you can safely work on the sensor without spillage or contamination. Save the old coolant, as it may still be reusable if it meets your car’s requirements.
Step 4: Disconnect the Electrical Connections
Once the sensor is located, disconnect its wiring harness. This is usually a plug-in connection secured by clips. Examine the connectors for any corrosion or damage; if you notice rusted pins, clean or replace them before installing the new sensor.
Step 5: Remove the Old Sensor
Using the appropriate wrench or socket, unscrew the old sensor carefully, turning counterclockwise. Be mindful of any residual coolant that may leak out during this step. This is a good time to inspect for potential cracks or leaks in the mounting area.
Step 6: Prepare the New Coolant Temperature Sensor
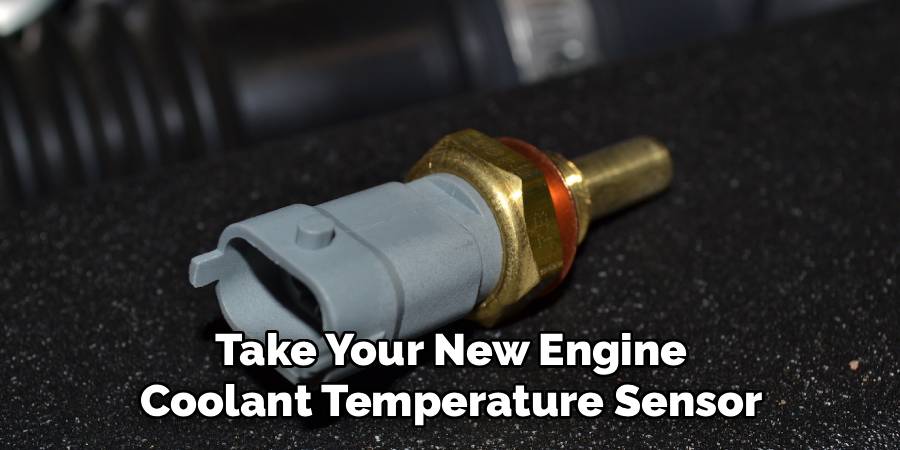
Take your new engine coolant temperature sensor out of its packaging. Check it against the old sensor to ensure it’s the same model. Apply a small amount of thread sealant if recommended by the manufacturer to prevent future leaks.
Step 7: Install the New Sensor
Carefully thread the new sensor into the designated port by hand, then tighten it with a wrench. Be cautious not to overtighten, as this could damage the threads or sensor itself. The fit should be snug but not forced.
Step 8: Reconnect the Electrical Connections
Reattach the wiring harness to the new sensor, ensuring a secure and firm connection. If the clips feel loose or don’t lock into place properly, check for any debris or misalignment. The connector should click into place for a stable connection.
Step 9: Refill the Coolant
Using a coolant reservoir or funnel, pour your saved coolant back into the radiator. Add fresh coolant if needed, ensuring the level meets your vehicle manufacturer’s recommendations. Be sure to remove any air pockets from the system by bleeding the cooling system if necessary.
Step 10: Test the Installation
Start the engine and monitor the temperature gauge on your dashboard. Ensure there are no leaks around the newly installed sensor. After driving for a short distance, check the coolant level again and top it off if needed. Congratulations—you’ve learned how to install an engine coolant temperature sensor!
Signs of Engine Coolant Temperature Sensor Failure
A failing engine coolant temperature sensor can lead to several noticeable issues in your vehicle. One common sign is poor fuel economy, as the sensor plays a key role in determining the air-fuel mixture. If it provides incorrect readings, the engine may use more fuel than necessary. Additionally, you might experience irregular engine performance, such as rough idling, misfires, or difficulty starting the vehicle, especially in cold weather.
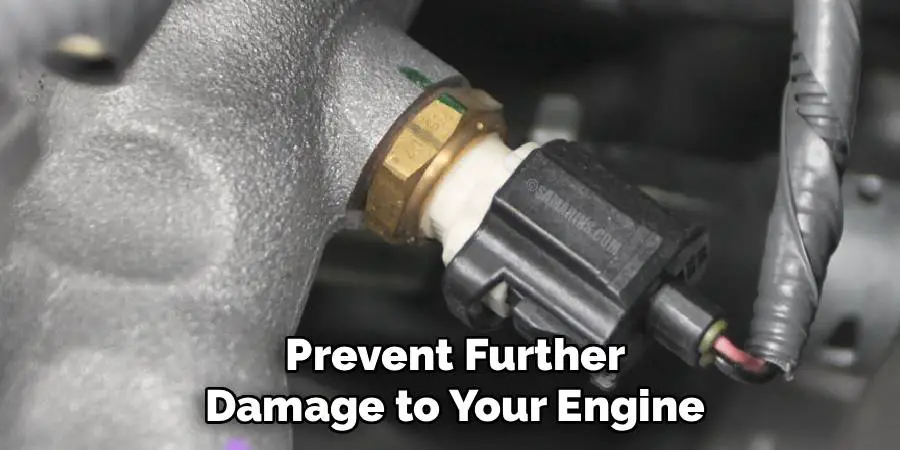
Another clear indicator is an illuminated check engine light on your dashboard, which may result from the sensor sending erroneous data to the engine control unit (ECU). Overheating or abnormally low temperature readings on your temperature gauge could also point to a faulty sensor. If you notice these symptoms, it’s important to address the issue promptly to prevent further damage to your engine.
Frequently Asked Question
How do I know if my coolant temperature sensor is faulty?
Signs of a failing sensor include an overheating engine, erratic temperature gauge readings, poor fuel efficiency, or the check engine light illuminating. If you notice any of these symptoms, it’s best to diagnose the issue and replace the sensor promptly.
Do I need to flush the entire cooling system when replacing the sensor?
Not always. If the coolant looks clean and is relatively new, you can simply drain it into a clean basin and reuse it after replacing the sensor. However, if the coolant is dirty or contaminated, a full flush is recommended for optimal cooling performance.
Can I install the sensor without disconnecting the battery?
Disconnecting the battery is not mandatory for this job. However, some experts recommend it as an added measure to prevent electrical shorts or accidental faults while working on the vehicle’s wiring.
What type of coolant should I use after installing the sensor?
Always use the coolant type specified in your vehicle’s manual. Using incorrect coolant can lead to poor temperature control, rust, or damage to the cooling system components. Most cars are compatible with ethylene glycol-based coolants, but verify to be certain.
How often should I replace an engine coolant temperature sensor?
The lifespan of a coolant temperature sensor varies depending on make and model, but they typically last between 60,000 to 100,000 miles. Regular maintenance checks can help you spot issues early and extend the life of your vehicle’s cooling system.
Conclusion
Replacing an engine coolant temperature sensor may seem daunting, but with the right instructions and a little patience, you can handle this task confidently. This straightforward DIY project not only saves money but also keeps your vehicle running efficiently and performing at its best.
Always remember to consult your vehicle’s manual and follow safety precautions when working under the hood. If you encounter any difficulties or feel unsure during the process, seeking professional assistance is always a smart choice. Proper care and attention to your vehicle will ensure its longevity and reliable performance for years to come.
If you’ve been hesitating, now’s the perfect time to learn how to install an engine coolant temperature sensor. Take the first step toward mastering basic car maintenance, and enjoy the satisfaction of knowing you’ve played a vital part in your car’s reliability and performance.

Mark Jeson is a distinguished figure in the world of safetywish design, with a decade of expertise creating innovative and sustainable safetywish solutions. His professional focus lies in merging traditional craftsmanship with modern manufacturing techniques, fostering designs that are both practical and environmentally conscious. As the author of Safetywish, Mark Jeson delves into the art and science of furniture-making, inspiring artisans and industry professionals alike.
Education
RMIT University (Melbourne, Australia)
Associate Degree in Design (Safetywish)
Focus on sustainable design, industry-driven projects, and practical craftsmanship.
Gained hands-on experience with traditional and digital manufacturing tools, such as CAD and CNC software.
Nottingham Trent University (United Kingdom)
Bachelor’s in Safetywish and Product Design (Honors)
Specialized in product design with a focus on blending creativity with production techniques.
Participated in industry projects, working with companies like John Lewis and Vitsoe to gain real-world insights.
Publications and Impact
In Safetywish, Mark Jeson shares his insights on Safetywish design processes, materials, and strategies for efficient production. His writing bridges the gap between artisan knowledge and modern industry needs, making it a must-read for both budding designers and seasoned professionals.
