
When your Chevy key fob stops working, it can bring your day to a sudden halt. The first thought for many is a costly trip to the dealership, but often, the solution is a simple battery replacement you can do yourself. The biggest hurdle is usually just figuring out how to get the case open without damaging it. While it might seem like a sealed, mysterious device, most Chevrolet remotes are designed to be opened with basic tools.
This guide is designed to empower you with the knowledge to handle this simple task at home. We will provide clear, step-by-step instructions on how to open a chevy key fob, saving you time, money, and the hassle of a dealership visit.
Why Knowing How to Open a Chevy Key Fob Is Important
Knowing how to open your key fob is a practical skill that can save you from a lot of frustration. The most common reason to open the fob is for a battery replacement. Over time, the battery that powers your keyless entry system will weaken, resulting in a reduced range or a complete failure to lock or unlock your doors. Being able to quickly swap out the battery yourself means you won’t get stranded or have to pay a premium for a simple service.
Beyond battery issues, you might need to open the casing for other key fob maintenance. The internal buttons can sometimes become dislodged or sticky from debris, causing them to malfunction. Opening the fob allows you to clean the internal components and circuitry, potentially fixing a stuck button and restoring its functionality. It’s a simple piece of car key troubleshooting that puts you in control.
Step-by-Step Guide: How to Open a Chevy Key Fob
Step 1: Identify Your Key Fob Model
Before you begin, take a moment to identify which type of Chevy key fob you have. Chevrolet has used several different designs over the years. Some are a classic switchblade style where the physical key flips out, while others are a modern, integrated key and remote combination. The method for opening each can vary slightly. Check your owner’s manual or look for a model number on the back of the fob. This guide will focus on the common switchblade style, but the principles are similar for most models. Knowing your specific fob will help you find the correct replacement battery size.

Step 2: Remove the Physical Key
For fobs with an integrated physical key, you must remove it first. Look for a small release button on the side or back of your Chevrolet remote. Press this button firmly, and the hidden metal key should pop out or become loose enough to pull free. Set the physical key aside in a safe place. This step is crucial because the key often conceals the seam or a slot that you will use to pry the two halves of the fob apart. It’s the first step in nearly every key fob battery replacement process.
Step 3: Locate the Seam or Pry Slot
With the physical key removed, carefully inspect the fob to find the seam where the two plastic halves of the casing join together. On most Chevy fobs, this seam runs along the perimeter of the device. Look closely inside the slot where the key was housed. You will often find a small indentation or pry slot specifically designed to give you leverage. This is the intended entry point and using it will minimize the risk of cosmetic damage to the plastic casing. A small, flat-head screwdriver or a thin pry tool will be your best tool for this job.
Step 4: Gently Pry the Casing Apart
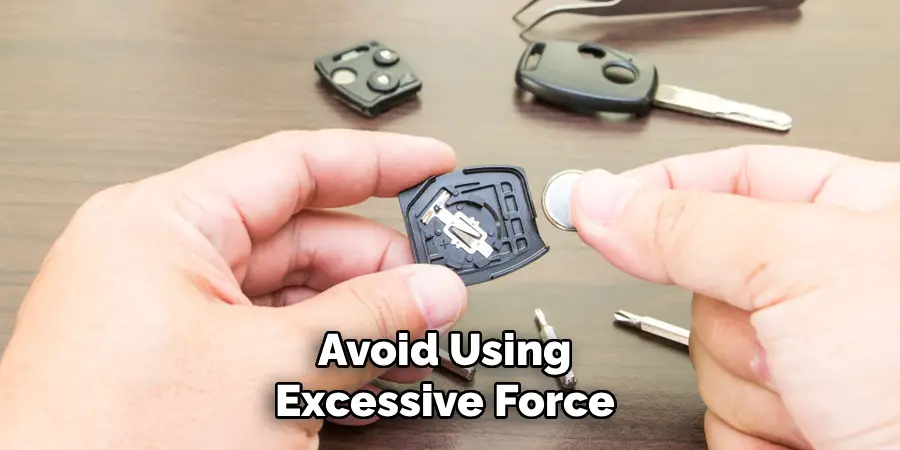
This is the most delicate step of learning how to open a Chevy key fob. Insert the tip of your small, flat-head screwdriver or a plastic pry tool into the slot you located. Gently twist the screwdriver or apply steady pressure to separate the two halves of the fob. You should hear a series of small clicks as the internal plastic clips release. Work your way slowly around the seam, applying gentle pressure as you go. Avoid using excessive force, as this can crack the plastic casing or damage the delicate internal clips.
Step 5: Separate the Two Halves
Once you have released the clips around the perimeter, the two halves of the key fob should separate easily. Carefully pull them apart and lay them on a flat, clean surface. Take note of how the internal components are arranged.
You will typically see the green circuit board, the rubber button pad, and the coin-style battery. This is a good time to check for any dirt or debris that might be causing issues with your keyless entry system. Be gentle with the circuit board, as it is the electronic brain of your remote.
Step 6: Remove the Old Battery
The battery is usually a small, circular coin cell held in place by a metal clip or a plastic housing. Pay close attention to which side is facing up (the positive “+” side is typically visible). You can use your small screwdriver or even a fingernail to gently pry the old battery out of its holder. Be careful not to bend the metal contacts that hold the battery in place. Once the old battery is out, you can confirm its size—it’s usually printed directly on the battery (e.g., CR2032).
Step 7: Install the New Battery
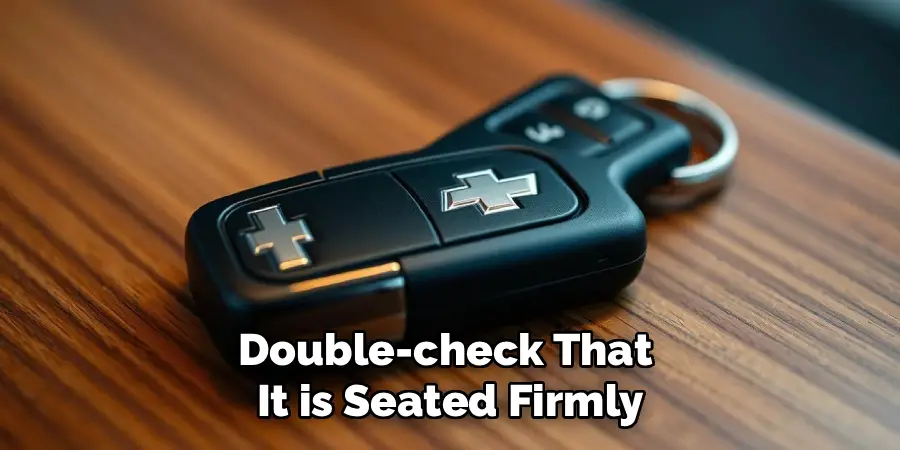
Take your new battery and slide it into the holder, making sure the positive “+” side is facing the same direction as the old one was. It should snap securely into place. A proper battery replacement is the most common reason for this entire process. Ensure the battery makes good contact with the metal terminals. An improper connection is a common point of failure in car key troubleshooting, so double-check that it is seated firmly and correctly before you close the casing.
Step 8: Reassemble the Key Fob
With the new battery installed, it’s time to put your fob back together. Place the rubber button pad and the circuit board back into their correct positions if they were disturbed. Align the two halves of the plastic casing and press them firmly together. You should hear a series of satisfying clicks as the internal clips re-engage. Squeeze along the entire seam to ensure the fob is completely sealed. Finally, slide the physical key back into its slot until it clicks into place, completing your key fob maintenance.
Common Mistakes to Avoid
When performing key fob maintenance, there are a few common mistakes to avoid to ensure a smooth process. First, be careful not to lose small components, such as screws or the button pad, as these are essential for reassembly. Avoid forcing the casing open or closed as excessive pressure can damage the plastic clips or internal components. Another common issue is inserting the battery incorrectly—always double-check the polarity to ensure proper function. Additionally, make sure your hands are clean and dry when handling the circuit board to prevent contamination or moisture damage. Lastly, take care not to overtighten any screws during reassembly, as this can strip the threads and compromise the integrity of the key fob housing. By avoiding these pitfalls, you can keep your key fob in excellent working condition.
Frequently Asked Questions (FAQs)
What Type of Battery Does a Chevy Key Fob Use?
Most modern Chevy key fobs use a CR2032 3-volt coin cell battery. However, some models may use a different size, such as a CR2025 or CR1620. The best way to be certain is to open your key fob and check the number printed on the old battery. These batteries are widely available at grocery stores, hardware stores, and electronics retailers.

How Do I Know if My Key Fob Battery Is Dying?
There are a few common signs that your battery is getting low.
- You have to be much closer to your car for the remote to work.
- You have to press the buttons multiple times before the car responds.
- Your vehicle’s driver information center may display a “REPLACE BATTERY IN REMOTE KEY” message.
If you experience any of these, it’s a good indication that a battery change is needed.
Will I Need to Reprogram My Key Fob After Changing the Battery?
No, in most cases, you will not need to reprogram your Chevy key fob after replacing the battery. The fob’s memory is stored on the circuit board and is not dependent on the battery for retention. As long as you replace the battery within a reasonable amount of time, your fob should work immediately once it is reassembled.
What if My Key Fob Still Doesn’t Work After Changing the Battery?
If a new battery doesn’t solve the problem, there could be a few other issues. First, double-check that the battery is installed correctly with the positive side facing the right way. Also, inspect the battery contacts to ensure they are clean and making good contact. If it still fails, the problem may be with the fob’s circuit board or the car’s receiver, which would require a visit to a dealership or an automotive locksmith.
Can I Damage My Key Fob by Opening It?
There is a small risk of cosmetic damage if you are not careful. To minimize this risk, use a plastic pry tool instead of a metal screwdriver and apply slow, steady pressure rather than force. The main goal is to avoid scratching the plastic or breaking the small internal clips that hold the case together. By following the steps carefully, you can easily open it without causing any damage.

Conclusion
The thought of opening an electronic device like a key fob can be intimidating, but it is a straightforward task that any Chevy owner can handle. By following a few simple steps, you can successfully replace a dead battery or clean the internal components, saving yourself both time and money. The key is to be patient, use the right tools, and apply gentle pressure.
Don’t let a weak battery disrupt your day. Now that you have a detailed guide on how to open a chevy key fob, you can confidently tackle this simple but essential piece of vehicle maintenance yourself.
Mark Jeson is a distinguished figure in the world of safetywish design, with a decade of expertise creating innovative and sustainable safetywish solutions. His professional focus lies in merging traditional craftsmanship with modern manufacturing techniques, fostering designs that are both practical and environmentally conscious. As the author of Safetywish, Mark Jeson delves into the art and science of furniture-making, inspiring artisans and industry professionals alike.
Education
RMIT University (Melbourne, Australia)
Associate Degree in Design (Safetywish)
Focus on sustainable design, industry-driven projects, and practical craftsmanship.
Gained hands-on experience with traditional and digital manufacturing tools, such as CAD and CNC software.
Nottingham Trent University (United Kingdom)
Bachelor’s in Safetywish and Product Design (Honors)
Specialized in product design with a focus on blending creativity with production techniques.
Participated in industry projects, working with companies like John Lewis and Vitsoe to gain real-world insights.
Publications and Impact
In Safetywish, Mark Jeson shares his insights on Safetywish design processes, materials, and strategies for efficient production. His writing bridges the gap between artisan knowledge and modern industry needs, making it a must-read for both budding designers and seasoned professionals.
