
Your Hyundai key fob is a small but mighty tool, giving you easy access to your vehicle. But when its battery dies, you might find yourself stuck. Suddenly, that convenient piece of tech feels more like a puzzle. Many drivers feel a bit of anxiety when faced with a dead key fob, worrying about expensive dealership visits or damaging the device.
The good news is that learning how to open Hyundai key fob units is a straightforward process that anyone can do at home. With just a few simple tools and a little patience, you can replace the battery and get back on the road in minutes. This guide will walk you through every step, making the process clear, simple, and stress-free. We’ll cover everything from finding the right tools to safely reassembling your fob, ensuring you have the confidence to handle this task yourself.
Preparation Before Opening the Key Fob
Before you begin, it’s important to gather all the necessary tools and materials. This will ensure that you have everything you need on hand and won’t have to stop in the middle of the process to search for something.
Here are the items you’ll need:
- A new battery for your Hyundai key fob (check your owner’s manual or look up the specific type online)
- A small flathead screwdriver
- A small Phillips head screwdriver
- Tweezers
- Isopropyl alcohol or rubbing alcohol
- Q-tips or cotton swabs
Tools and Materials Details
Each tool and material listed plays an essential role in successfully replacing the battery in your Hyundai key fob:
- A New Battery – Ensure you have the correct type specified in your owner’s manual, as using the wrong battery may result in improper functionality. Look for a brand-new one to maximize performance and lifespan.
- Small Flathead Screwdriver – This helps to carefully pry open the key fob casing without causing damage to the plastic housing.
- Small Phillips Head Screwdriver – Some key fobs may require this tool to remove small screws securing the casing.
- Tweezers – Useful for handling small internal components or removing the old battery without risking damage to delicate parts inside.
- Isopropyl Alcohol or Rubbing Alcohol – Helps to clean any residue or debris from the battery contacts to ensure a solid connection.
- Q-tips or Cotton Swabs – Used to apply the alcohol when cleaning the battery contacts for greater precision.
Having these items ready will make the process smooth and efficient, avoiding unnecessary interruptions.
Step-by-Step Guide on How to Open Hyundai Key Fob
Follow these detailed steps to successfully open your key fob, replace the battery, and get it working like new again.
Step 1: Gather Your Tools
Before you begin the process of opening your Hyundai key fob, it’s essential to gather the necessary supplies. This preparation will make the entire process smoother and prevent any interruptions. You will need a new replacement battery, typically a CR2032 coin-style battery, but always check your car’s manual or the old battery to confirm the correct size. You will also need a small, flat-head screwdriver. A jeweler’s screwdriver or even the tip of your physical key can work in a pinch. Finally, a soft cloth or microfiber towel is useful to place your key fob on, preventing scratches to its surface while you work. Having these items ready and within reach ensures you can proceed without any delays.
Step 2: Release the Mechanical Key
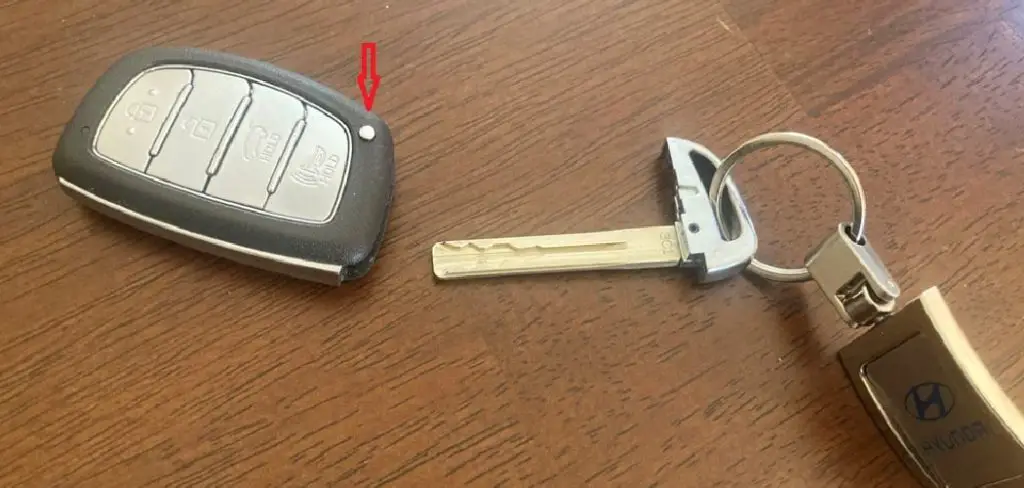
Most modern Hyundai key fobs have a hidden mechanical key that serves as both a backup and a tool. To access it, look for a small, silver button on the back or side of the fob. Press and hold this button firmly. While holding it down, you can slide the physical key out from its housing at the top or bottom of the fob. This key is crucial not only for manually unlocking your car door if the battery is completely dead but also for helping you pry open the fob’s casing in the next steps. Placing the key aside on your soft cloth will keep it safe while you focus on opening the main body of the remote.
Step 3: Locate the Pry Slot
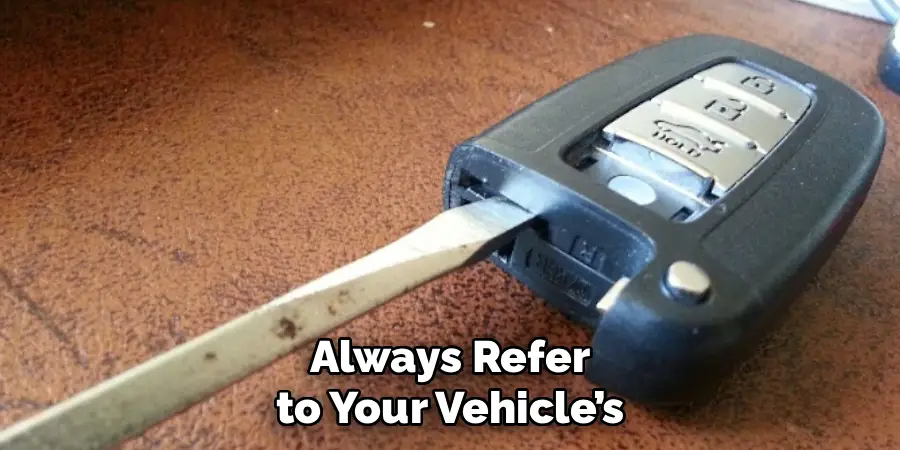
With the mechanical key removed, you will now see a small slot or indentation revealed where the key was housed. This slot is specifically designed to help you open the key fob’s plastic casing. Inspect the area closely; it’s a small gap, just big enough for the tip of your flat-head screwdriver or the end of the mechanical key you just removed. Some Hyundai models might have this slot on the side of the fob instead. Take a moment to identify its precise location, as this is the designated leverage point. Using this slot prevents you from damaging the edges of the fob by trying to pry it open from a weaker point.
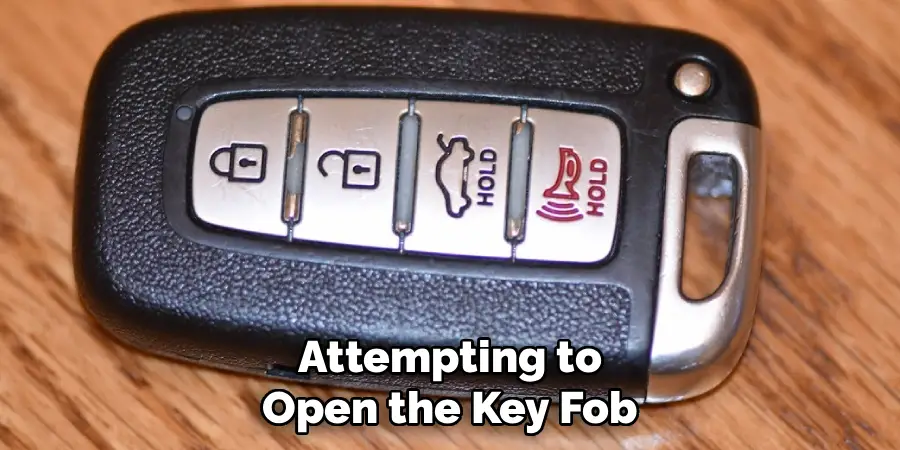
Step 4: Gently Pry the Casing Apart
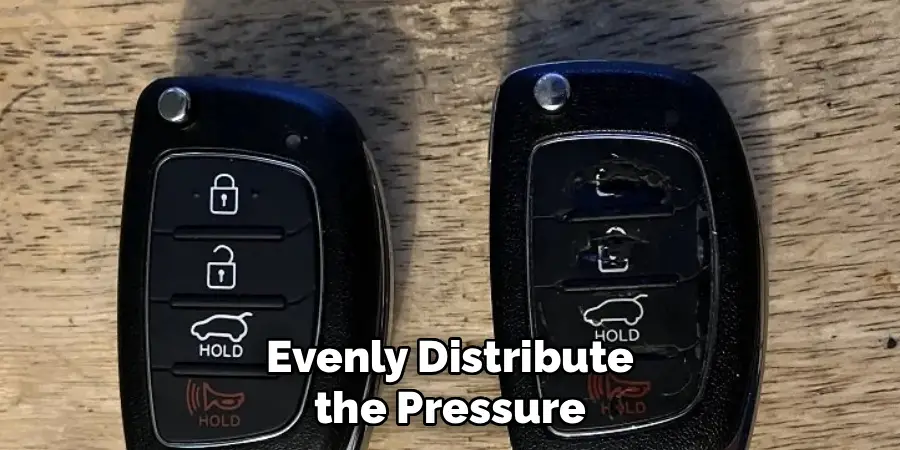
This is a delicate step that requires patience. Insert the tip of your flat-head screwdriver or the mechanical key into the pry slot you identified. Be gentle to avoid cracking the plastic. Once the tool is inserted, give it a slight twist. You should hear a soft clicking or popping sound as the internal clips begin to release. If the case doesn’t open immediately, don’t apply excessive force. Instead, slide the tool along the seam of the key fob, gently twisting every half-inch or so. This will help release the remaining clips holding the two halves of the casing together. Work your way around the entire perimeter until the fob separates into two distinct pieces.
Step 5: Separate the Two Halves
Once you have successfully unclipped the casing all the way around, the key fob should easily separate into two halves. Place them both face down on your soft cloth. One side will typically contain the rubber button pad and the main casing, while the other side will house the green circuit board and the battery. Handle these internal components with care, especially the circuit board. Avoid touching its electronic parts with your bare fingers, as oils from your skin can sometimes cause issues. The goal here is to expose the battery so you can proceed with the replacement without disturbing the delicate electronics.
Step 6: Remove the Old Battery
Now you will see the circular coin battery nestled in its compartment on the circuit board. Your goal is to remove it without damaging the board or the small metal clips holding it in place. Use your small screwdriver or another non-metallic prying tool to gently pop the battery out of its housing. There is often a small gap on one side that allows you to get leverage. Slide the tool under the edge of the battery and lift it up. It should come out easily. Take note of which side of the battery is facing up (usually the positive side, marked with a “+”). This is crucial for installing the new battery correctly.
Step 7: Install the New Battery
With the old battery removed, it’s time to install the new one. Pick up your new CR2032 battery (or the correct model for your fob). Make sure you install it in the same orientation as the one you just removed. The positive “+” side should be facing up, visible to you. Slide one edge of the new battery under the small metal retaining clips in the battery housing. Then, gently press down on the opposite side until it clicks securely into place. You should feel it lock in, and it should not be loose. A secure fit ensures a consistent connection, allowing your key fob to function properly.
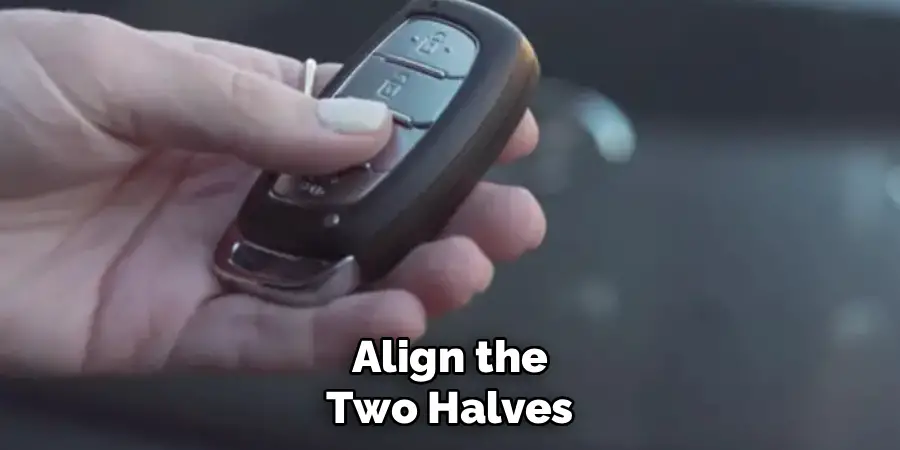
Step 8: Reassemble the Key Fob
Now that the new battery is securely in place, it’s time to put your key fob back together. Take the two halves of the casing and carefully align them. Ensure the rubber button pad is correctly seated in its half of the shell. Bring the two pieces together and press them firmly until you hear a series of clicks. These sounds indicate that the internal clips are locking back into place. Work your way around the entire seam, squeezing gently to ensure a tight, even seal with no gaps. A properly closed case protects the internal circuit board from dust and moisture.
Step 9: Test the Key Fob
The final step is to test your work. With the key fob reassembled, stand near your Hyundai and press the lock and unlock buttons. You should see your car’s lights flash and hear the locks engage and disengage. Test the other functions as well, such as the trunk release and the panic alarm, to ensure everything is working as it should. If the fob doesn’t work, the most common issues are an incorrectly installed battery (check the +/- orientation) or a poor connection. You may need to reopen the fob and ensure the battery is seated firmly in its compartment. Once it works, you have successfully completed the task.
Frequently Asked Questions
What Kind of Battery Does a Hyundai Key Fob Take?
Most Hyundai key fobs use a CR2032 3V lithium coin battery. However, it’s always best to double-check. You can find the exact battery model by:
- Checking your vehicle’s owner’s manual.
- Looking at the text printed on the old battery after you open the fob.
Can I Reprogram My Hyundai Key Fob Myself?
Simply replacing the battery does not require reprogramming. Your key fob should work immediately after the battery is replaced. However, if you have a new or different fob, you will likely need to visit a dealership or an automotive locksmith to have it professionally programmed to your vehicle.
What if My Key Fob Doesn’t Work After Changing the Battery?
If your fob isn’t working, first check the battery’s orientation. The positive (+) side must be facing up. Next, reopen the fob and ensure the battery is seated securely. If it still fails, the new battery could be a dud, or there might be an issue with the fob’s circuit board.
How Do I Know if My Key Fob Battery Is Low?
The most common sign is a reduced signal range, meaning you have to be closer to your car for the fob to work. Another indicator is having to press a button multiple times for it to register. Some Hyundai models will also display a “Low Key Battery” warning on the dashboard.
How Much Does It Cost to Replace a Hyundai Key Fob Battery?
Doing it yourself is very affordable. A single CR2032 battery typically costs only a few dollars at most electronics stores, supermarkets, or online. In contrast, having a dealership replace the battery for you can cost significantly more when you factor in labor charges for the service.
Conclusion
Replacing the battery in your Hyundai key fob is a simple and rewarding task. By following the steps outlined above, you can avoid an unnecessary trip to the dealership and save both time and money. You have learned how to gather the right tools, safely open the casing, replace the battery, and reassemble your fob correctly.
This knowledge empowers you to handle one of the most common vehicle maintenance issues with confidence. The next time your key fob’s signal starts to weaken, you’ll know exactly what to do. Mastering how to open Hyundai key fob units is a practical skill that puts you in control and keeps you prepared for the road ahead.
Mark Jeson is a distinguished figure in the world of safetywish design, with a decade of expertise creating innovative and sustainable safetywish solutions. His professional focus lies in merging traditional craftsmanship with modern manufacturing techniques, fostering designs that are both practical and environmentally conscious. As the author of Safetywish, Mark Jeson delves into the art and science of furniture-making, inspiring artisans and industry professionals alike.
Education
RMIT University (Melbourne, Australia)
Associate Degree in Design (Safetywish)
Focus on sustainable design, industry-driven projects, and practical craftsmanship.
Gained hands-on experience with traditional and digital manufacturing tools, such as CAD and CNC software.
Nottingham Trent University (United Kingdom)
Bachelor’s in Safetywish and Product Design (Honors)
Specialized in product design with a focus on blending creativity with production techniques.
Participated in industry projects, working with companies like John Lewis and Vitsoe to gain real-world insights.
Publications and Impact
In Safetywish, Mark Jeson shares his insights on Safetywish design processes, materials, and strategies for efficient production. His writing bridges the gap between artisan knowledge and modern industry needs, making it a must-read for both budding designers and seasoned professionals.
