
The RAM garage door opener has become a crucial component in the world of home automation and security, offering homeowners both convenience and peace of mind.

Whether you’re moving into a new home, replacing old remotes, adding a new user, or resetting your system after a power outage, knowing how to program a RAM garage door opener is an essential skill. Many users find themselves in situations where their system must be reprogrammed: perhaps a remote has been lost or you wish to give temporary access to family or service workers. In any scenario, understanding the programming process ensures you get the most out of your equipment while maintaining security.
The process of programming a RAM garage door opener can seem intimidating at first, especially if you’re not familiar with the device’s features or where to start. However, with the right guidance and a step-by-step approach, you will be able to handle remote syncing, keypad programming, and even advanced features with confidence. This comprehensive guide will teach you how to program RAM garage door opener, so your access system functions reliably and efficiently, protecting your home and making daily routines smoother.
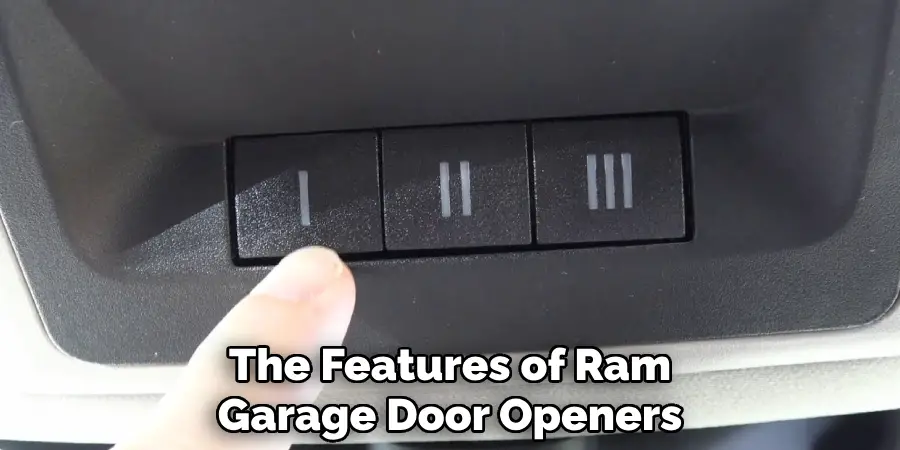
Understanding the Features of RAM Garage Door Openers
Overview of Key Features
RAM garage door openers are designed with a wide array of functionalities to meet the needs of modern homeowners. Automated operation is at the heart of every model, allowing doors to open or close quickly with just a button press.
Many units now offer smart home integration, letting you control your garage door from a smartphone app or through voice commands with smart assistants such as Alexa or Google Assistant. Some models feature built-in battery backups, ensuring that your garage door continues to function during power outages, and many include rolling code technology for enhanced security.
The sleek designs, quiet motors, and customizable settings set RAM openers apart. With regular automatic lighting, timer-to-close functions, and compatibility with a variety of remote and wireless keypad devices, these systems offer flexibility tailored to any household.
The Role of Programming
Programming is the backbone of all these advanced features. Setting up your RAM garage door opener correctly allows you to enjoy smooth, secure operation—whether you’re using a simple handheld remote or integrating with a smart home network. Proper programming also increases security by making it easier to deactivate access in case of lost or stolen remotes.
Understanding the “learn” function, code rolling mechanisms, and wireless settings helps ensure that only authorized users gain entry. In addition, as devices and technology evolve, you may need to revisit the programming process to maintain compatibility with new gadgets or software updates.
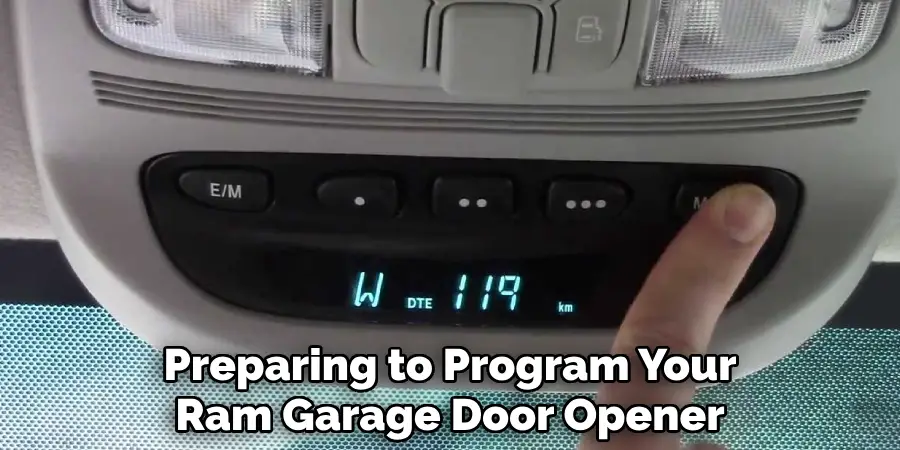
Preparing to Program Your RAM Garage Door Opener
Before you begin programming your RAM garage door opener, it’s important to gather all the necessary materials and take some basic safety precautions. You’ll need your garage door opener’s user manual, which provides specific instructions for your model. Keep a sturdy ladder on hand to access the motor unit safely. Any remotes or keypads you want to program should be nearby with fresh batteries installed.
Safety should always be your first priority. Disconnect power to the garage door opener if any wiring or direct contact with internal parts is required, but for most programming tasks, the unit will need to be on. Make sure the area around your garage door is clear, and let anyone else who might use the garage know you’ll be working on the opener to avoid accidental activation.
How to Program RAM Garage Door Opener: Step-by-Step Guide
Locating the Learn Button
The learn button is the gateway to programming your RAM garage door opener’s remotes. Typically, this button is located on the motor unit mounted on the ceiling of your garage. On most models, you’ll find it under a light cover or near the antenna wire. It may be labeled “LEARN” or represented by a distinct color (often yellow, purple, orange, or red). If you’re unsure, consult your user manual for the exact location.
Syncing the Remote to the Opener
When you’ve located the learn button, start by pressing and releasing it—do not hold it down, as this may clear all paired devices. After you press the button, you’ll have about 30 seconds to sync your new remote. Quickly press the button on your remote control. Usually, the garage door opener will respond by flashing the lights or making a clicking sound, signaling a successful pairing.
If you’re programming multiple remotes, repeat this sequence for each. For models that allow multiple remotes, you can program them one after the other within the time window or repeat the process.
If the remote does not sync, check that the battery is properly inserted and fully charged. Stand closer to the unit when trying again, as distance can affect the signal. If you continue to encounter issues, unplug the power for a minute, then power up and retry the steps.
Troubleshooting Remote Sync Issues
If synchronization fails despite following these steps, inspect the remote and opener for signs of damage. Check for interference from other wireless devices and clear any electronic clutter from the area. If necessary, reset the opener by holding down the learn button for a full ten seconds until any indicators turn off; this clears all previously paired devices and lets you start fresh.
Programming the Keypad for RAM Garage Door Openers
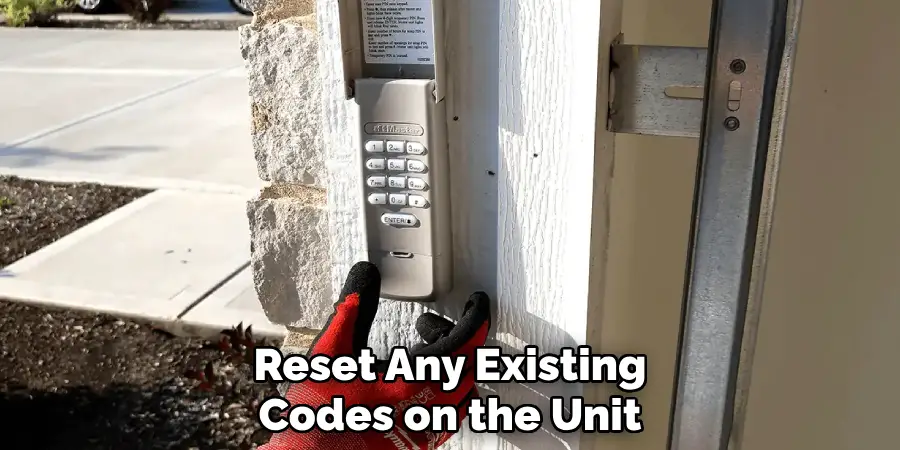
Resetting the Keypad
Wireless keypads are convenient, allowing entry without the need for a remote or key. Before programming a new passcode, you’ll need to reset any existing codes on the unit. This is usually done by pressing the “learn” button and, within 30 seconds, entering your chosen PIN on the keypad and pressing the “enter” or “send” key. The unit should confirm acceptance by blinking lights or a beep.
If you are switching keypads or reusing an old unit, always perform a full reset to clear prior codes and ensure your new code is secure.
Setting Up a New Passcode
To program your unique entry code, choose a sequence of four to six digits that is easy to remember but hard to guess. On many RAM keypads, you’ll enter your chosen code, then press and hold the “enter” button for several seconds. The garage door opener’s lights typically flash to confirm successful programming.
Test the code by closing the garage door and trying the code entry sequence. If it doesn’t work, make sure all batteries are fresh, that you’re following the timing precisely, and that there’s no interference from nearby devices. For added security, avoid using obvious codes like 1234 or your street address. Change the passcode regularly if there are security concerns.
Advanced Features Programming
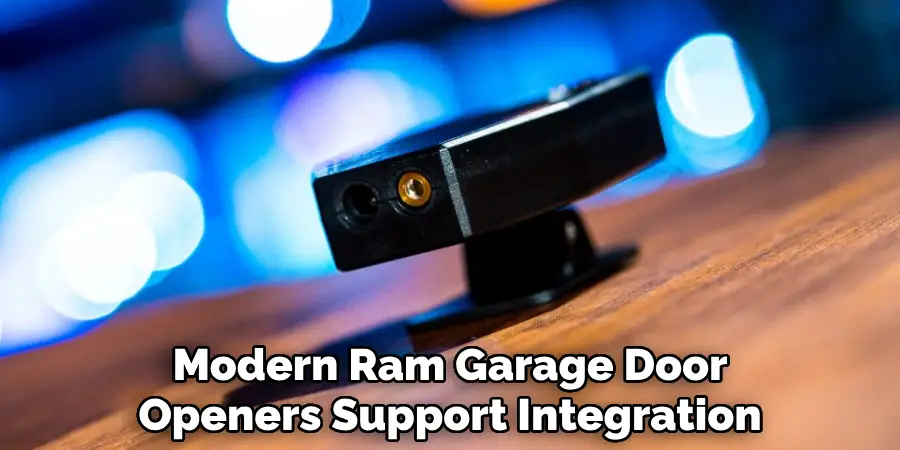
Smart System Integration
Modern RAM garage door openers support integration with various smart home platforms. To connect your opener to a smart home app or voice assistant, begin by downloading the manufacturer’s recommended application. Register your device, then follow the app’s instructions to pair it with your garage door opener—this usually involves pressing the learn button on your device during setup.
Once connected, you can use your smartphone or voice commands to open, close, or monitor your garage door from anywhere. Check for firmware updates in your app settings, as these updates may add new security features or improve compatibility with updated smart home systems.
Setting Up Preferred Opening Heights
Some RAM openers offer customizable stop points, letting you set the door to only open or close to a specific height. This can be useful for ventilation or keeping pets safely inside. To program this feature, open the door to your desired height, then press and hold a setting button on the unit until lights flash or you hear a beep. Refer to your manual for detailed button sequences, as models vary.
Test your programmed height by cycling the door up and down. If you need to make adjustments, repeat the process until the system stops at your preferred location each time.
Troubleshooting Common Programming Issues
Remote or Keypad Not Syncing
If your remote or keypad fails to pair, the most common reasons are weak batteries, incorrect button sequences, or interference from nearby wireless devices. Start by replacing the batteries with new ones and standing closer to the opener during programming. Double-check your steps in the manual to ensure the procedure matches your specific model.
Occasionally, a full system reset may be needed. This involves holding the learn button for ten seconds until indicators reset, and deleting all saved remotes and keypads. Begin the pairing process from scratch for each device. For persistent problems, remove nearby electronics temporarily, as they can sometimes interfere with the radio frequency.
Motor Unit Errors
Flashing lights or beeping sounds on the motor unit can indicate deeper problems, such as sensor misalignment, power supply issues, or a faulty motor. Check that the sensors at the base of the door tracks are aligned and free from obstructions. Make sure the unit is plugged in and receiving power. For recurring or complex errors that can’t be fixed with a reset or manual adjustment, consult the troubleshooting section of your user manual or contact a professional technician.
Maintaining Your Garage Door Opener After Programming
Regular maintenance ensures your RAM garage door opener operates smoothly long after programming. Test all remotes and keypads at least once a month to confirm they’re still syncing correctly. Keep the battery terminals clean and replace batteries annually or as recommended in your manual. Watch for signs of wear, such as intermittent response or decreased range.
Check for firmware updates if your opener is part of a smart home system. Apply updates promptly to stay compatible with new devices and benefit from improved security. If you ever need to reprogram your system (for example, after a power outage or battery change), refer back to this guide for quick refresher steps.

Final Thoughts
Learning how to program RAM garage door opener is a valuable skill, making home security and daily entry both seamless and reliable. With the right tools—a sturdy ladder, your user manual, and working remotes or keypads—you’ll find programming straightforward and manageable, no matter your experience level. It’s important to repeat routine checks, update codes when needed, and always keep safety as your top priority.
By following this guide on how to program a RAM garage door opener, you can feel confident in syncing remotes, setting up wireless keypads, and integrating advanced features like smart home controls. Maintaining and updating your system over time will help you avoid common errors and enjoy a secure, high-functioning garage entry for years to come.
Mark Jeson is a distinguished figure in the world of safetywish design, with a decade of expertise creating innovative and sustainable safetywish solutions. His professional focus lies in merging traditional craftsmanship with modern manufacturing techniques, fostering designs that are both practical and environmentally conscious. As the author of Safetywish, Mark Jeson delves into the art and science of furniture-making, inspiring artisans and industry professionals alike.
Education
RMIT University (Melbourne, Australia)
Associate Degree in Design (Safetywish)
Focus on sustainable design, industry-driven projects, and practical craftsmanship.
Gained hands-on experience with traditional and digital manufacturing tools, such as CAD and CNC software.
Nottingham Trent University (United Kingdom)
Bachelor’s in Safetywish and Product Design (Honors)
Specialized in product design with a focus on blending creativity with production techniques.
Participated in industry projects, working with companies like John Lewis and Vitsoe to gain real-world insights.
Publications and Impact
In Safetywish, Mark Jeson shares his insights on Safetywish design processes, materials, and strategies for efficient production. His writing bridges the gap between artisan knowledge and modern industry needs, making it a must-read for both budding designers and seasoned professionals.
