
Properly securing a car battery is an essential step in maintaining vehicle safety and performance. A loose or improperly installed battery can lead to electrical issues, reduced efficiency, or even severe damage to your car’s components.
Additionally, it poses a safety risk by increasing the likelihood of leaks, vibrations, or short circuits. By following the right steps and using the correct tools, you can ensure that your car battery is securely installed and functioning reliably. This guide will walk you through the process of how to secure a car battery effectively.
Importance of Securing a Car Battery
Securing a car battery is crucial for both the safety and longevity of your vehicle. A properly secured battery ensures stable electrical connections, which are essential for the reliable operation of your car’s electrical system. When the battery is loose, it can shift during driving, causing damage to itself or other components due to vibrations or collisions. Furthermore, a poorly secured battery poses safety hazards such as leaks, which can lead to corrosion, or the risk of electrical short circuits that may result in fire. By taking the time to secure your car battery correctly, you not only protect your vehicle’s components but also enhance overall road safety and reduce the likelihood of costly repairs down the line.
Signs Your Car Battery Isn’t Properly Secured
Identifying whether your car battery is improperly secured can save you from significant troubles. Here are some common signs to watch out for:
- Unusual Vibrations or Noises – If you hear rattling or notice vibrations coming from under the hood, it could indicate that the battery is loose and moving while the vehicle is in motion.
- Battery Terminal Wear or Corrosion – Loose batteries can cause the terminals to wiggle, leading to premature wear or visible corrosion around the connections.
- Difficulty Starting the Engine – An improperly secured battery may struggle to provide a consistent electrical connection, resulting in delayed or failed engine starts.
- Dashboard Battery Warning Light – If the battery isn’t secure or has been damaged due to movement, the car’s electrical system might trigger a warning light on the dashboard.
If you observe any of these signs, it’s crucial to address the issue immediately to prevent further complications and maintain your vehicle’s performance and safety.
Tools and Materials You’ll Need
To properly secure your car battery and address any related issues, you’ll need the following tools and materials:
- Wrench or Socket Set – For loosening and tightening the battery terminals and hold-down clamps.
- Battery Terminal Cleaner – To remove any corrosion or buildup on the terminals.
- Protective Gloves – To protect your hands from battery acid or dirt.
- Safety Glasses – To shield your eyes during the process.
- Battery Hold-Down Kit (if needed) – To replace any missing or damaged hold-down components.
- Multimeter – To test the battery voltage and ensure it’s functioning properly.
Having these tools and materials at hand will ensure a smooth and safe process while securing or maintaining your car battery.
10 Methods How to Secure a Car Battery
1. Use a Proper Battery Hold-Down Clamp or Bracket
The most effective and factory-approved method to secure a car battery is with a hold-down clamp or bracket, which anchors the battery to the tray using metal or hard plastic parts bolted on both sides. This system prevents the battery from shifting during driving, especially during hard braking or over bumps.
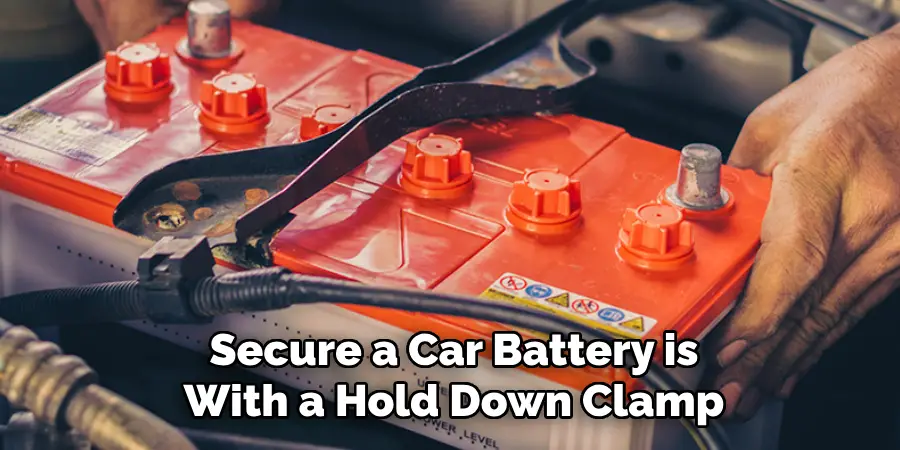
The hold-down is usually installed on top of the battery or at the base with a J-hook assembly. Make sure the clamp is tightened evenly to prevent cracking the battery case or allowing movement.
If your original clamp is missing or corroded, universal battery hold-down kits are available at most auto parts stores.
2. Secure with a Battery Tray and Frame Bolting
For larger or specialty batteries, especially in trucks or classic cars, a metal battery tray bolted into the engine bay offers additional structural support. These trays typically have side or bottom lips that keep the battery from sliding. Once the battery is placed in the tray, a frame is bolted over it to hold it in place. Use anti-corrosive coating on tray bolts and ensure it’s mounted on a flat, clean surface.
This method is ideal for vehicles in rough terrain or high-vibration environments, such as off-roading.
3. Install Rubber or Foam Padding to Prevent Vibration
While mechanical security is crucial, vibration isolation is equally important. Constant road vibrations can damage internal battery plates over time, reducing lifespan. You can insert rubber shims or foam padding around the sides and bottom of the battery within the tray. These dampen engine and road vibrations without compromising the battery’s placement.
Be careful not to over-insulate the battery, as overheating can occur. The padding should allow some airflow around the battery case.
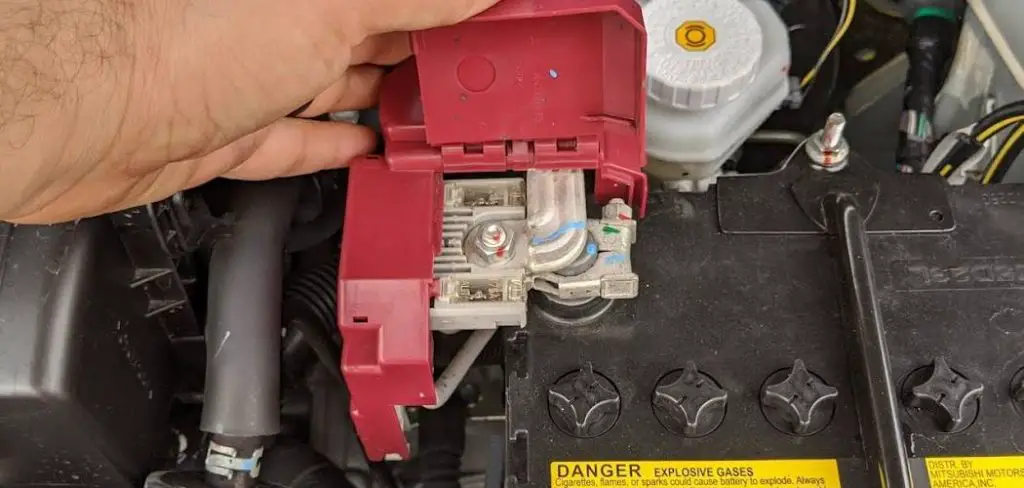
4. Use Locking Battery Terminals or Anti-Theft Lids
Battery theft can be a serious problem in urban areas or for high-performance vehicles. Some manufacturers offer locking terminal clamps or battery lock lids with steel coverings that make unauthorized access difficult. These devices lock around the terminals or clamp down over the battery, often secured with a small padlock or proprietary key.
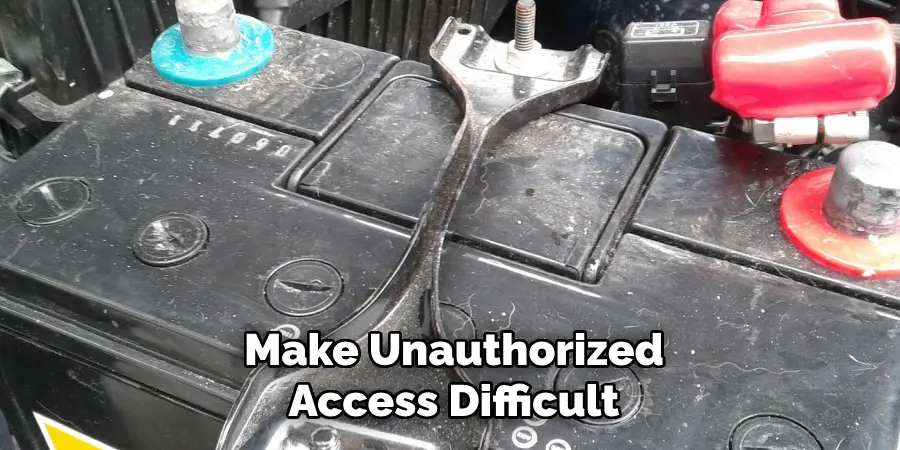
While not always necessary, these anti-theft measures are valuable in public parking or long-term storage situations.
5. Install a Battery Box with a Strap (for Trunks or RVs)
If your battery is located in the trunk, cabin, or under a seat (common in racing cars, RVs, or boats), enclosing it in a sealed battery box is essential for safety. These boxes protect from acid spills, fumes, and impact. Most come with heavy-duty straps to tightly secure the box to the floor pan or a mounting platform.
Use nylon or reinforced polyester straps with metal buckles to avoid deterioration from heat and vibration.
6. Use Threadlocker on Mounting Hardware
Vibration can cause battery clamps and brackets to loosen over time. To ensure long-term security, apply a threadlocker compound (such as blue Loctite) to the clamp bolts during installation. This prevents the bolts from vibrating loose but still allows removal if needed.
Avoid red threadlocker unless you want a semi-permanent bond—it may require heat to remove.
7. Routinely Inspect and Re-Torque Battery Mounts
Even a well-secured battery can shift if neglected. Every 3 to 6 months, visually inspect the battery hold-downs for rust, cracks, or looseness. Use a torque wrench to gently retighten bolts to manufacturer specifications. An over-tightened clamp can crack the plastic casing; an under-tightened one can allow battery movement and stress the terminals.
Maintenance is key to keeping your secure setup functional over the long haul.
8. Use Heat Shields or Insulating Wraps in Hot Climates
Extreme engine heat can weaken or warp battery materials and cause expansion, which may unseat it from its mount. In hot environments, battery heat shields or insulation wraps help regulate temperature and protect against warping that could compromise stability. Some wraps include built-in padding, doubling as a vibration absorber.
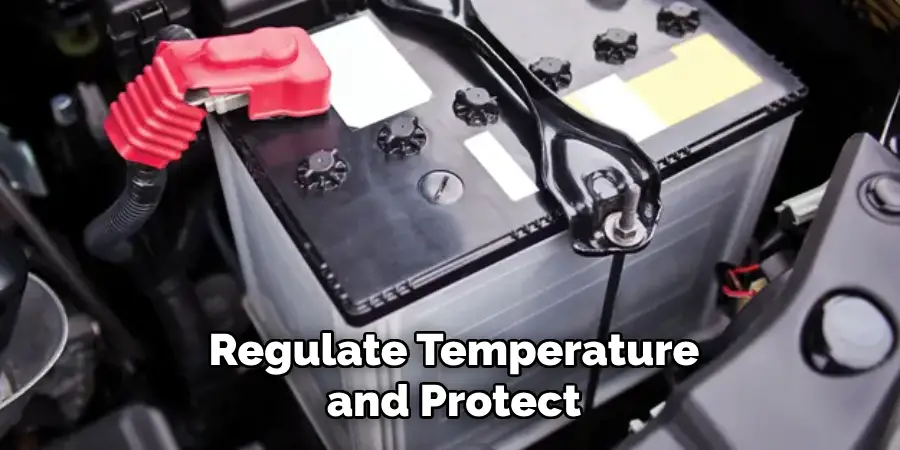
Install these accessories without covering vent holes and verify compatibility with your battery type (AGM, lead-acid, etc.).
9. Prevent Corrosion Around Mounting Surfaces
Battery leaks and moisture buildup can cause rust to form on the tray, bolts, or brackets, eventually weakening the mount. Clean all metal contact points thoroughly, and apply a battery corrosion protector spray or dielectric grease to mounting surfaces and terminals. Painted or powder-coated mounting brackets are also more resistant to rust.
Addressing corrosion early helps keep the mounting hardware strong and reliable.
10. Retrofit Custom Brackets for Non-Standard Batteries
In restoration or modification projects, sometimes the original battery doesn’t fit—or you’re using a different size or type. In such cases, custom brackets can be fabricated or purchased to fit your battery securely. Use angled aluminum, stainless steel, or powder-coated steel to create a custom bracket that bolts to existing tray holes. Reinforce with a top strap or a side clamp for added safety.
Always double-check for clearance with the hood and avoid creating contact points that could short terminals.
Safety Considerations
When working with batteries, safety should always be a top priority. Start by wearing appropriate personal protective equipment (PPE) such as gloves and safety glasses to protect against acid spills or electrical shocks. Always ensure the battery is disconnected before beginning any work to avoid accidental short circuits. Be mindful of battery orientation to prevent potential leaks or damage.
Additionally, use insulated tools to minimize the risk of accidental contact with live terminals. Proper ventilation is also crucial when handling batteries, as they can emit harmful gases. Take time to follow all manufacturer guidelines and dispose of old batteries responsibly at certified recycling facilities.
Conclusion
Securing a car battery isn’t just about keeping it physically in place—it’s also about ensuring electrical integrity, preventing theft, and avoiding damage from vibration or thermal expansion. These 10 methods provide layered protection for authorized users, whether you’re maintaining a daily driver, restoring a classic car, or outfitting an RV or performance vehicle.
Always consult your vehicle’s owner’s manual or a professional mechanic before modifying any battery mounting system, and never attempt to secure or bypass components without ensuring compatibility and safety. So, there you have it – a quick and easy guide on how to secure a car battery.
Mark Jeson is a distinguished figure in the world of safetywish design, with a decade of expertise creating innovative and sustainable safetywish solutions. His professional focus lies in merging traditional craftsmanship with modern manufacturing techniques, fostering designs that are both practical and environmentally conscious. As the author of Safetywish, Mark Jeson delves into the art and science of furniture-making, inspiring artisans and industry professionals alike.
Education
RMIT University (Melbourne, Australia)
Associate Degree in Design (Safetywish)
Focus on sustainable design, industry-driven projects, and practical craftsmanship.
Gained hands-on experience with traditional and digital manufacturing tools, such as CAD and CNC software.
Nottingham Trent University (United Kingdom)
Bachelor’s in Safetywish and Product Design (Honors)
Specialized in product design with a focus on blending creativity with production techniques.
Participated in industry projects, working with companies like John Lewis and Vitsoe to gain real-world insights.
Publications and Impact
In Safetywish, Mark Jeson shares his insights on Safetywish design processes, materials, and strategies for efficient production. His writing bridges the gap between artisan knowledge and modern industry needs, making it a must-read for both budding designers and seasoned professionals.
