
Removing a commercial door lock may seem like a daunting task, but with the right tools and a clear understanding of the process, it can be done efficiently. Whether you are replacing a damaged lock, upgrading security, or simply performing maintenance, knowing how to remove a commercial door lock is an essential skill.
This guide will walk you through the step by step process of how to remove a commercial door lock, ensuring that you can complete the task safely and effectively.
Common Reasons for Removing a Commercial Door Lock
There are several reasons why you might need to remove a commercial door lock. One common reason is to upgrade to a more secure locking system, as advancements in security technology continue to provide better options for protecting commercial spaces.
Another reason could be due to wear and tear; over time, locks can become damaged or less reliable, necessitating a replacement to maintain proper functionality. Lost or stolen keys can also prompt removing and replacing a lock to ensure the security of the premises.
Additionally, rekeying a lock, whether for convenience or enhanced security, might require the temporary removal of the locking mechanism. Finally, renovations or changes to the door itself may also lead to the removal of a commercial lock to accommodate a new design or alignment.
Types of Commercial Door Locks
Selecting the right type of commercial door lock is essential for ensuring both security and functionality. Various types of locks are designed to meet specific needs, and understanding their unique features can help businesses make informed decisions. Here are some common types of commercial door locks:
- Cylindrical Lever Locks
These are one of the most widely used commercial locks due to their durability and simplicity. They are easy to install and operate, making them a popular choice for office doors and other frequently accessed spaces.
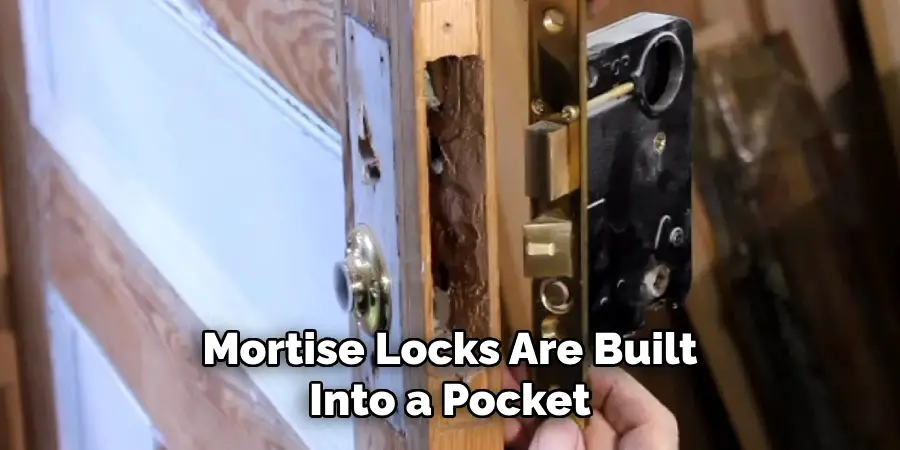
- Mortise Locks
Known for their strength and reliability, mortise locks are ideal for high-security areas. They feature a complex mechanism that is built into a pocket within the door, providing enhanced resistance to tampering.
- Smart Locks
Combining technology with security, smart locks allow businesses to control and monitor access remotely. They often use keypads, biometric scanners, or even smartphone apps for entry, offering a modern and flexible solution.
- Panic Bars (Crash Bars)
Designed for emergency exits, panic bars ensure a quick and easy egress. They are push-activated bars that unlock the door from the inside, promoting safety during evacuations.
- Keypad Entry Systems
These locks use numeric keypads to grant access, eliminating the need for physical keys. Keypad systems are particularly useful for managing access in multi-user environments and can be easily reprogrammed.
- High-Security Locks
Engineered to withstand advanced break-in techniques, these locks feature reinforced materials and complex keyways. They are often used in sensitive areas requiring top-tier security.
By understanding the different types of commercial door locks and their applications, businesses can choose the most suitable option to protect their property and ensure the safety of employees and customers.
10 Methods How to Remove a Commercial Door Lock
1. Identify the Type of Lock Before Starting
Before picking up a single tool, it’s critical to identify the specific type of commercial lock you’re dealing with. The most common commercial lock types include cylindrical locks, mortise locks, panic bars (exit devices), and electronic keypad locks. Each type has unique installation hardware and internal configurations.
For example, mortise locks are built into a pocket within the door edge, while cylindrical locks are mounted through holes in the face of the door. Knowing the type helps you anticipate the removal steps and choose the right tools for the job, reducing trial and error.
2. Gather the Required Tools for Safe Removal
Once you’ve identified the lock type, gather the appropriate tools. For most commercial locks, you’ll need a flathead screwdriver, Phillips screwdriver, Allen (hex) wrench set, needle-nose pliers, and possibly a drill if the lock is stuck or has tamper-resistant screws.
For electronic or keypad locks, keep a small electronics screwdriver set on hand. Additionally, have a labeling system—such as masking tape and a marker—ready to identify screws and components as you remove them. This helps immensely during reinstallation or troubleshooting.
3. Remove the Exterior Handle or Lever
Start by removing the outside lever or knob, which is typically the first part of a commercial lock to be detached. For cylindrical locks, locate the detent or release hole, usually near the base of the lever.
Insert a small flathead screwdriver or Allen wrench to depress the release pin, then pull the handle off. In some cases, you may need to loosen a set screw first. Removing the handle reveals the lock chassis underneath and allows easier access to mounting screws or the internal cam mechanism.
4. Remove the Interior Handle and Cover Plate
Next, move to the inside portion of the door. Unscrew and remove the interior lever or knob, following the same procedure as the exterior side. Often, there will be a cover plate or rose under the handle that conceals the mounting screws. Carefully pry it off using a flathead screwdriver.
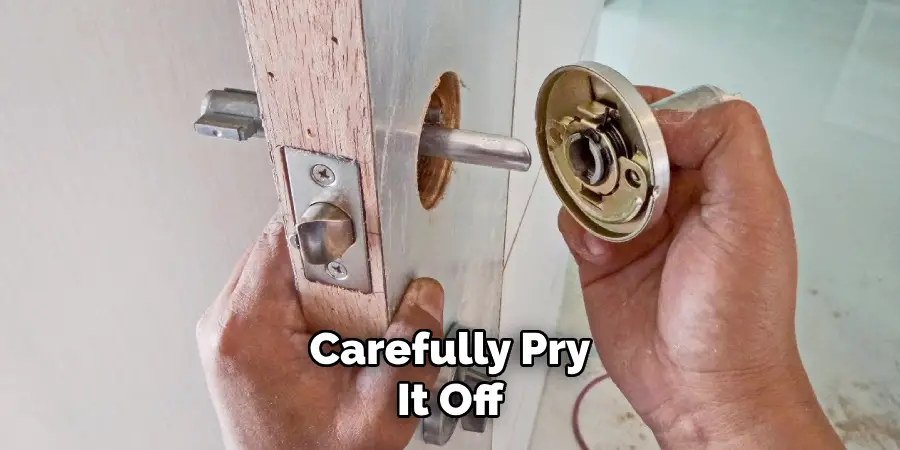
This step exposes the mounting plate and structural components of the lockset. Take your time and avoid scratching the door’s finish or bending any metal parts, as these may be reused or need to remain intact for new lock installation.
5. Unscrew the Mounting Plate or Lock Chassis
With the cover plate removed, locate the mounting screws that secure the lock body (or chassis) to the door. These screws typically run through the door and anchor both the interior and exterior halves of the lock together. Using a Phillips or flathead screwdriver, remove these screws and gently pull the lock chassis apart.
If the lock doesn’t separate easily, double-check for hidden screws or clips holding it in place. The lock body may be spring-loaded, so hold both sides as you disengage them to avoid parts falling or snapping unexpectedly.
6. Extract the Latch or Deadbolt Mechanism
Once the chassis is removed, you’ll have clear access to the latch assembly (for cylindrical locks) or the mortise lock body (for mortise locks). Remove the screws on the edge of the door that hold the latch plate or faceplate in place. Gently pull the latch or bolt mechanism out of the door cavity.
If it resists, wiggle it slightly back and forth or use needle-nose pliers to grip the body without damaging it. Removing this part is essential for a full lock replacement or internal cleaning.
7. For Mortise Locks: Remove the Lock Body from the Pocket
If you’re dealing with a mortise lock, you’ll find a large rectangular metal box embedded in a pocket within the edge of the door. Unscrew the faceplate and slowly slide the mortise lock body out of the pocket. Be cautious, as these units can be heavy and contain multiple moving parts.
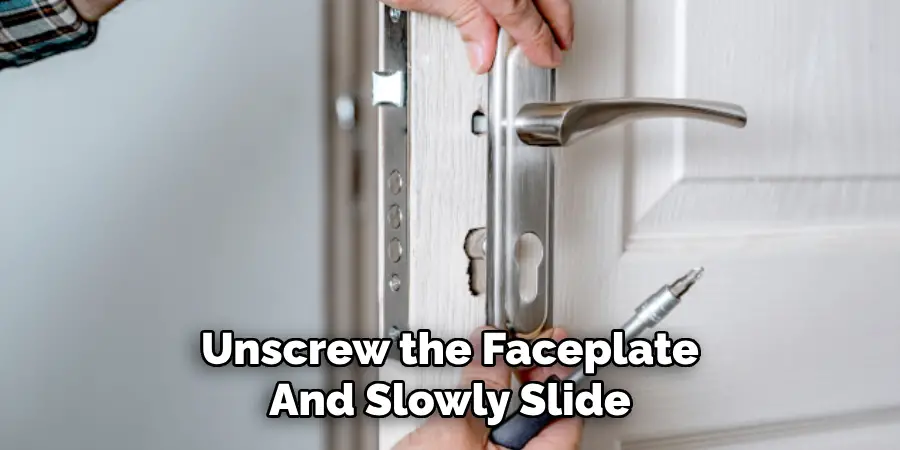
Handle it carefully to avoid dislodging internal mechanisms. Mortise locks may also have additional trim or escutcheon plates that need removal from the door face. Keep these parts organized, especially if the lock is being replaced with the same model.
8. Disconnect Wiring on Electronic or Keypad Locks
If your commercial lock includes a keypad, biometric reader, or electronic component, take care to disconnect any wiring or battery packs before removal. Turn off power to the unit (if hardwired), or remove batteries to prevent accidental shocks or short circuits.
Most keypad locks have a terminal block or clip-in connector behind the keypad. Gently pull or unscrew these connections and set them aside. Take note of how wires are routed so they can be reconnected easily later. Labeling each wire is recommended to prevent confusion during reinstallation.
9. Inspect and Clean the Door Prep Holes
With the entire lock removed, take a moment to inspect the holes and cutouts in the door. Look for debris, rust, wood splinters, or misalignment that could interfere with the new lock’s fit.
Use a brush or cloth to clean out the recesses and lubricate any sticking latches or hardware if you plan to reuse them. Check that the door edge and face are not damaged or cracked. A properly cleaned and prepped surface helps the new lock sit flush and operate smoothly, extending its life and reliability.
10. Save All Parts for Replacement or Reference
Finally, organize and label all removed parts, even if you don’t plan to reuse them. Keep screws, mounting plates, levers, and latches in a small container or plastic bag. These parts may serve as useful references when selecting a new lock or reinstalling components.
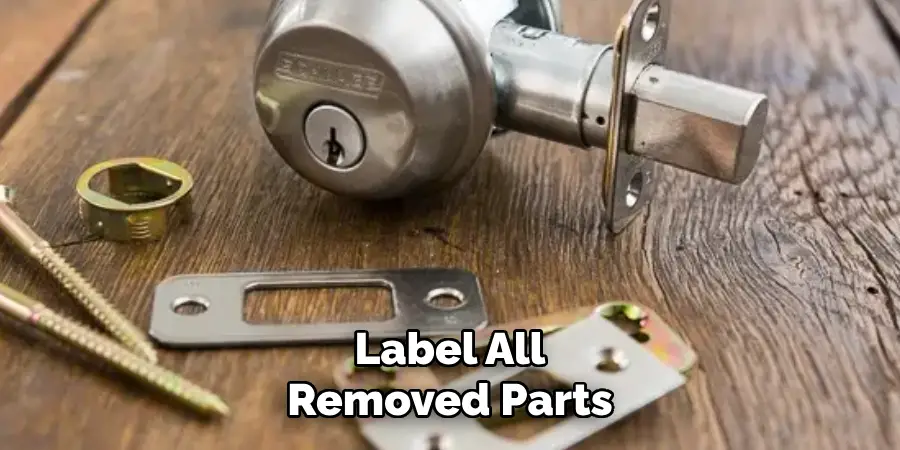
If the lock is being replaced due to damage or failure, examine the removed parts for wear, corrosion, or broken elements to better understand the cause. Documenting this process with photos can also be helpful, especially for reassembly or troubleshooting.
Conclusion
Removing a commercial door lock may seem intimidating due to its robust design and varied configurations, but by following these ten well-structured methods, you can approach the task with clarity and confidence.
Whether you’re replacing a high-traffic entry system, repairing a failed mechanism, or simply upgrading your security, proper disassembly ensures smooth progress and avoids damage to the door or lock components. Thanks for reading our blog post on how to remove a commercial door lock! We hope you found it helpful and informative.
Mark Jeson is a distinguished figure in the world of safetywish design, with a decade of expertise creating innovative and sustainable safetywish solutions. His professional focus lies in merging traditional craftsmanship with modern manufacturing techniques, fostering designs that are both practical and environmentally conscious. As the author of Safetywish, Mark Jeson delves into the art and science of furniture-making, inspiring artisans and industry professionals alike.
Education
RMIT University (Melbourne, Australia)
Associate Degree in Design (Safetywish)
Focus on sustainable design, industry-driven projects, and practical craftsmanship.
Gained hands-on experience with traditional and digital manufacturing tools, such as CAD and CNC software.
Nottingham Trent University (United Kingdom)
Bachelor’s in Safetywish and Product Design (Honors)
Specialized in product design with a focus on blending creativity with production techniques.
Participated in industry projects, working with companies like John Lewis and Vitsoe to gain real-world insights.
Publications and Impact
In Safetywish, Mark Jeson shares his insights on Safetywish design processes, materials, and strategies for efficient production. His writing bridges the gap between artisan knowledge and modern industry needs, making it a must-read for both budding designers and seasoned professionals.
