
Are you having trouble with your Liftmaster gate opener? If your gate won’t close or open properly, it may be time to reset the system.

Resetting your Liftmaster gate opener can be an essential step to resolve issues such as unresponsive controls, malfunctioning systems, or after making modifications to the device. Whether you are troubleshooting a problem or setting up the opener for the first time, understanding the reset process ensures smooth operation and extends the lifespan of your equipment. Additionally, regularly resetting your gate opener can help prevent potential safety hazards and maintain the security of your property.
This guide on how to reset liftmaster gate opener will walk you through the simple, step-by-step instructions to reset your Liftmaster gate opener effectively, keeping your system running efficiently and securely.
What Are the Benefits of Resetting Your Liftmaster Gate Opener?
Resetting your Liftmaster gate opener can provide various benefits, such as:
- Improved Performance: Over time, the internal components of your gate opener may become worn out or malfunction. Regularly resetting your gate opener can help reset these components and improve its overall performance.
- Enhanced Safety: If there are any glitches or malfunctions in your gate opener, it could potentially create a safety hazard for you and others. By resetting your gate opener, you can ensure that all systems are functioning correctly and avoid any potential accidents.
- Longer Lifespan: As with any electronic equipment, regular maintenance and resetting can help extend its lifespan. By following the recommended reset process, you can prevent any unnecessary strain or wear and tear on your gate opener, allowing it to last longer.
- Improved Security: Resetting your gate opener can also help improve its security features. By clearing out any stored codes or settings, you can ensure that only authorized individuals have access to your property.
What Will You Need?
Before you begin the reset process, there are a few items that you will need to have on hand:
- The instruction manual for your specific gate opener model. This can often be found online if you no longer have a physical copy.
- A small screwdriver or other tool for accessing the control panel of your gate opener.
- Any necessary access codes or passwords required for your specific model?
Once you have gathered these items, you will be ready to begin the reset process.
10 Easy Steps on How to Reset Liftmaster Gate Opener
Step 1. Disconnect the Power
To begin the reset process, the first step is to safely disconnect the power to your Liftmaster gate opener. Locate the power source for the device, which is typically an electrical outlet or a dedicated breaker. Unplug the device from the outlet or switch off the circuit breaker that powers the gate opener.
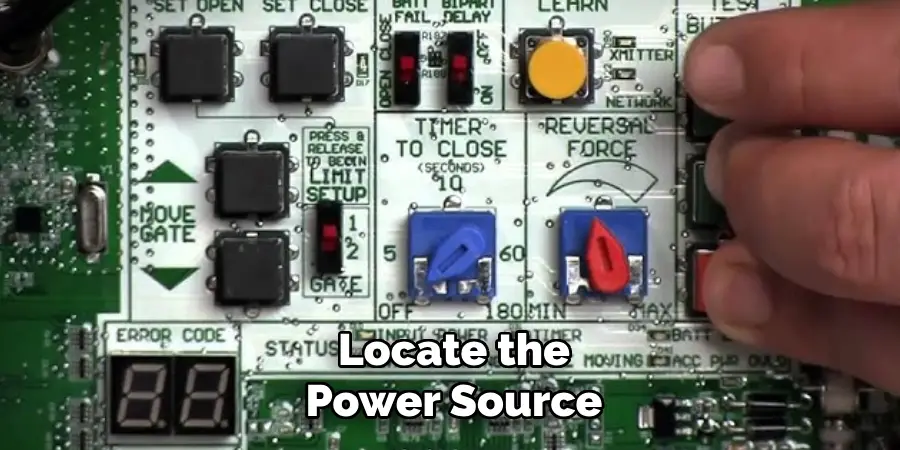
This ensures your safety during the reset process and prevents accidental activation of the gate. It is crucial to confirm that the gate is fully powered down before proceeding to the next step. Take a moment to double-check the power status to avoid any potential risks or interruptions during the reset process.
Step 2. Locate the Control Panel
The control panel is typically housed within a protective enclosure near the gate opener motor. Begin by identifying the location of the motor unit, as the control panel is generally attached or adjacent to it. Look for a small box or compartment labeled with the manufacturer’s name or technical specifications.
Once located, carefully open the panel using the appropriate tools, such as a screwdriver, if required. Be cautious not to damage any components while gaining access to the panel.
Step 3. Find the Reset Button
Inside the control panel, inspect the internal components to locate the reset button. It is often a small, recessed button, which may be labeled as “Reset” or marked with a corresponding symbol. Use a flashlight if necessary to ensure better visibility, as the reset button may be positioned near wiring or other technical hardware.
Once found, confirm its function by consulting the user manual provided by the manufacturer to avoid pressing the wrong button and disrupting the system.
Step 4. Press and Hold the Reset Button
Press the reset button gently using a small, non-metallic tool, such as a pen or a plastic pin, to avoid causing any damage. Hold the button down for a duration specified in the user manual, which is typically between 10 to 30 seconds. You may observe indicator lights flashing or hear a beep, signaling that the reset process has been initiated.
Maintain steady pressure during this time to ensure the reset is completed successfully. Release the button once the required time has elapsed and wait for the system to reboot fully.
Step 5. Wait for the System to Reset
Once you release the reset button, the system will begin the reboot process. This may take a few minutes, depending on the complexity of the device or system. During this time, avoid interrupting the process by powering off the device or pressing additional buttons, as this could disrupt the reset and potentially cause further issues.
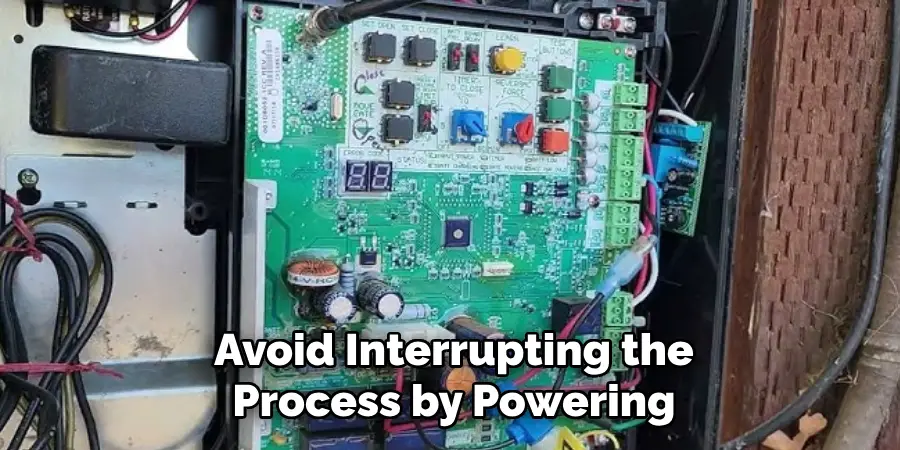
You may notice lights blinking or status indicators updating, signifying that the system is initializing. Be patient and allow the reset to complete fully before attempting to interact with the device again. Once the reset is finished, the device should be restored to its default settings and ready for reconfiguration or use.
Step 6. Reprogram Remote Controls and Keypads
After resetting the system, it is essential to reprogram any remote controls and keypads connected to the device. Begin by consulting the user manual or manufacturer’s guide for specific instructions on programming your model. Typically, this involves pressing a designated “program” or “learn” button on the device, followed by a series of inputs on the remote or keypad to sync them.
Ensure that each accessory is tested to confirm it is functioning correctly after programming. This step ensures that all devices are properly linked and operational, restoring full control and convenience to the system.
Step 7. Restore Power to the Gate Opener
Once all programming and adjustments are completed, it’s time to restore power to the gate opener. Carefully reconnect the power source, whether it’s plugging in the system, reactivating the circuit breaker, or reconnecting the backup battery. After powering on, allow a few moments for the system to initialize.
Observe the gate opener to ensure it powers up without any unusual noises or error indications. Perform a test operation by opening and closing the gate to confirm that all functions are working smoothly. If any issues arise, consult the user manual or contact the manufacturer for assistance.
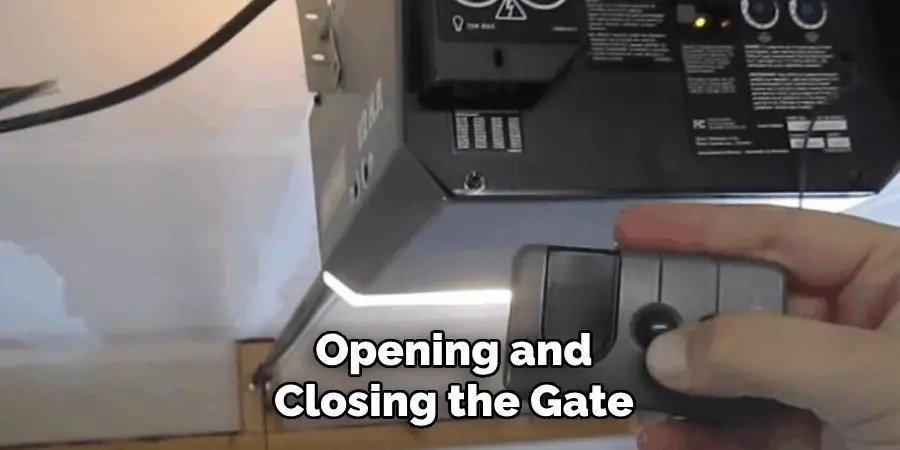
Step 8. Test the Gate Opener
To ensure the gate opener is functioning as expected, begin by using the remote control or wall-mounted switch to activate the gate. Watch closely as the gate opens and closes, noting any irregularities such as jerky movements, unusual sounds, or incomplete operations. Verify that all safety features, including sensors and auto-reverse mechanisms, are working correctly by testing with appropriate precautions.
Additionally, check the responsiveness of the controls to ensure there are no delays or connectivity issues. If the gate operates smoothly and without errors, the installation or maintenance process is complete. If problems are detected, refer to the troubleshooting section of the user manual to resolve them efficiently.
Step 9. Adjust Settings if Necessary
After ensuring the gate operates properly, review the control settings to confirm they meet your specific preferences and requirements. Adjust parameters such as opening and closing speed, auto-close timing, or sensitivity of safety sensors as needed. Refer to the user manual for guidance on modifying these settings accurately.
Testing the adjustments after each change can help ensure optimal functionality and performance. Once all desired settings are configured, your gate system will be fully optimized and ready for everyday use.
Step 10. Secure the Control Panel
After completing all adjustments and tests, ensure that the control panel is securely closed to protect the internal components from external elements such as dust, moisture, or tampering.
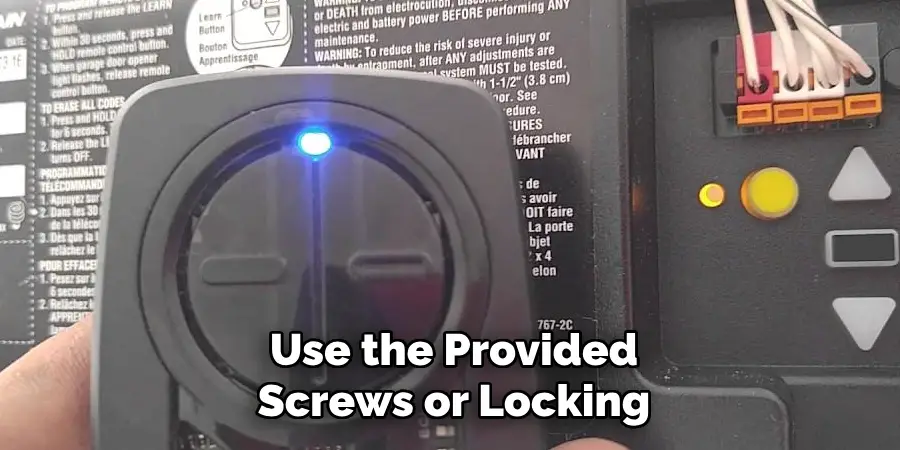
Use the provided screws or locking mechanism to fasten the panel cover firmly in place. Double-check that all connections remain intact and that the cover is properly aligned to prevent any gaps. Keeping the control panel secured not only extends the longevity of your gate system but also ensures its safe and efficient operation over time.
By following these maintenance procedures and keeping your control panel clean, secure, and well-maintained, you can greatly increase the lifespan of your gate system.
Conclusion
To reset your LiftMaster gate opener, it is crucial to follow the appropriate steps carefully to ensure proper functionality.
Begin by locating the “Learn” button on the motor unit, which is typically found on the back or side of the device. Press and hold this button until the LED light near it turns off, effectively erasing all programmed remotes and keypads.
Once cleared, reprogram your devices by pressing the “Learn” button again and using your remote or keypad to establish a new connection. Always consult your user manual for specific instructions and safety precautions.
By following these steps on how to reset liftmaster gate opener, you can reset your LiftMaster gate opener efficiently and keep your gate system operating smoothly.
Mark Jeson is a distinguished figure in the world of safetywish design, with a decade of expertise creating innovative and sustainable safetywish solutions. His professional focus lies in merging traditional craftsmanship with modern manufacturing techniques, fostering designs that are both practical and environmentally conscious. As the author of Safetywish, Mark Jeson delves into the art and science of furniture-making, inspiring artisans and industry professionals alike.
Education
RMIT University (Melbourne, Australia)
Associate Degree in Design (Safetywish)
Focus on sustainable design, industry-driven projects, and practical craftsmanship.
Gained hands-on experience with traditional and digital manufacturing tools, such as CAD and CNC software.
Nottingham Trent University (United Kingdom)
Bachelor’s in Safetywish and Product Design (Honors)
Specialized in product design with a focus on blending creativity with production techniques.
Participated in industry projects, working with companies like John Lewis and Vitsoe to gain real-world insights.
Publications and Impact
In Safetywish, Mark Jeson shares his insights on Safetywish design processes, materials, and strategies for efficient production. His writing bridges the gap between artisan knowledge and modern industry needs, making it a must-read for both budding designers and seasoned professionals.
