
Framing a pocket door can be a practical and aesthetically pleasing solution for saving space in your home. Unlike traditional hinged doors, pocket doors slide neatly into a wall cavity, making them ideal for areas where space is limited or where a sleek, modern look is desired.

While the installation process may seem intimidating, with the right tools and a step-by-step approach, framing a pocket door can be a manageable DIY project. This guide will walk you through how to frame a pocket door for smooth installation.
What is a Pocket Door?
A pocket door is a sliding door that disappears into a hidden compartment within a wall when opened, rather than swinging out like a traditional door. This innovative design saves space and creates a cleaner, more streamlined appearance in a room.
Pocket doors can be made from a variety of materials, including wood, glass, or metal, and are available in different styles to match your home’s décor. They are particularly useful in tight spaces, such as small bathrooms, closets, or hallways, where a swinging door might be impractical.
Beyond functionality, pocket doors add a modern and minimalist aesthetic, making them a popular choice for both contemporary and classic interior designs.
Advantages of Pocket Doors
Pocket doors offer several advantages that make them an excellent choice for many homes and spaces. One key benefit is their space-saving design, as they slide into a wall cavity rather than swinging open, freeing up valuable floor space. This makes them ideal for smaller rooms or areas where traditional doors could create congestion.
Additionally, pocket doors are highly versatile and can accommodate various design preferences, with options available in numerous materials, finishes, and styles. They also provide a unique aesthetic, adding a sleek and modern touch to any room.
Furthermore, pocket doors can enhance accessibility, especially in areas that require a seamless flow or wider entryways. Their ability to discreetly divide spaces while maintaining an open feel makes them both practical and visually appealing in any home.
Tools and Materials You’ll Need
Installing or repairing a pocket door requires the right tools and materials to ensure a smooth and efficient process. Below is a list of essential items you may need:
Tools:
- Tape measure
- Level
- Screwdriver (Phillips and flathead)
- Drill with appropriate drill bits
- Saw (circular or hand saw, depending on the task)
- Hammer
- Pry bar
- Stud finder
- Utility knife
- Sandpaper
Materials:
- Pocket door frame kit
- Door slab
- Screws and nails
- Door hardware (handles, locks, etc.)
- Drywall (if repairs are needed)
- Paint or stain (for finishing the door, if necessary)
Having these tools and materials on hand will help make the installation process more efficient and ensure your pocket door is properly fitted and functional.
10 Methods How to Frame a Pocket Door
1. Determine the Right Wall and Pocket Door Location
The first and most important step in framing a pocket door is selecting a suitable wall. Pocket doors require a non-load-bearing wall, or at least one that can be modified with a header to redistribute load above the pocket. Additionally, the wall should be free of plumbing, HVAC, or electrical systems that could interfere with the pocket.

Since the door needs space to slide into the wall, ensure the chosen wall has enough width to accommodate the full door slab plus the framing hardware. Most pocket door kits require about double the door width in clear wall space.
2. Choose the Appropriate Pocket Door Kit
Once you’ve identified the right wall, choose a pocket door frame kit that matches the dimensions and weight of your door. Kits are typically designed for standard door sizes (24″, 30″, 32″, 36″, etc.) and include the track, split studs, brackets, guides, and hangers.
Check the kit’s specifications to ensure it supports your door’s thickness and material—solid-core doors need sturdier kits than hollow-core versions. Some high-end kits also offer soft-close features, which can be a worthwhile upgrade. Choosing the right kit simplifies the process and ensures that all components are compatible.
3. Demolish Existing Wall (If Remodeling)
If you are installing a pocket door in an existing home, you’ll likely need to open up the wall. Begin by shutting off power to the area and removing drywall along the section of wall that will house the pocket door and new framing. Use a utility knife to score the drywall and a pry bar to remove it carefully.
Expose the full height of the wall—typically from floor to ceiling—and at least twice the width of the door. If necessary, remove existing studs within the pocket area, ensuring the structural header is supported during demolition.
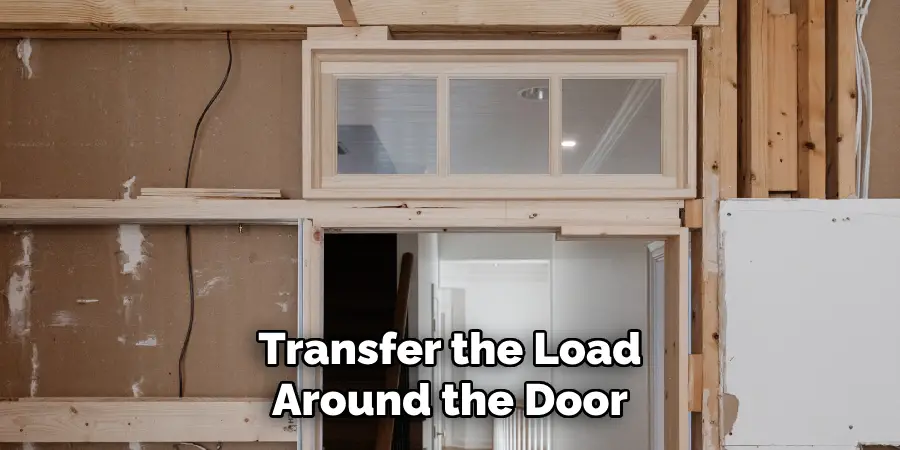
4. Install a New Header Above the Pocket Opening
If the pocket door is going into a load-bearing wall, install a new header to transfer the load around the door opening. Even for non-load-bearing walls, a header provides structural integrity and supports the top track. Measure and cut the header to span the full opening—this includes the pocket and the doorway itself.
Use jack studs on each side to support the header. Secure it with nails or structural screws, ensuring it’s level. For standard 2×4 walls, a doubled 2×4 or 2×6 header is typically sufficient, but always follow local code requirements.
5. Frame the Pocket Using Split Studs or Metal Hangers
Pocket door kits include split studs or steel-wrapped vertical supports that allow the door to slide between them without obstruction. Install these split studs in place of standard wall studs along the pocket section. They provide enough structural support while remaining hollow enough to allow the door to pass through.
Space them according to the kit’s instructions, typically 16″ on center. Ensure they’re plumb and straight, as any deviation can cause the door to bind during operation. Attach the split studs securely to the floor and underside of the header.
6. Mount the Sliding Track System
With the framing in place, it’s time to install the sliding track that will carry the pocket door. The track mounts directly to the underside of the header or to a bracket system depending on your kit. Carefully align the track with the centerline of the framed opening, ensuring it is level along its entire length.
A crooked or sagging track will lead to poor door performance. Fasten it securely using screws provided in the kit. At this point, also install the door hanger brackets, which will later connect to the top of the door slab.
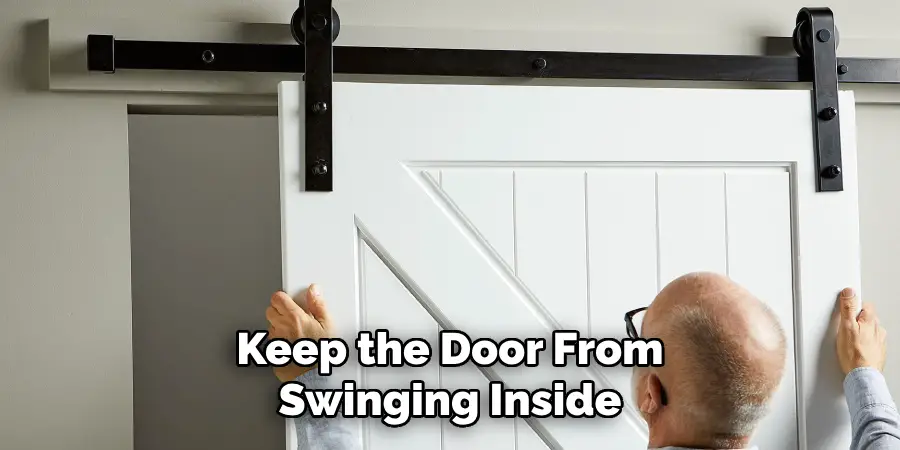
7. Install the Floor Guide and Check Alignment
To keep the door from swinging inside the wall cavity, a floor guide must be installed at the base of the door opening. These guides typically mount directly to the floor and hold the door in place while allowing it to slide freely.
Use a level to align the guide with the track above. Test the fit with your door slab before finalizing installation. This step is crucial for ensuring the door slides straight and doesn’t wobble. Some kits include adjustable guides, which can make fine-tuning much easier.
8. Hang the Door on the Track
After framing and installing the hardware, it’s time to hang the door. Attach the supplied hangers to the top edge of the door slab according to the kit’s instructions. Then, lift the door and hook the hangers onto the trolley rollers inside the track.
Most hangers allow for vertical adjustment, so you can raise or lower the door slightly to achieve perfect alignment. Once hung, slide the door back and forth a few times to confirm smooth motion. Make any necessary adjustments to the hangers or track if the movement is stiff or uneven.
9. Install Blocking for Trim and Drywall Support
Before closing the wall, install horizontal blocking between the split studs and around the opening. This will provide a solid surface for attaching drywall, casing, or trim later on. Use scrap 2x4s or other wood cut to fit snugly between studs. Nail or screw them in place, ensuring they’re flush with the edges of the frame.
Proper blocking makes drywall installation easier and prevents the trim from flexing or pulling away over time. Pay extra attention to areas around the pocket door opening, where trim stability is critical for a finished look.
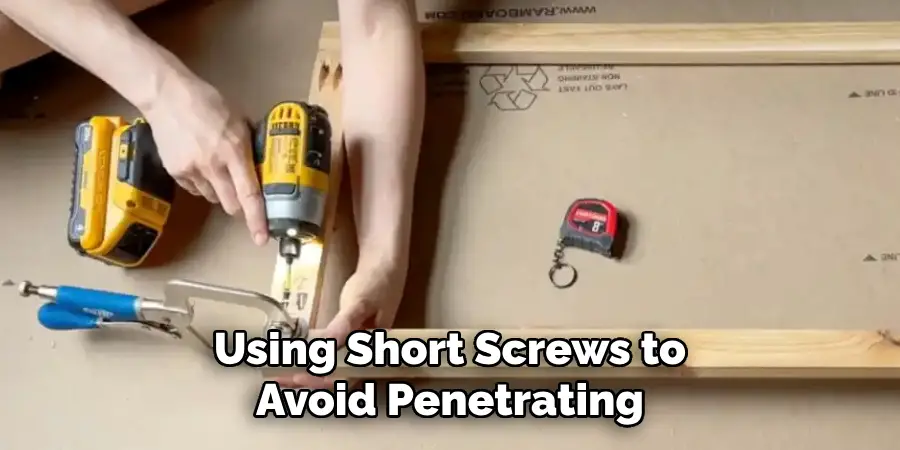
10. Drywall, Trim, and Finish the Wall
With the frame complete and door installed, it’s time to close the wall. Hang new drywall over the pocket section, using short screws to avoid penetrating the door cavity. Be especially cautious near the track and split studs—avoid overdriving screws that could interfere with the door’s motion.
Once the drywall is secure, tape, mud, and sand the seams as you would with any wall. Then install door casing, baseboards, and optional door stops or bumpers. Prime and paint to match the room’s décor. The result is a clean, seamless installation with a smooth-sliding door that disappears into the wall.
Conclusion
Framing a pocket door may require a bit more precision than installing a standard door, but the benefits are well worth the effort—especially in tight or high-traffic spaces. Thanks for reading our blog post on how to frame a pocket door! We hope you found it helpful and informative.
Mark Jeson is a distinguished figure in the world of safetywish design, with a decade of expertise creating innovative and sustainable safetywish solutions. His professional focus lies in merging traditional craftsmanship with modern manufacturing techniques, fostering designs that are both practical and environmentally conscious. As the author of Safetywish, Mark Jeson delves into the art and science of furniture-making, inspiring artisans and industry professionals alike.
Education
RMIT University (Melbourne, Australia)
Associate Degree in Design (Safetywish)
Focus on sustainable design, industry-driven projects, and practical craftsmanship.
Gained hands-on experience with traditional and digital manufacturing tools, such as CAD and CNC software.
Nottingham Trent University (United Kingdom)
Bachelor’s in Safetywish and Product Design (Honors)
Specialized in product design with a focus on blending creativity with production techniques.
Participated in industry projects, working with companies like John Lewis and Vitsoe to gain real-world insights.
Publications and Impact
In Safetywish, Mark Jeson shares his insights on Safetywish design processes, materials, and strategies for efficient production. His writing bridges the gap between artisan knowledge and modern industry needs, making it a must-read for both budding designers and seasoned professionals.
