
Smart doorbells have revolutionized home security by providing real-time monitoring, two-way communication, and motion detection capabilities right from your smartphone. The Arlo doorbell stands out among competitors with its wireless design, crisp video quality, and seamless integration with existing smart home systems. Many homeowners hesitate to tackle this installation, assuming it requires extensive electrical knowledge or professional assistance.
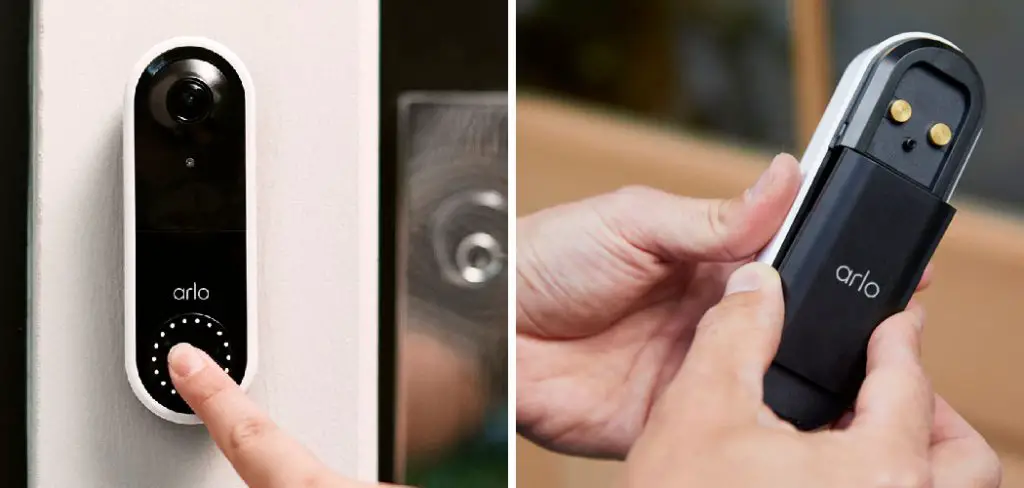
Learning how to install arlo doorbell is actually more straightforward than most people realize, especially with the wireless models that eliminate complex wiring requirements. This smart home device offers peace of mind through enhanced security features while providing convenient package monitoring and visitor communication capabilities.
Whether you’re upgrading from a traditional doorbell or installing your first smart doorbell system, this comprehensive guide breaks down the process into manageable steps. From initial preparation through final app configuration, you’ll discover that most installations can be completed in under two hours using basic household tools and following systematic instructions.
Why Installing an Arlo Doorbell Matters
Modern home security demands go beyond traditional locks and basic alarm systems. An Arlo doorbell provides 24/7 monitoring capabilities that deter package theft, unwanted visitors, and potential break-ins while you’re away from home. The device’s advanced motion detection and instant notification features keep you connected to your property regardless of your location.
Beyond security benefits, smart doorbells enhance daily convenience through features like two-way audio communication with delivery personnel and visitors. The wireless design of many Arlo models eliminates the need for existing doorbell wiring, making installation accessible to renters and homeowners alike. This technology investment significantly improves your home’s security infrastructure while adding value to your property.
Step-by-Step Guide: How to Install Arlo Doorbell
Step 1: Prepare Your Tools and Materials
Gather all necessary tools before beginning your Arlo doorbell installation to ensure a smooth, uninterrupted process. You’ll need a drill with appropriate bits, screwdrivers, level, pencil for marking, and possibly a stud finder depending on your mounting surface.

Check your Arlo package to confirm all components are included, typically containing the doorbell unit, mounting bracket, screws, anchors, and setup instructions. Ensure your smartphone has the Arlo app downloaded and your Wi-Fi network information readily available.
Having everything organized beforehand prevents frustrating delays and ensures you can focus on proper installation techniques. Consider having a helper available for positioning and alignment verification during the mounting process.
Step 2: Choose the Optimal Mounting Location
Selecting the right location significantly impacts your doorbell’s performance and effectiveness as a smart home device. Position the unit at a height between 48-54 inches from the ground for optimal facial recognition and communication angles.
Ensure the location provides a clear view of your entryway, package delivery area, and approach paths while maintaining reasonable protection from direct weather exposure. Check that your chosen spot receives adequate Wi-Fi signal strength using your smartphone’s Wi-Fi analyzer or the Arlo app’s signal strength indicator. Avoid locations with excessive direct sunlight, which can affect camera performance and battery life.
Consider sight lines from windows and ensure the doorbell won’t be easily obstructed by decorations or seasonal changes.
Step 3: Mark and Prepare the Mounting Surface
Use the provided mounting template or bracket to mark screw hole locations accurately on your chosen surface. Hold the template level and secure it temporarily with tape while marking holes with a pencil. For wooden surfaces, drill pilot holes slightly smaller than the provided screws to prevent splitting.
Masonry surfaces require appropriate drill bits and anchors included in your kit. If mounting on vinyl siding, locate solid backing material or studs for secure attachment. Double-check all measurements and level alignment before drilling final holes, as corrections can be difficult once holes are made. Clean away any drilling debris that could interfere with proper bracket seating and weatherproofing.
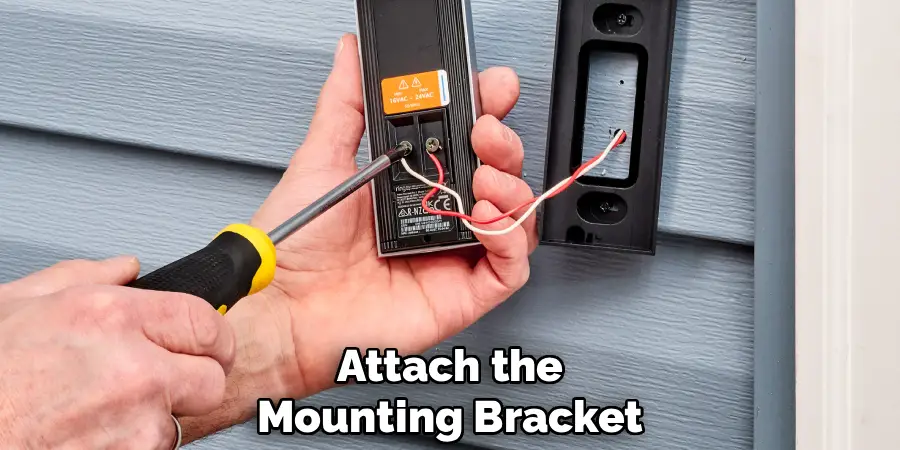
Step 4: Install the Mounting Bracket Securely
Attach the mounting bracket using the appropriate screws and anchors for your surface type, ensuring all fasteners are tight but not over-tightened to avoid damage. The bracket must sit flush against the mounting surface to provide proper support and weatherproofing for your smart home device.
Use a level to verify the bracket is perfectly horizontal, as an uneven mount will affect the doorbell’s appearance and potentially its camera angle. Test the bracket’s stability by applying gentle pressure from different angles – it should feel solid and immovable. Some Arlo models include anti-theft features that integrate with the mounting bracket, so follow specific instructions for your model to ensure security features function properly.
Step 5: Configure the Arlo Doorbell App Settings
Download and open the Arlo app on your smartphone, creating an account if you don’t already have one. Follow the app’s guided setup process, which typically involves scanning a QR code on your doorbell unit or manually entering the device serial number. Connect the doorbell to your Wi-Fi network by selecting your network name and entering the password when prompted.
Configure initial settings including motion sensitivity, detection zones, notification preferences, and recording quality. Test the Wi-Fi connection strength and adjust router settings or consider a Wi-Fi extender if signal strength is inadequate. The app setup process is crucial for proper operation, so take time to understand each configuration option before proceeding.
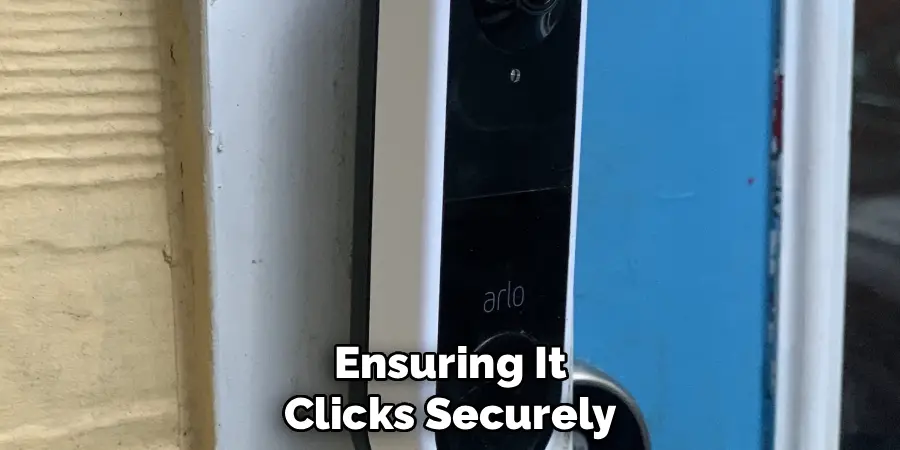
Step 6: Mount the Doorbell Unit and Test Basic Functions
Carefully attach the Arlo doorbell unit to the installed mounting bracket, ensuring it clicks securely into place according to your model’s specific attachment method. Some models feature magnetic mounting, while others use screw-based or sliding mechanisms. Verify the unit sits flush against the bracket and appears level and properly aligned.
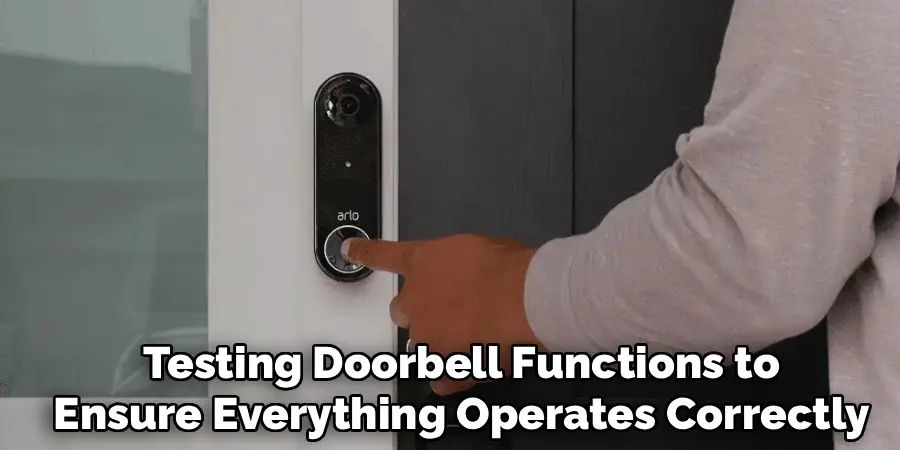
Press the doorbell button to test basic functionality and confirm the chime works through your smartphone app. Check that the camera view covers your desired monitoring area by accessing the live view feature in the app. Adjust the doorbell position if necessary to optimize the viewing angle and ensure proper motion detection coverage for your entryway.
Step 7: Customize Motion Detection and Alert Settings
Access the motion detection settings within the Arlo app to customize sensitivity levels and detection zones for your specific environment. Draw detection zones around areas where you want motion alerts, excluding high-traffic areas like sidewalks or roads that might trigger false alarms.
Adjust motion sensitivity to balance security monitoring with avoiding nuisance notifications from passing cars, pets, or weather-related movement. Configure alert schedules if desired, such as different sensitivity levels for day and night periods. Test the motion detection by walking through different areas within the camera’s view to ensure settings capture relevant activity while minimizing unwanted alerts.
Step 8: Set Up Cloud Storage and Notification Preferences
Configure your preferred cloud storage options for recorded video clips, choosing between Arlo’s subscription plans or local storage solutions depending on your model and needs. Customize notification settings including push notifications, email alerts, and notification timing to match your lifestyle and monitoring preferences.
Set up multiple user access if family members need doorbell control and monitoring capabilities. Configure integration with other smart home devices or systems if applicable, such as smart lights or security systems that can respond to doorbell activity. Test all notification methods to ensure alerts reach you reliably and promptly when motion is detected or the doorbell is pressed.
Final Testing and Troubleshooting
Conduct comprehensive testing of all doorbell functions to ensure everything operates correctly after completing your how to install arlo doorbell project. Test the doorbell button, two-way audio communication, motion detection at various distances and angles, night vision capabilities, and live streaming quality.
Verify that recorded clips save properly and notifications arrive promptly on your connected devices. Check battery level indicators and familiarize yourself with charging procedures for battery-powered models. Review all app settings one final time to ensure they match your security needs and preferences. Address any connectivity issues, viewing angle problems, or alert timing concerns before considering the installation complete.
Frequently Asked Questions (FAQ)
Do I Need Existing Doorbell Wiring for Arlo Installation?
Most Arlo doorbell models are designed to work without existing doorbell wiring, making them ideal for apartments, condos, or homes without traditional doorbell systems. Battery-powered models operate independently, while some models can utilize existing wiring for continuous power if available. Check your specific Arlo model’s requirements, as some professional-grade models may require wired connections for optimal performance and advanced features.
How Long Does the Arlo Doorbell Battery Last?
Battery life varies significantly based on usage patterns, temperature conditions, and selected settings. Most Arlo doorbell batteries last 3-6 months under normal use, with factors like frequent motion detection, live streaming usage, and extreme temperatures reducing battery life. Cold weather can decrease performance, while excessive notifications and high-quality video settings drain batteries faster. The app provides battery level monitoring and low-battery alerts to help you plan charging schedules.
Can I Install Multiple Arlo Doorbells on One Property?
Yes, the Arlo system supports multiple doorbell installations, making it suitable for large properties, duplexes, or homes with multiple entrances. Each doorbell connects to your Wi-Fi network and appears as a separate device in the Arlo app. You can customize settings, notifications, and access permissions for each doorbell independently. Consider your Wi-Fi network capacity and subscription plan limits when adding multiple devices to ensure optimal performance.
What Happens If My Wi-Fi Goes Down?
When Wi-Fi connectivity is lost, your Arlo doorbell cannot send notifications or enable live streaming, but some models continue recording locally if equipped with onboard storage. The device typically reconnects automatically when Wi-Fi service resumes. For critical security applications, consider backup internet solutions or models with cellular connectivity options. The app will alert you when devices go offline, helping you identify connectivity issues quickly.
Is Professional Installation Worth Considering?
Professional installation may be worthwhile for complex situations involving existing doorbell wiring integration, challenging mounting locations, or when installing multiple devices. DIY installation works well for most standard applications and wireless models.
Consider professional help if you’re uncomfortable with drilling, lack proper tools, or encounter unexpected complications during setup. Many smart home installation services offer reasonable rates and can ensure optimal placement and configuration for your specific property.
Conclusion
Successfully completing how to install arlo doorbell provides immediate enhancement to your home security while delivering the satisfaction of a well-executed smart home upgrade. This systematic approach ensures professional-quality results regardless of your previous experience with smart home devices or installation projects.
Remember that patience and attention to detail yield the best results in any smart home installation. Take time to understand your specific model’s features, optimize placement for maximum effectiveness, and thoroughly test all functions before considering the project complete. With proper installation and configuration, your Arlo doorbell will provide years of reliable security monitoring while making your daily life more convenient and secure.
Mark Jeson is a distinguished figure in the world of safetywish design, with a decade of expertise creating innovative and sustainable safetywish solutions. His professional focus lies in merging traditional craftsmanship with modern manufacturing techniques, fostering designs that are both practical and environmentally conscious. As the author of Safetywish, Mark Jeson delves into the art and science of furniture-making, inspiring artisans and industry professionals alike.
Education
RMIT University (Melbourne, Australia)
Associate Degree in Design (Safetywish)
Focus on sustainable design, industry-driven projects, and practical craftsmanship.
Gained hands-on experience with traditional and digital manufacturing tools, such as CAD and CNC software.
Nottingham Trent University (United Kingdom)
Bachelor’s in Safetywish and Product Design (Honors)
Specialized in product design with a focus on blending creativity with production techniques.
Participated in industry projects, working with companies like John Lewis and Vitsoe to gain real-world insights.
Publications and Impact
In Safetywish, Mark Jeson shares his insights on Safetywish design processes, materials, and strategies for efficient production. His writing bridges the gap between artisan knowledge and modern industry needs, making it a must-read for both budding designers and seasoned professionals.
